These are my build notes of my last server. This server is based around the Supermicro X10SDV-4C-7TP4F motherboard that I already described in my previous article (Bill-of-Materials). For the Case I select a Fractal Design Node 804 square small chassis. It is described as being able to handle upto 10x 3.5″ disks.
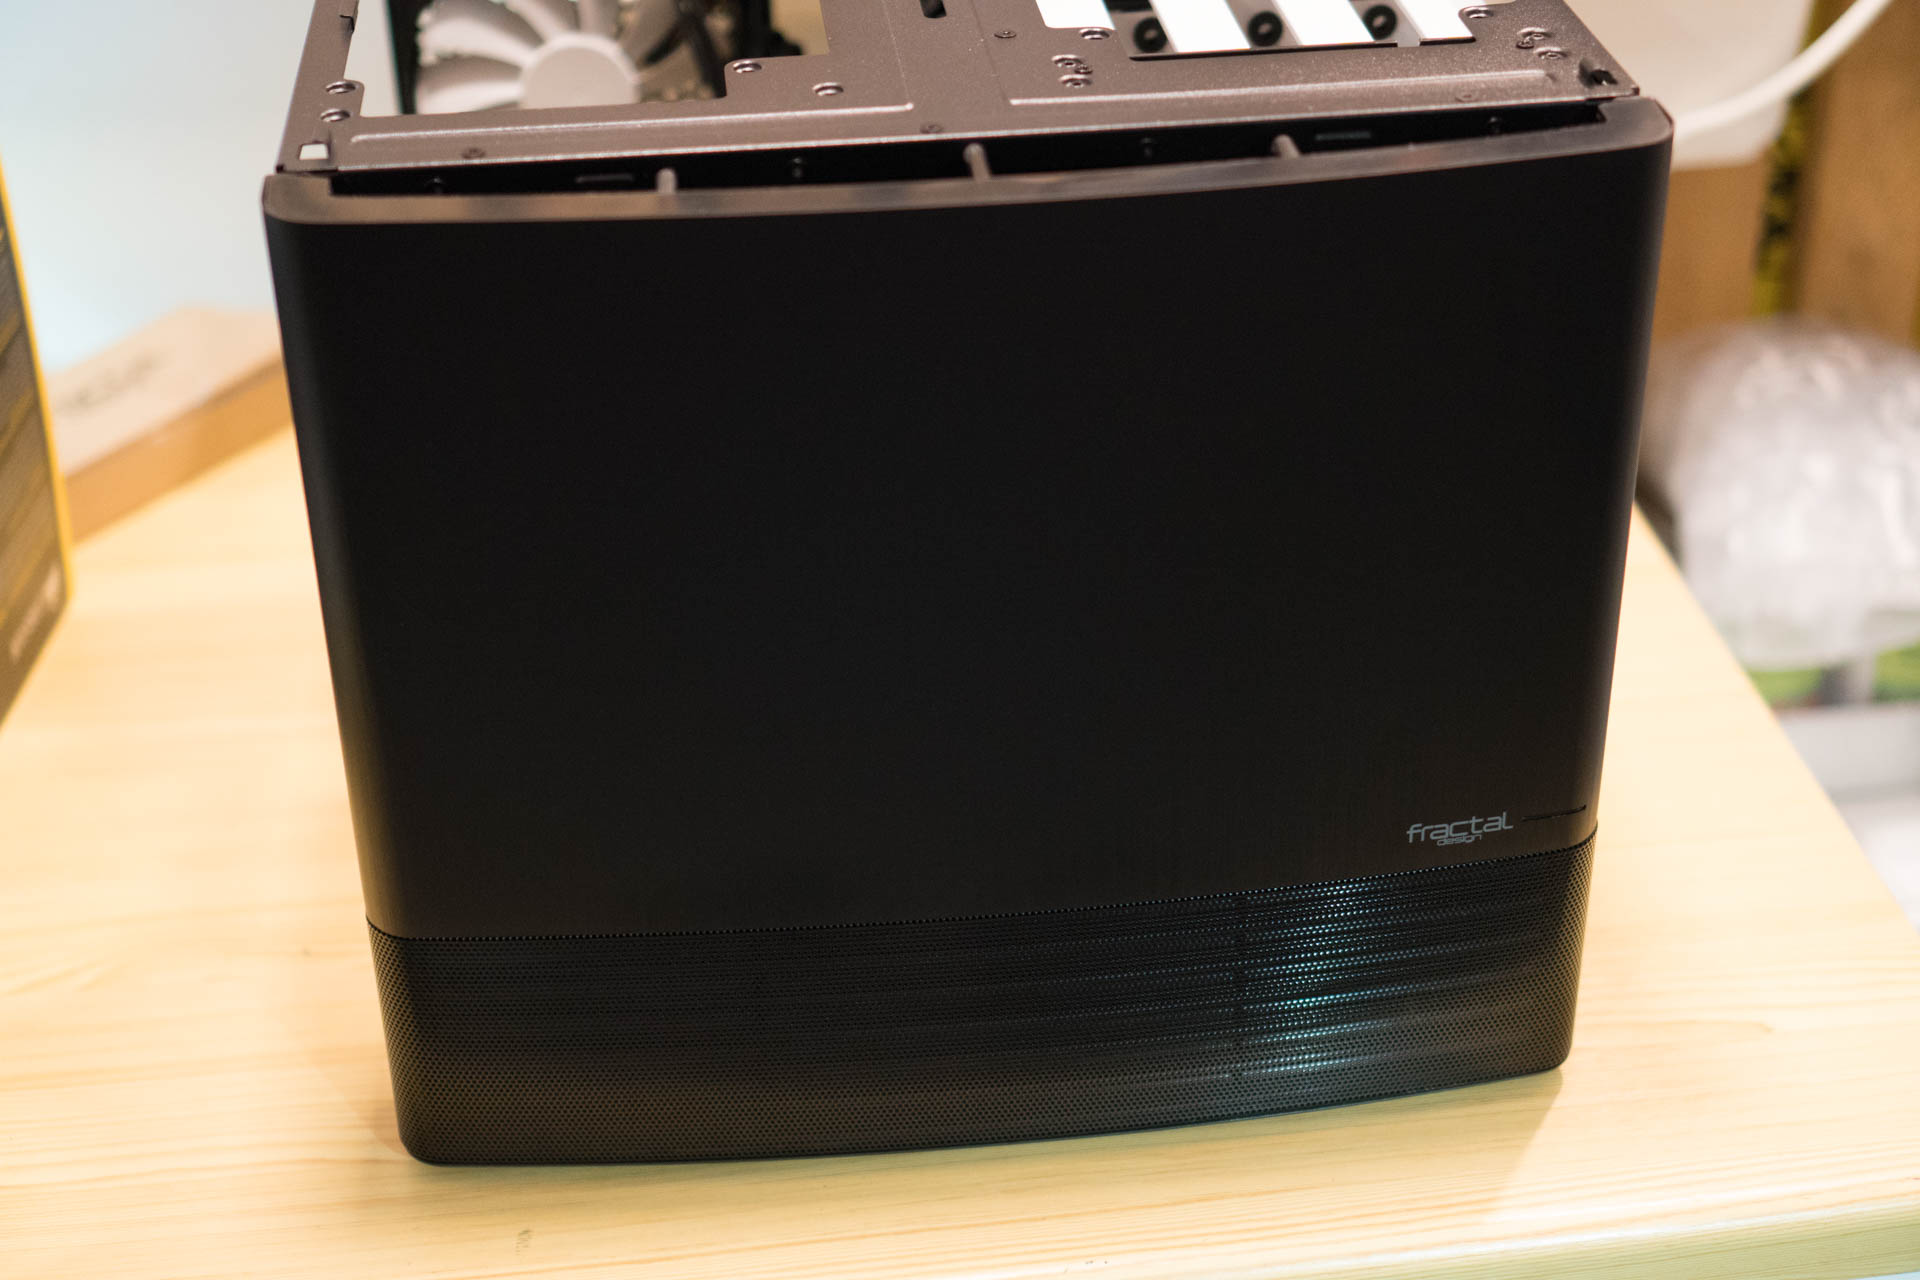
Fractal Design Node 804
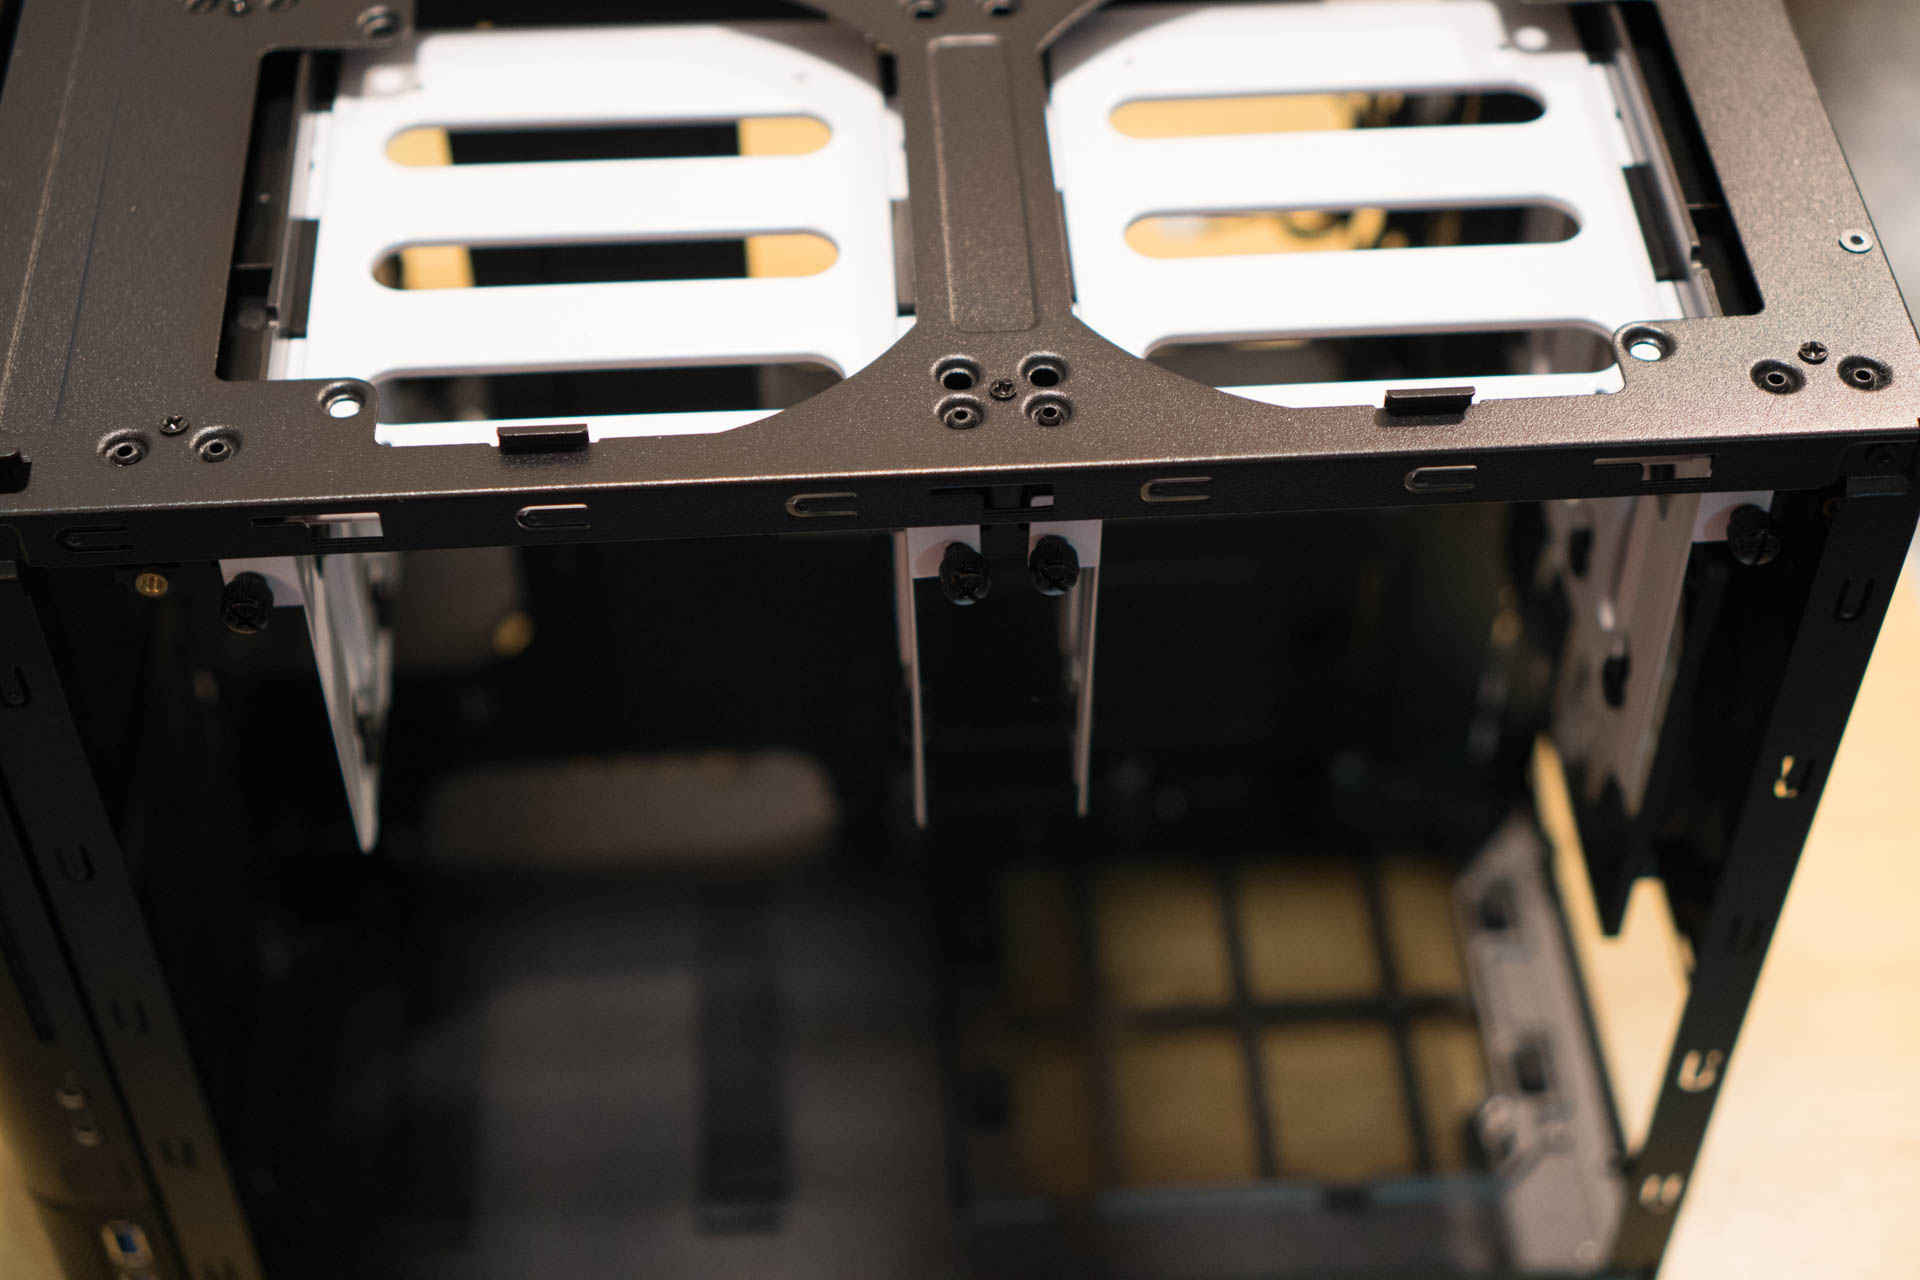
Here is the side view where the motherboard can be fitted. It supports MiniITX, MicroITX and the FlexATX of the Supermicro motherboard. Two 3.5″ harddrives or 2.5″ SSD can be fitted on the bottom plate.
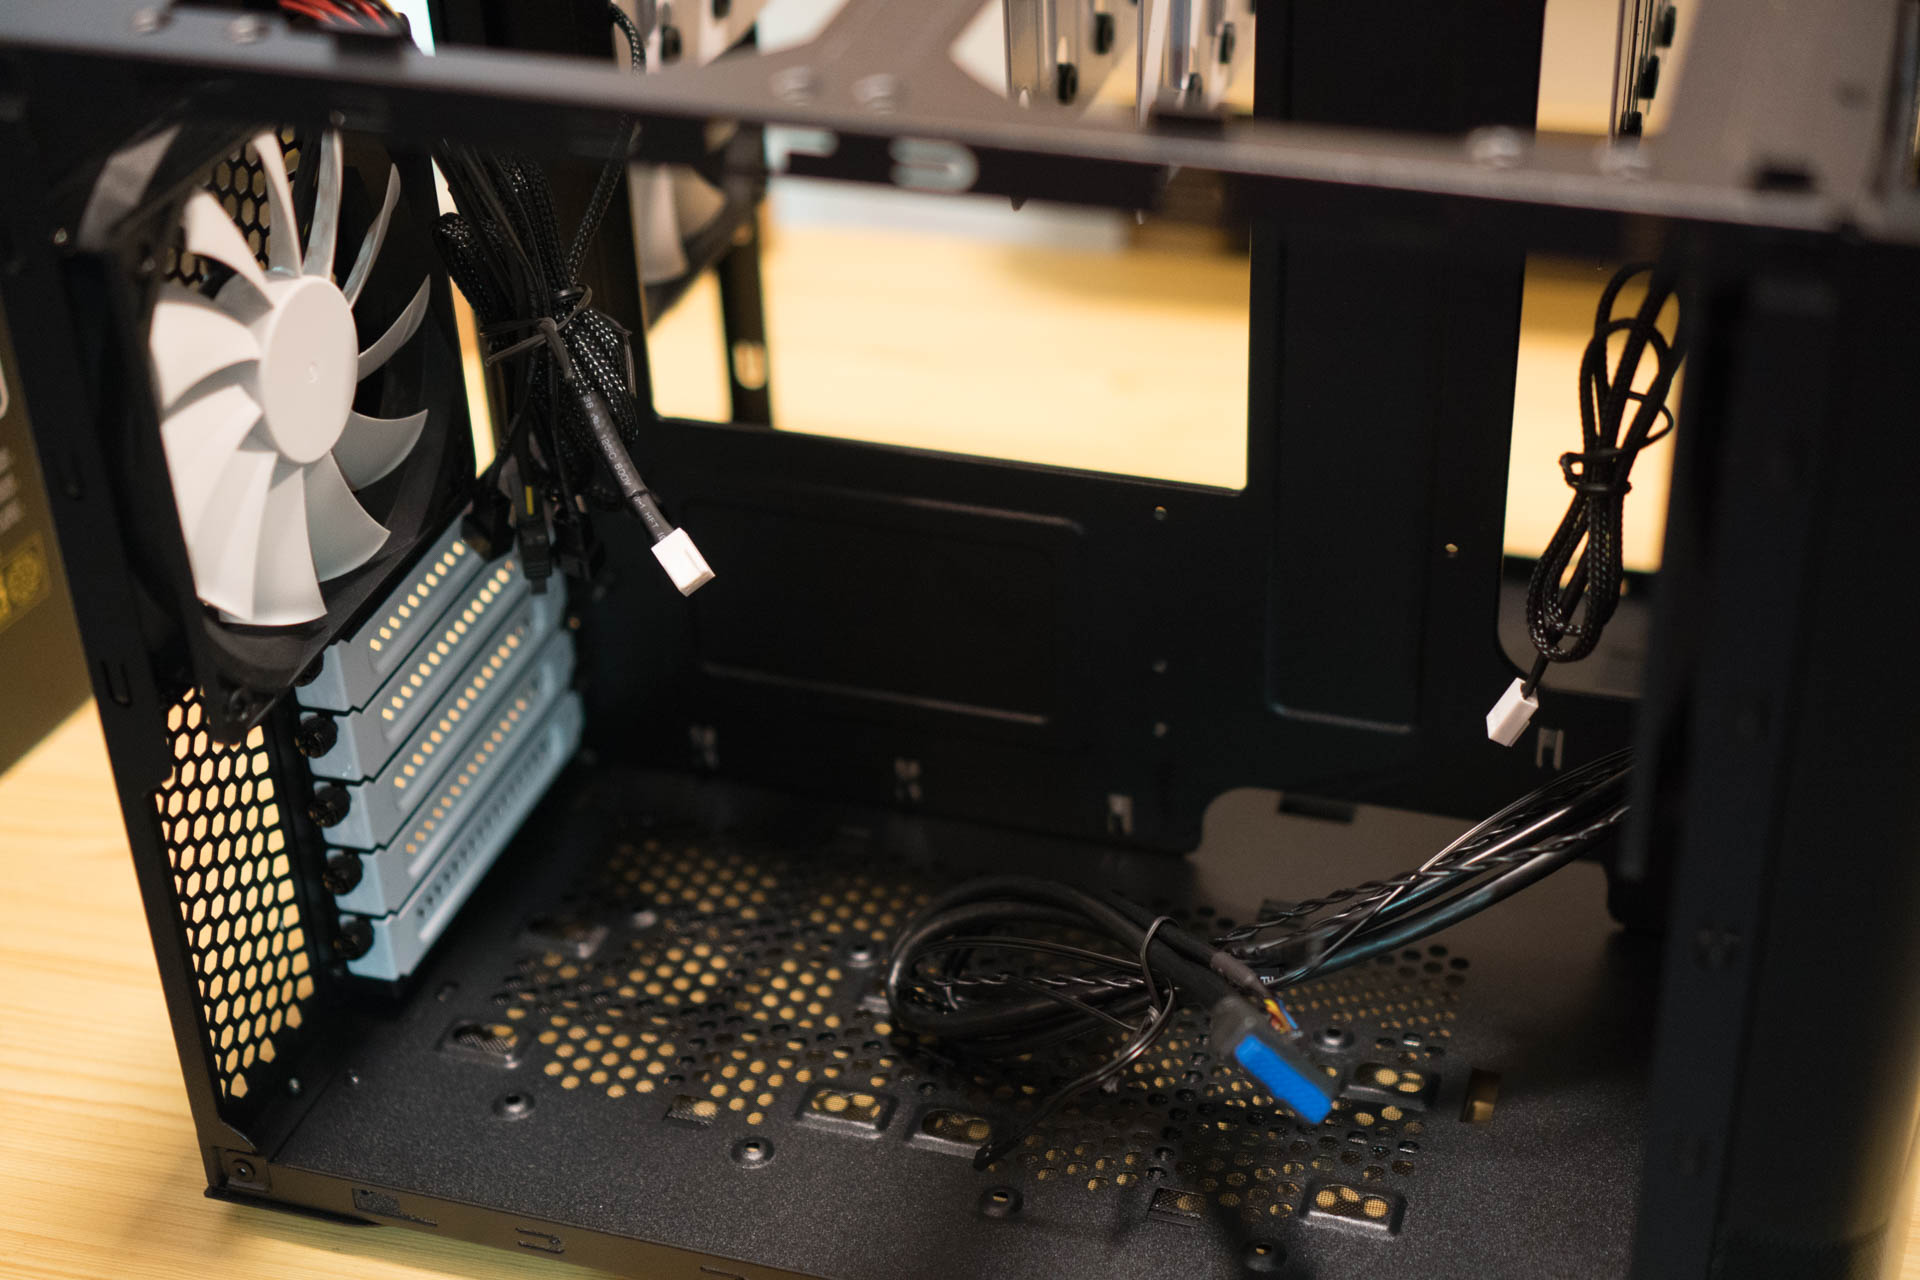
The right section of the chassis, contains the space for eight 3.5″ harddrives, fixed in two sliding frame at the top.
Let’s compare the size of the Chassis, the Power Supply Unit and the Motherboard in the next photo.
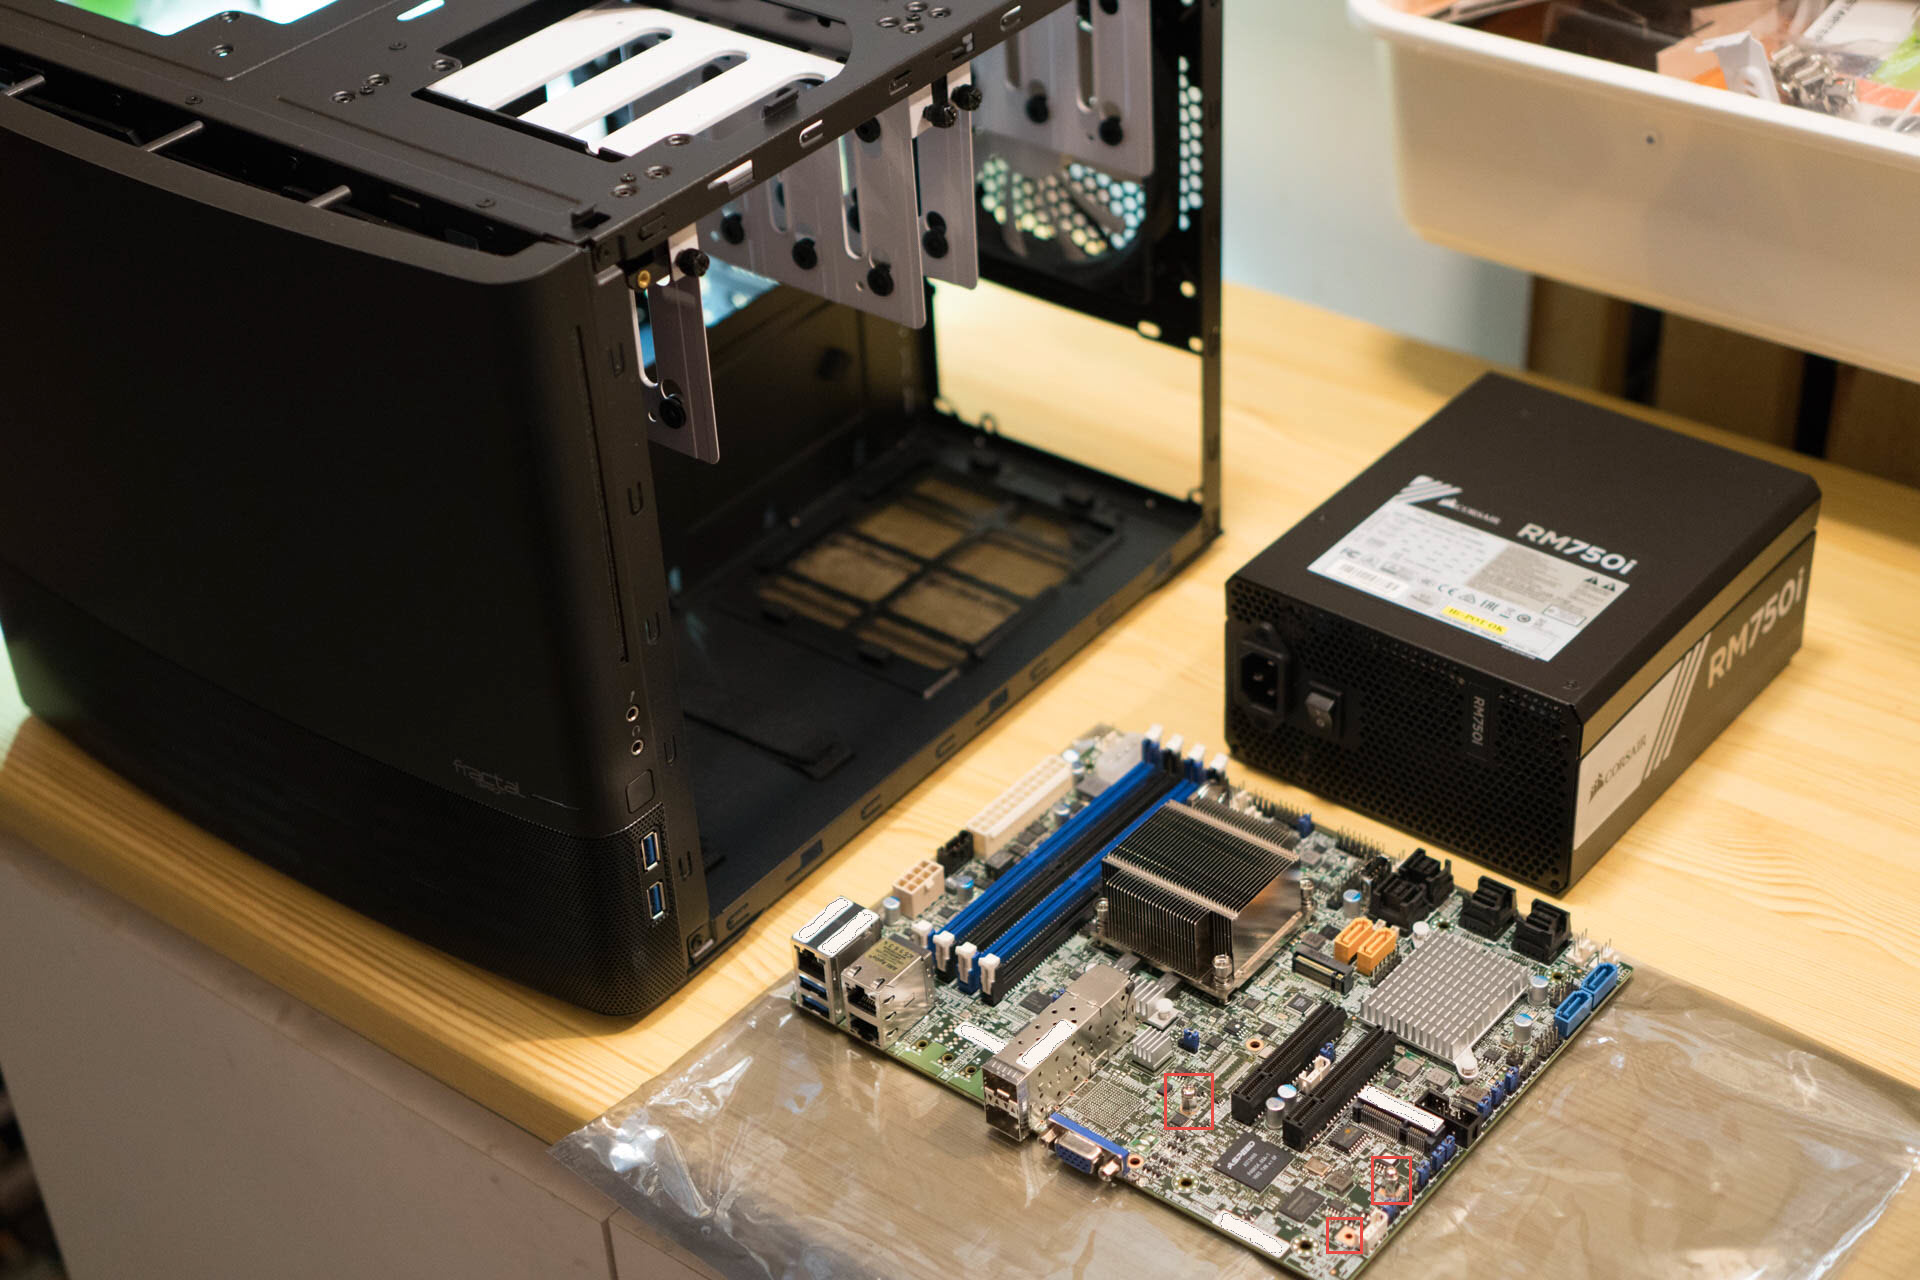
Fractal Design Node 804, Supermicro X10SDV-4C-7TP4F and Corsair RM750i
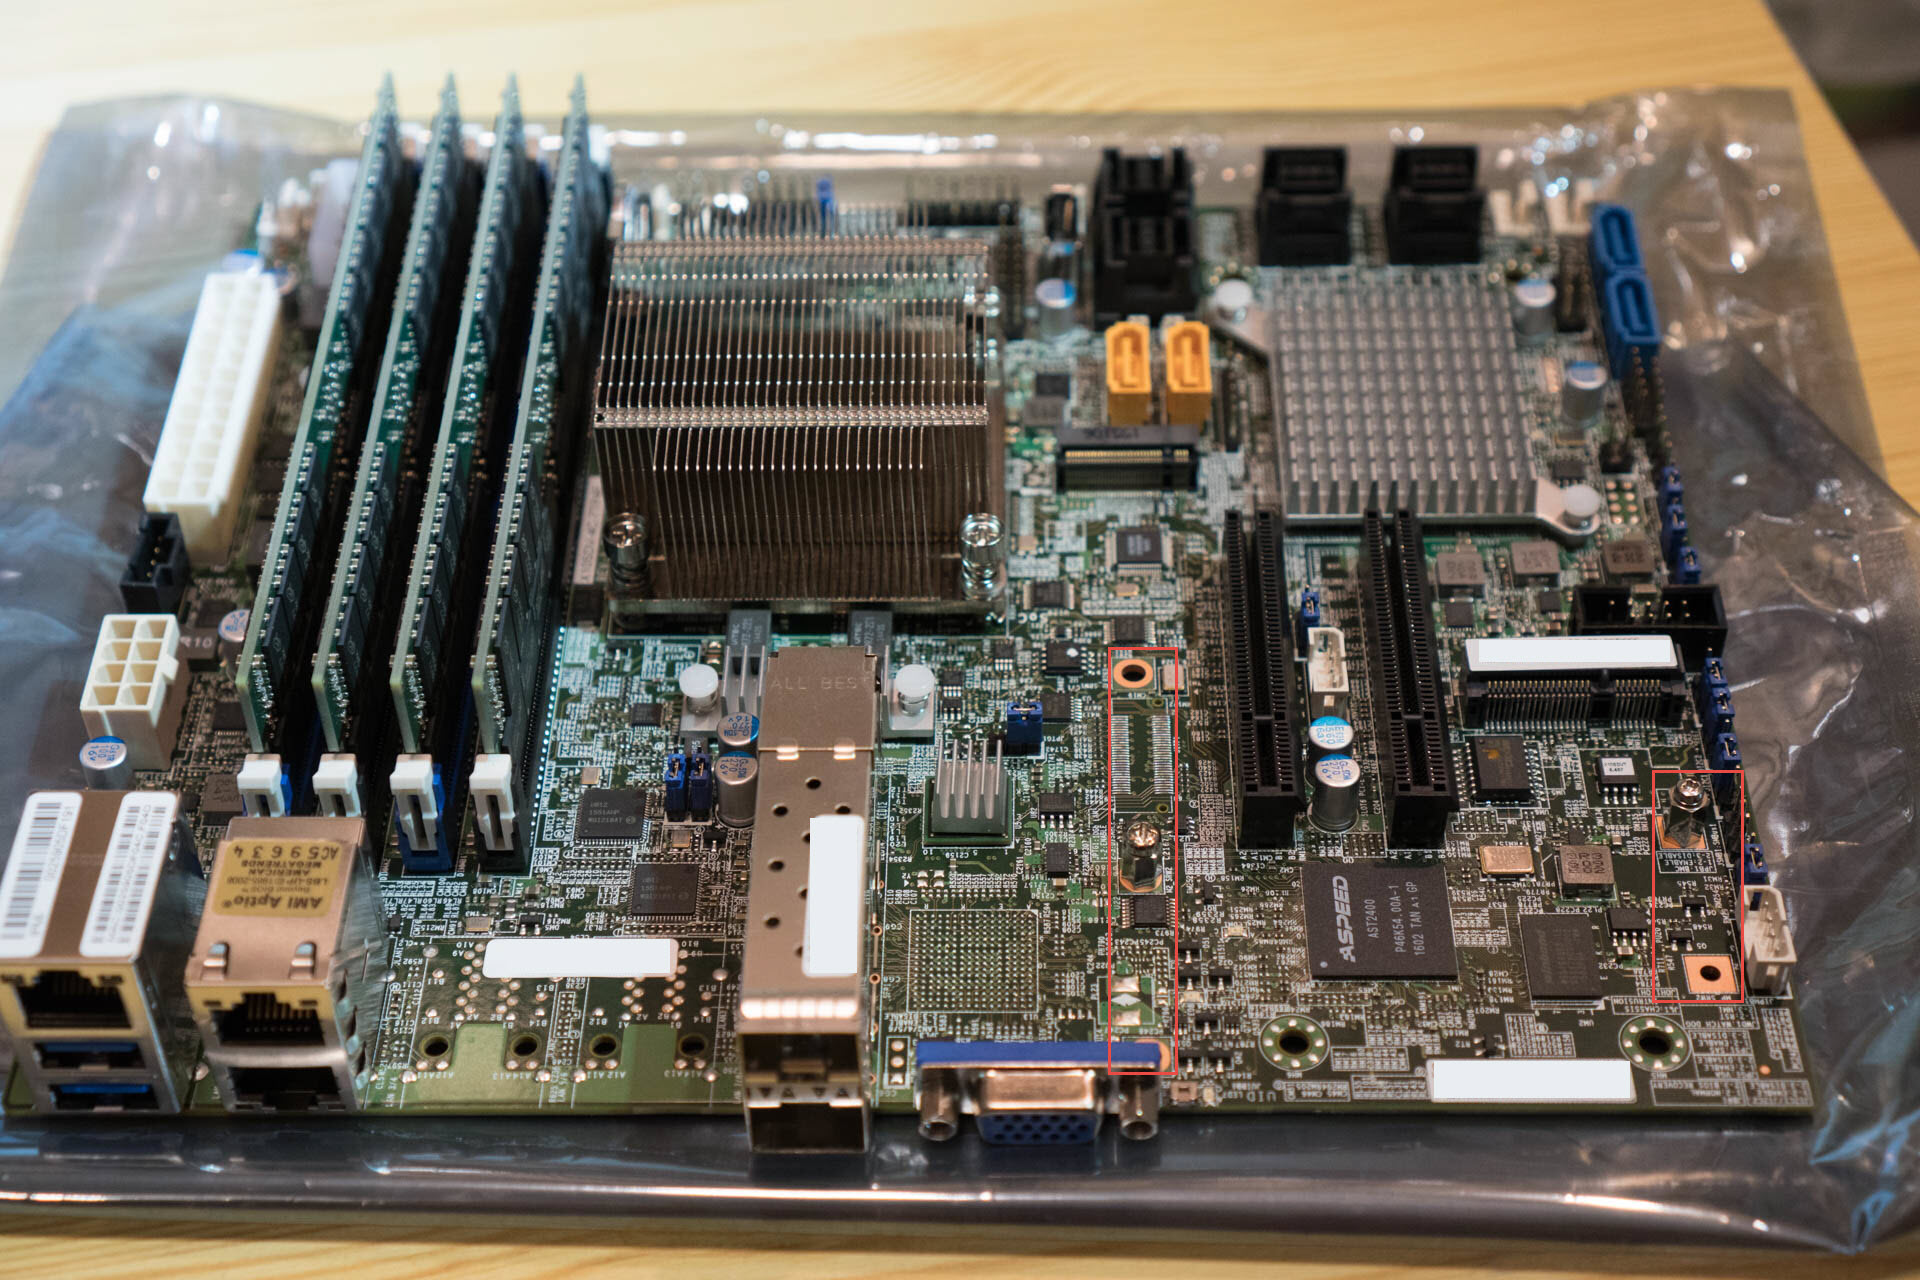
When you zoom in the the picture above, you can see three red squares on the bottom right of the motherboard. Before you inser the motherboard in the chassis, you might want to make sure you have moved the mSATA pin from the position on the photo to the 2nd position, otherwise you will not be able to attach the mSATA to the chassis. You need to unscrew the holding grommet from below the motherboard. People having purchased the Supermicro E300-8D will have a nasty surprise. The red square in the center of the motherboard is set for M.2 sticks at the 2280 position. If you have a M.2 storage stick 22110, you better move the holding grommet also.
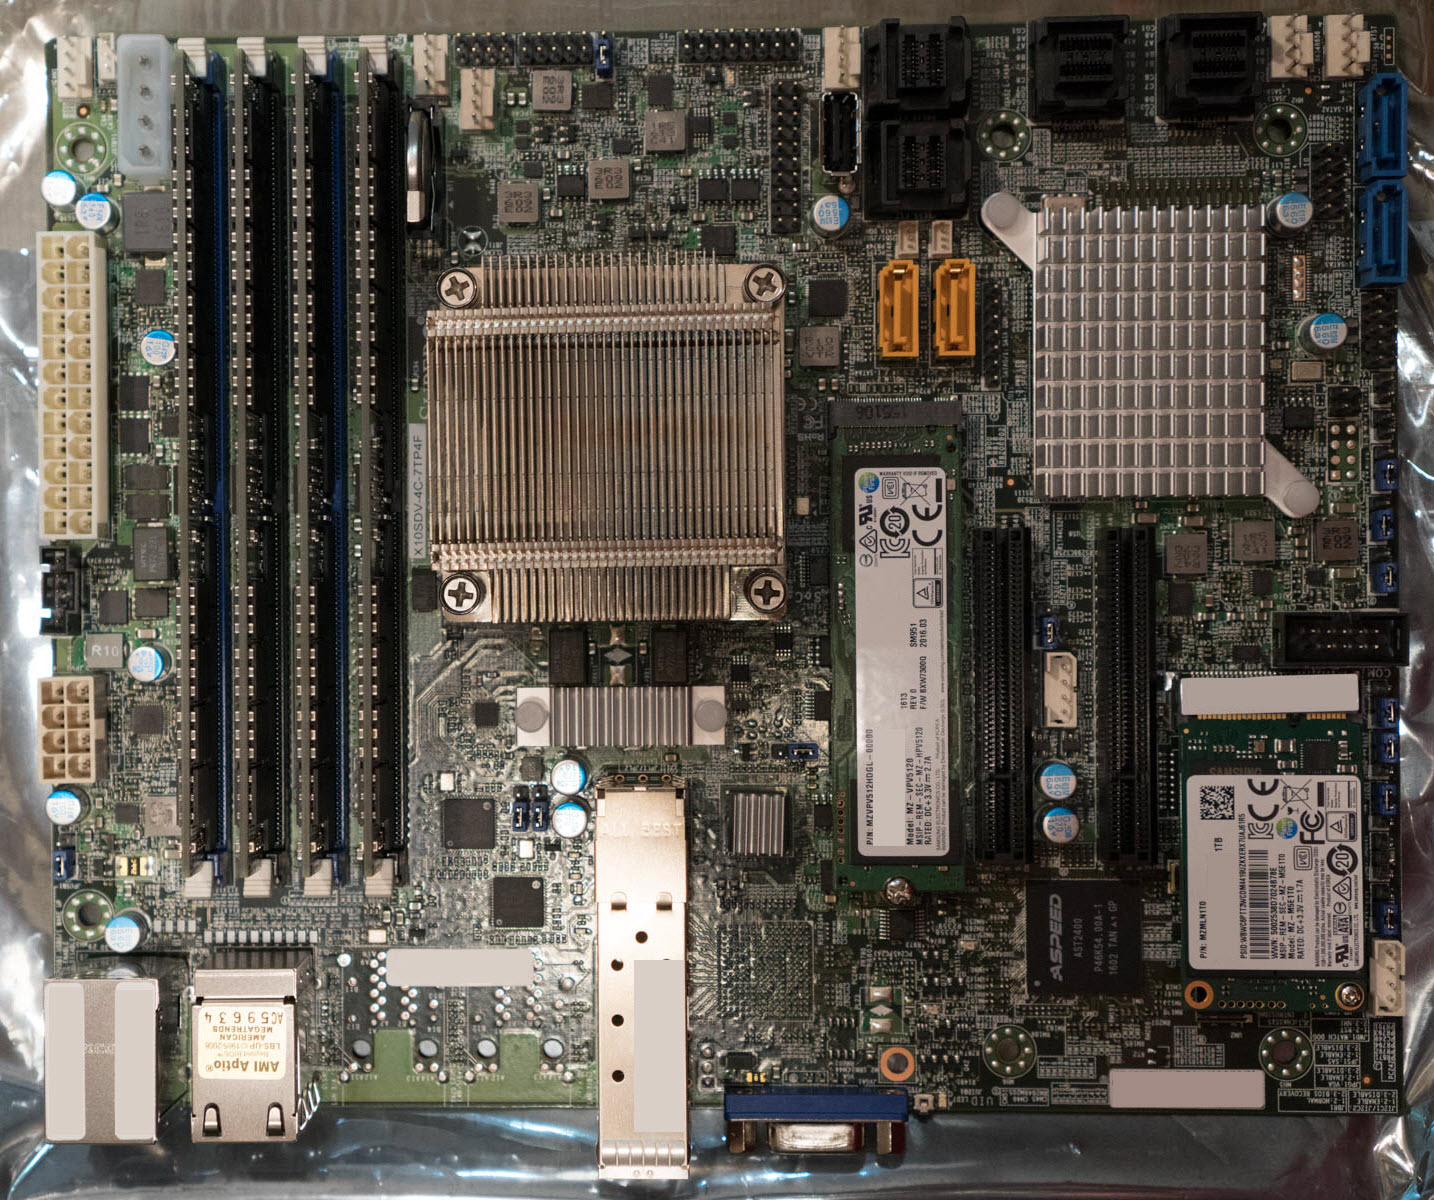
Here is another closer view of the Supermicro X10SDV-4C-7TP4F motherboard with the two Intel X552 SFP+ connectors, and the 16 SAS2 ports managed by the onboard LSI 2116 SAS Chipset.
In the next picture you see the mSATA holding grommet moved to accommodate the Samsung 850 EVO Basic 1TB mSATA SSD, and the Samsung SM951 512GB NVMe SSD in the M.2 socket.
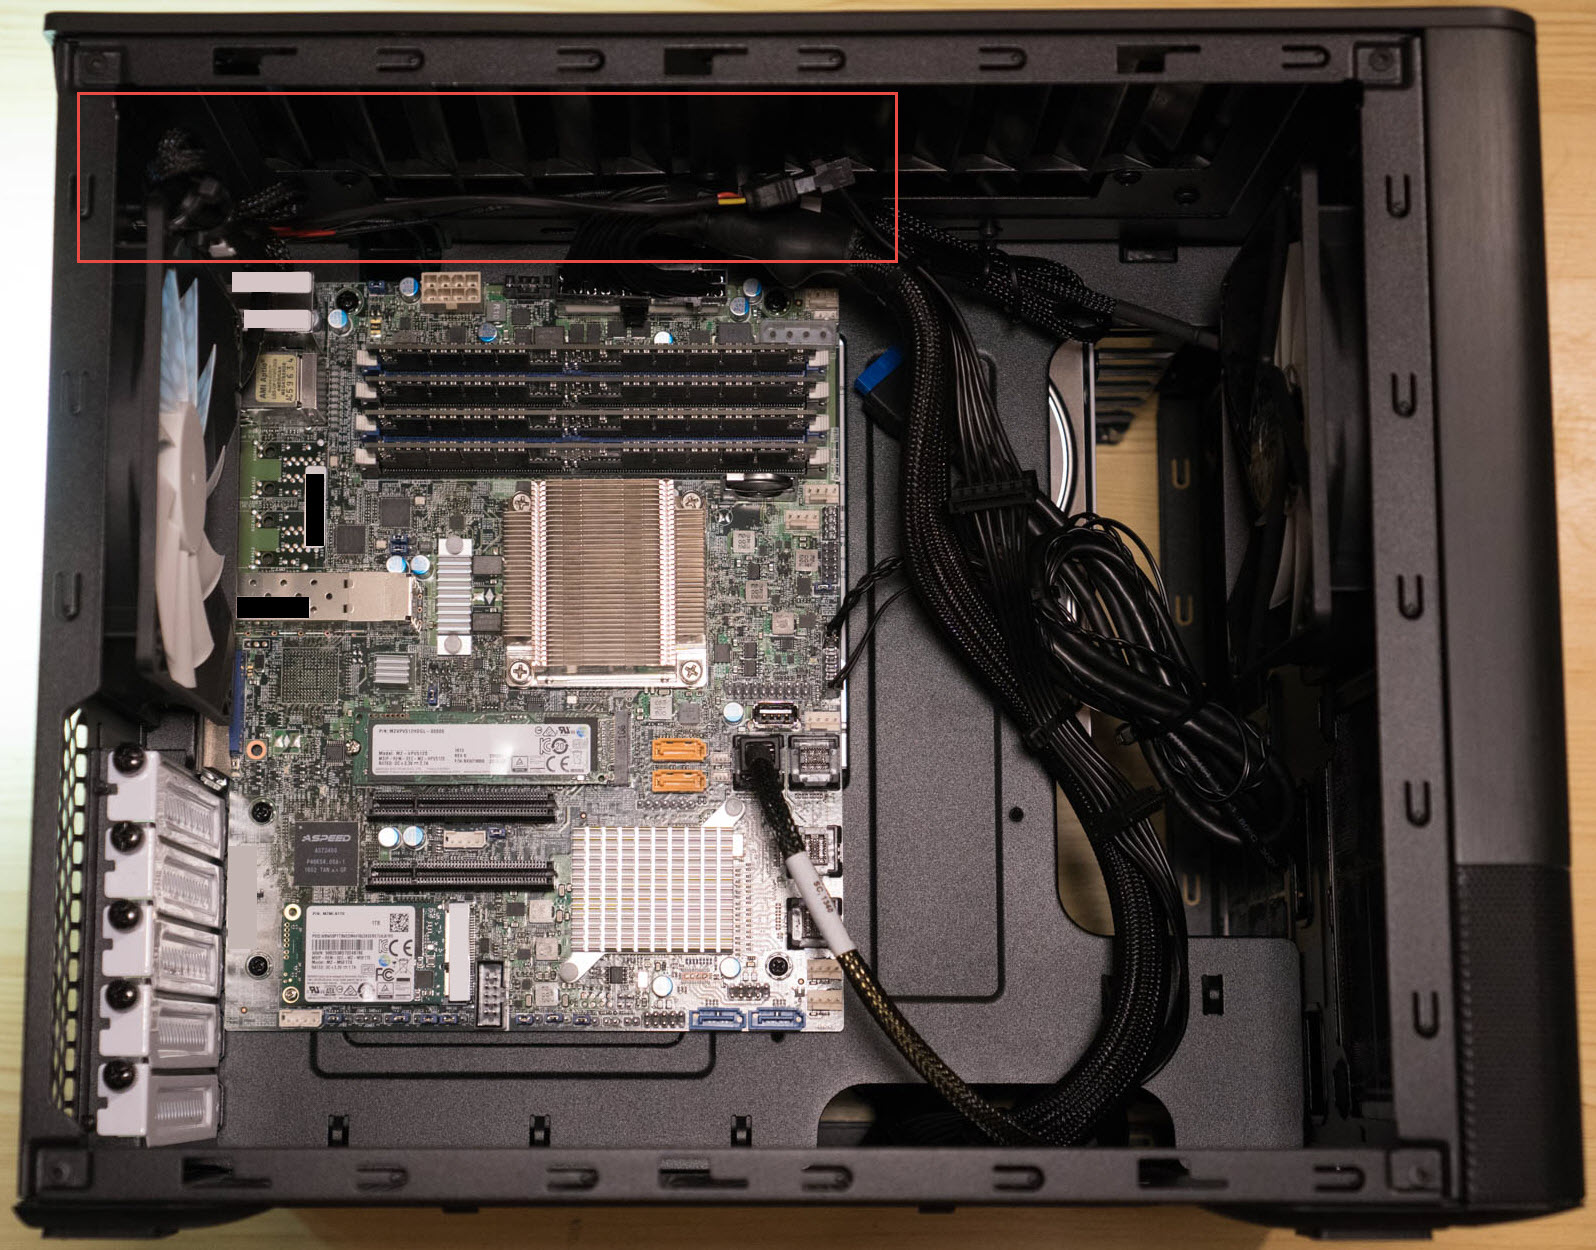
In the next picture we see the size of the motherboard in the Chassis.At the top left, you will see a feature of the Fractal Design Node 804. A switch that allows you to change the voltage of three fans. This switch is getting it’s electricity thru a SATA power connector. It’s on this power switch, that I was able to put a Y-power cable and then drive the Noctua A6x25 PWM CPU fan that fits perfectly on top of the CPU heatsink. This allowed me to bring down the CPU heat buildup during the Memtest86+ test from 104c to 54c.
I used two spare Noctua Fan on CPU Heatsink fixer to hold the Noctua A6x25 PWM on the Heatsink, and a ziplock to hold those two fixers together (sorry I’m not sure if we have a proper name for those metal fixing brackets). Because the Noctua is getting it’s electricity from the Chassis and not the Motherboard, the Supermicro BIOS is not attemping to increase/decrease the Fan’s rpm. This allows me to keep a steady air flow on the heatsink.
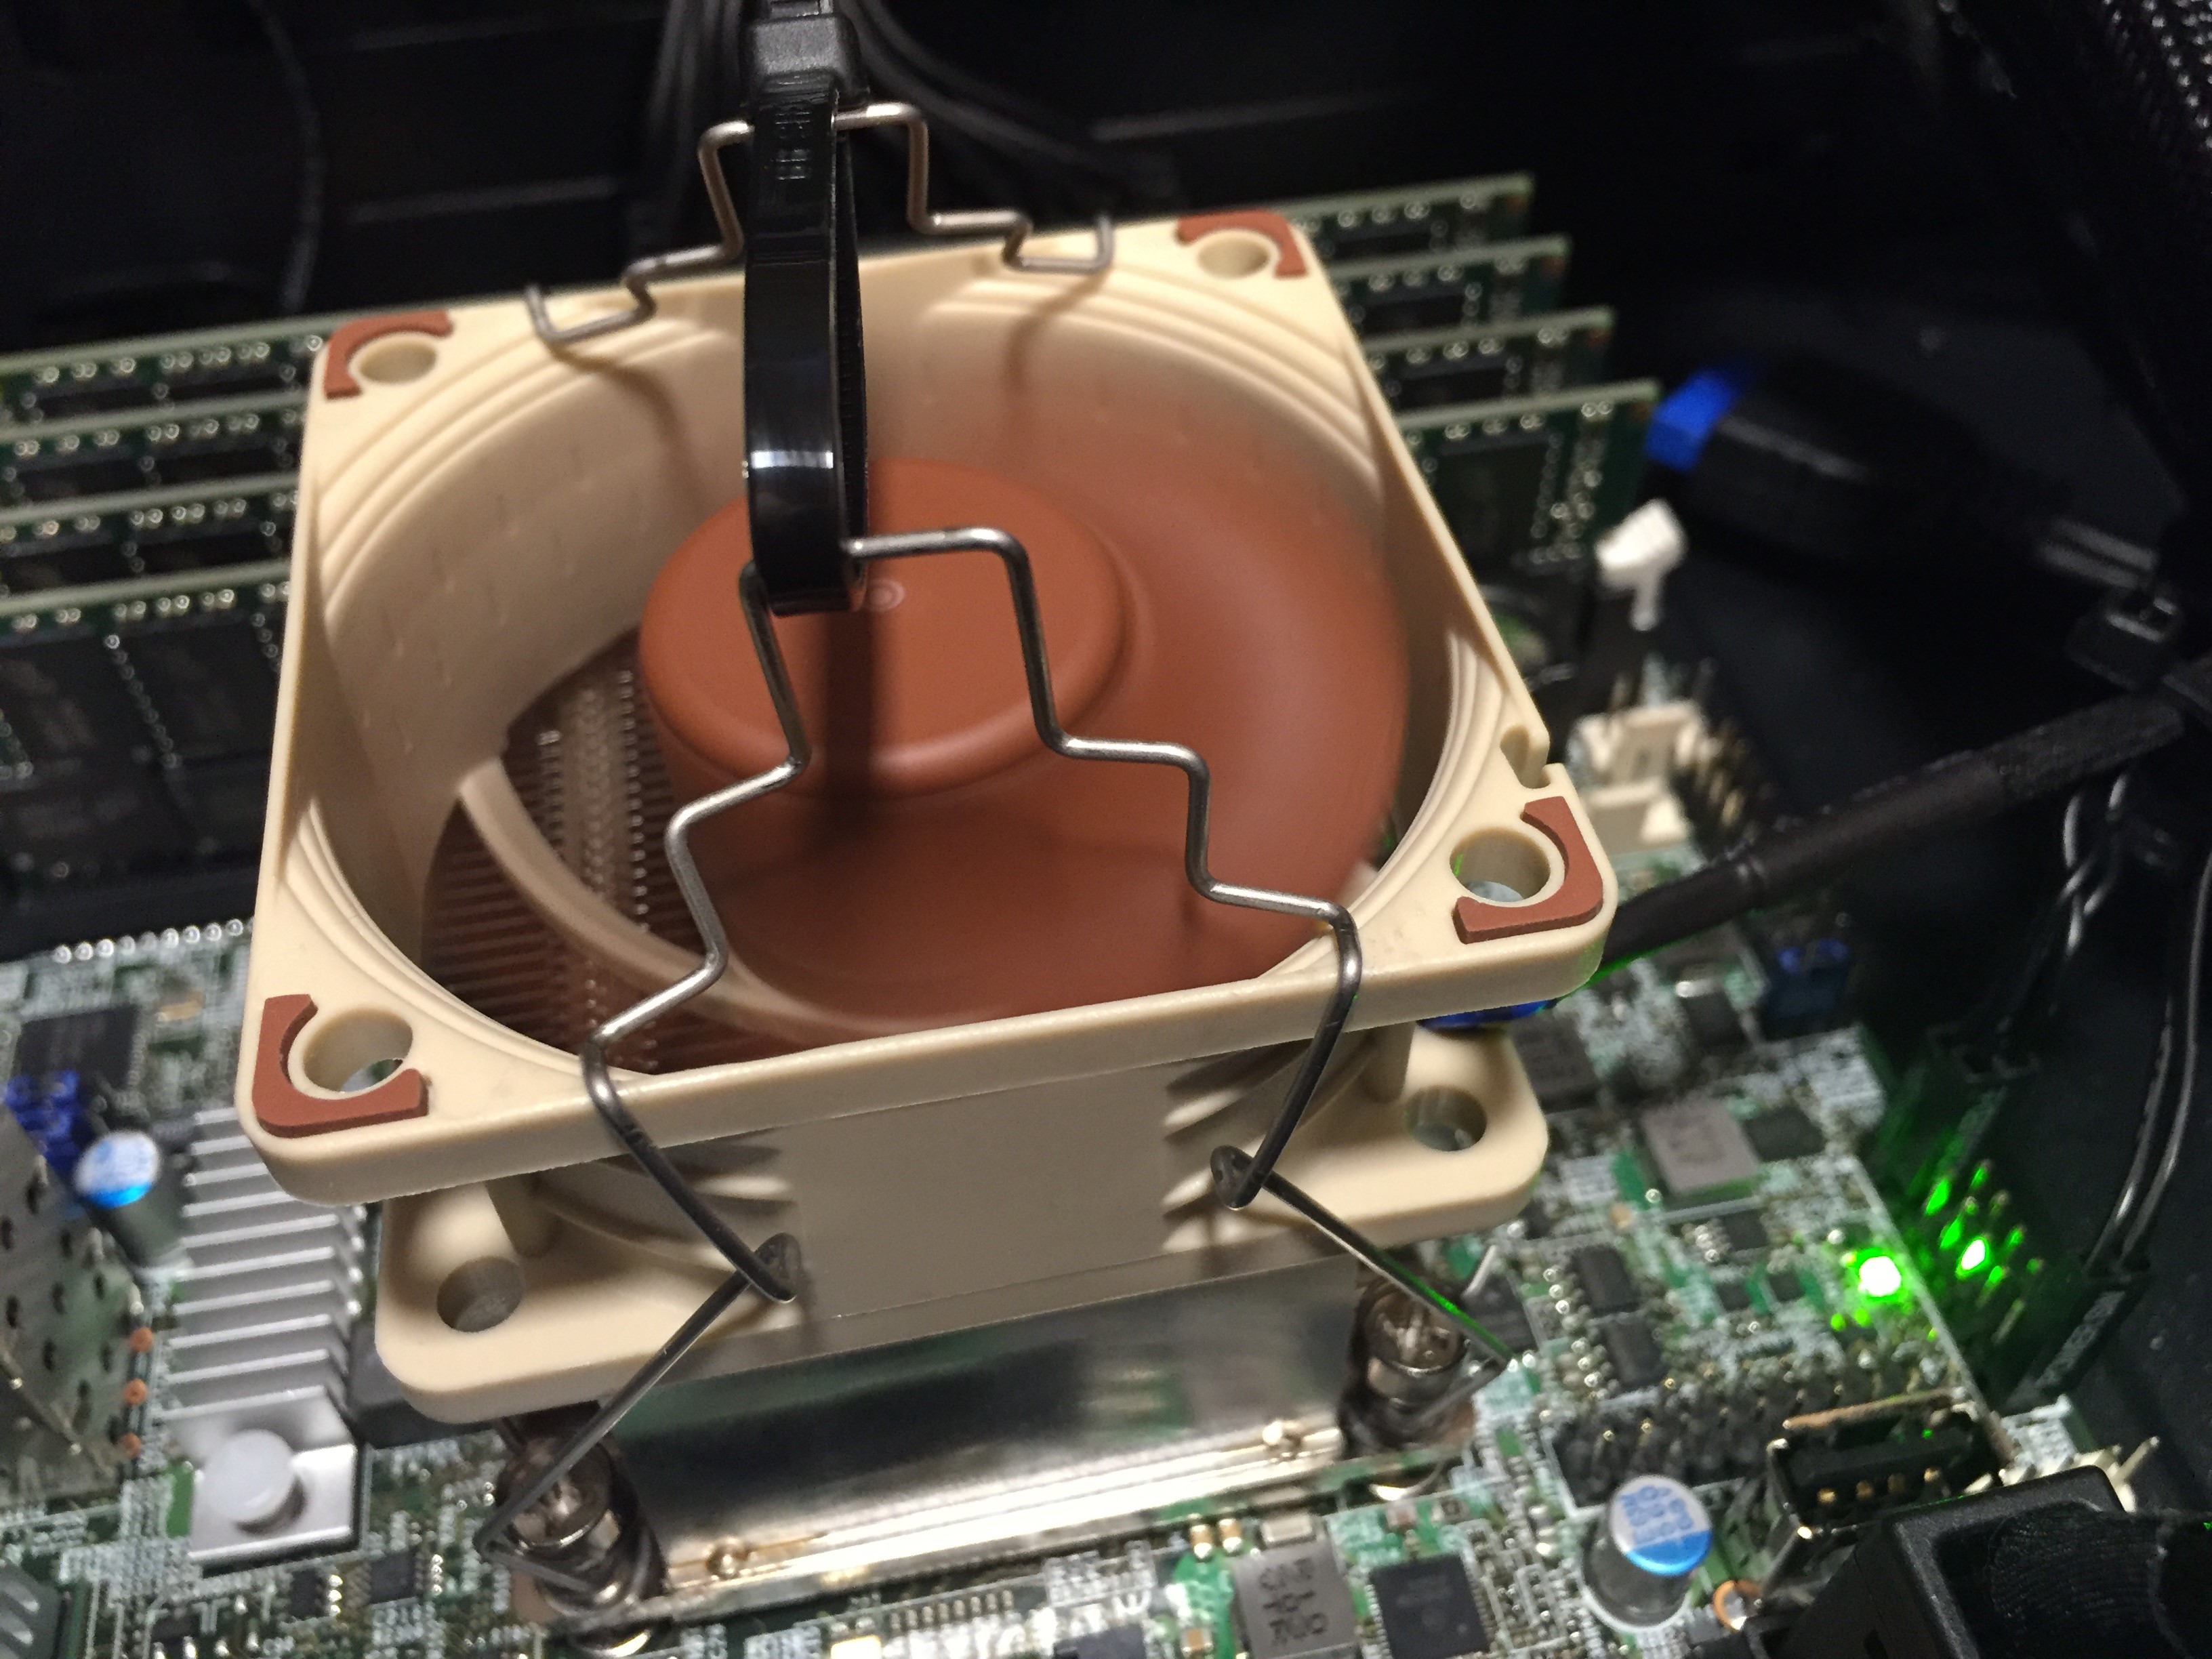
Noctua A6x25 PWM fixed on heatsink
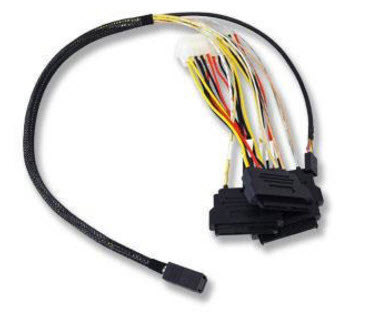
I have fitted my server with a single 4TB SAS drive. To do this I use a LSI SAS Cable L5-00222-00 shown here.
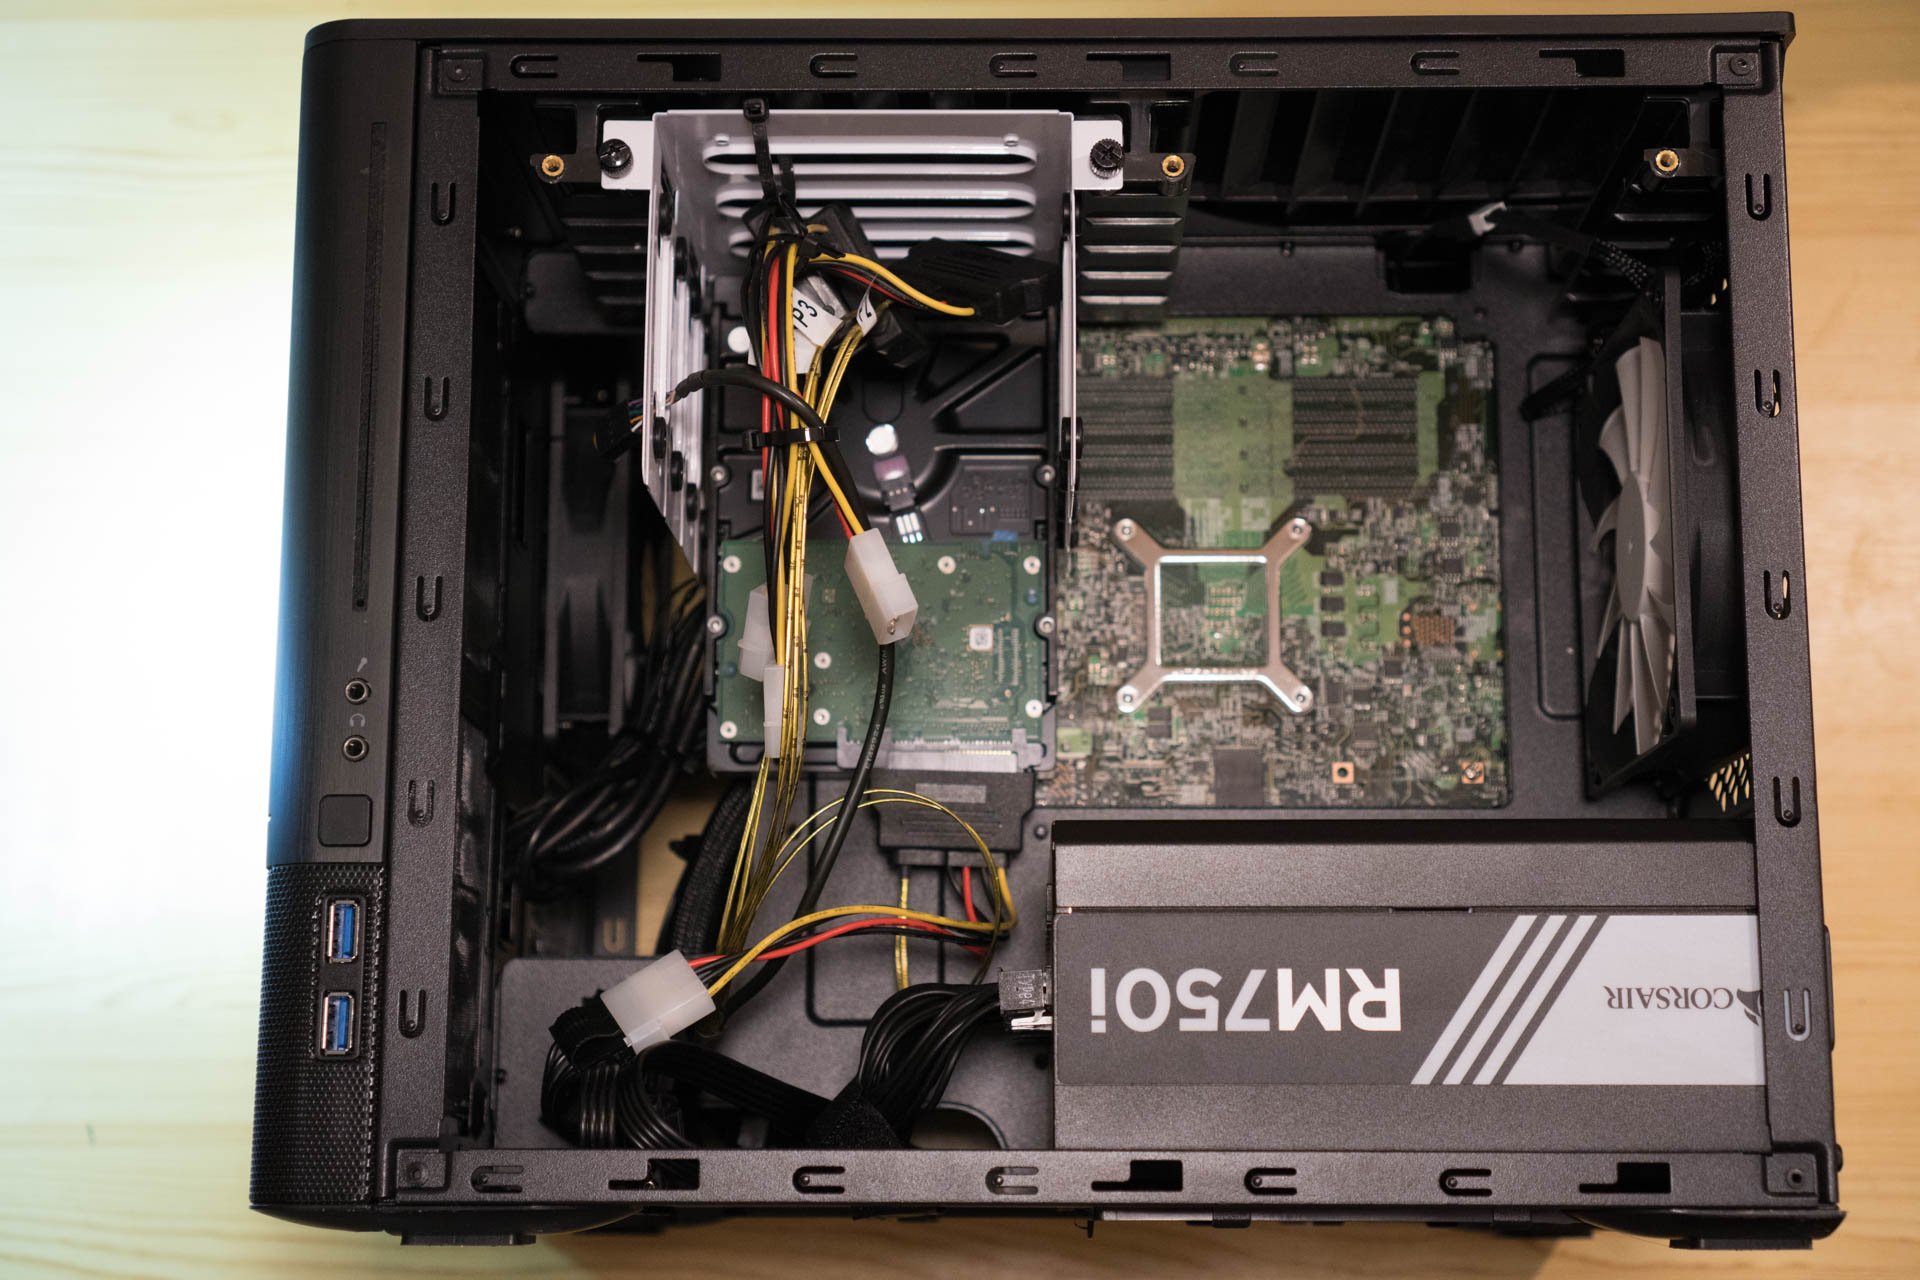
This picture shows the 4TB SAS drive in the left most storage frame. Due to the length of the adapter, the SAS cable would be blocked by the Power Supply Unit. I will only be able to expand to 4x 3.5″ SAS disk in this chassis. Using SATA drives, the chassis would take upto 10 disks.
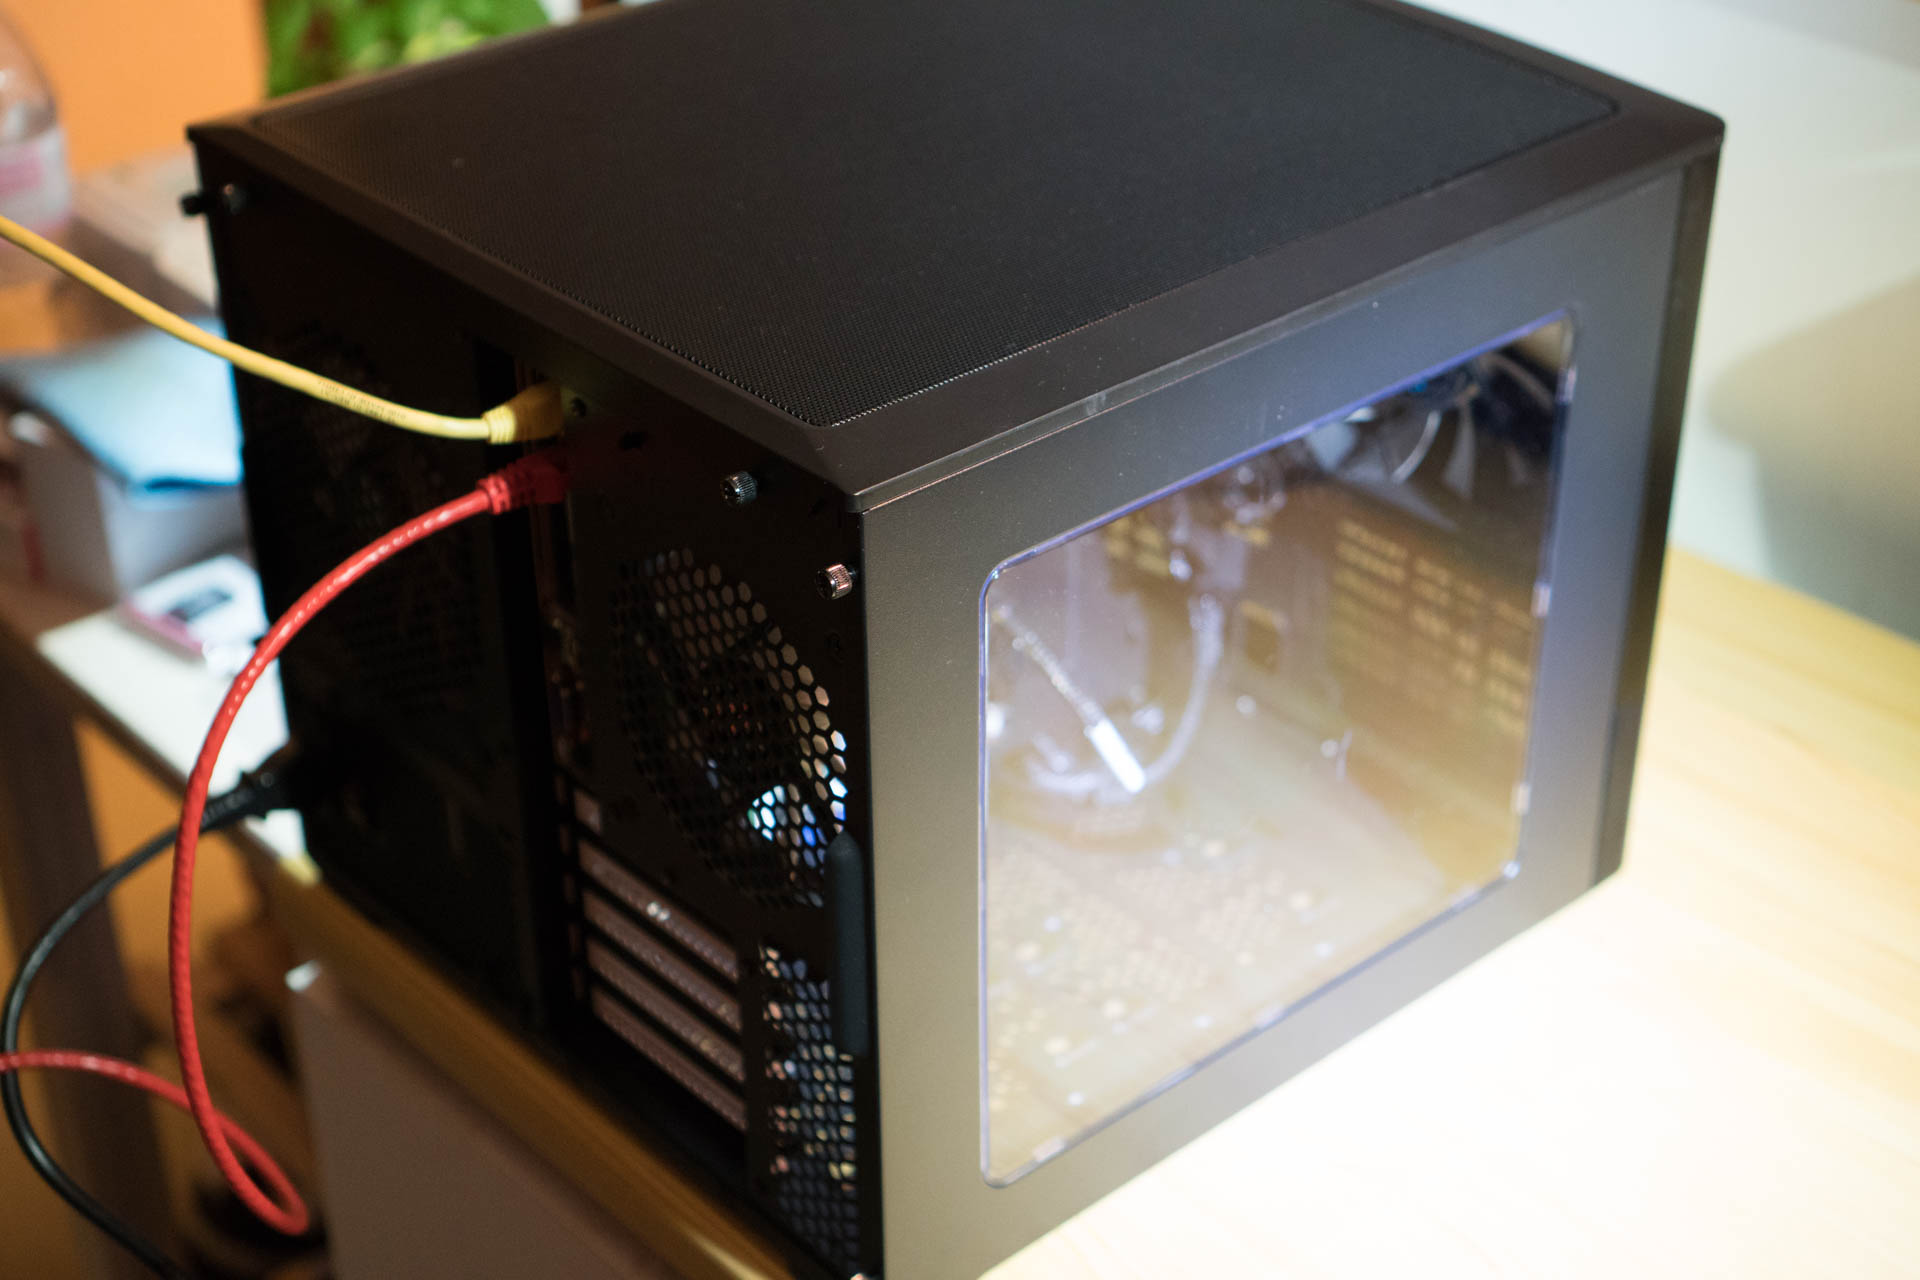
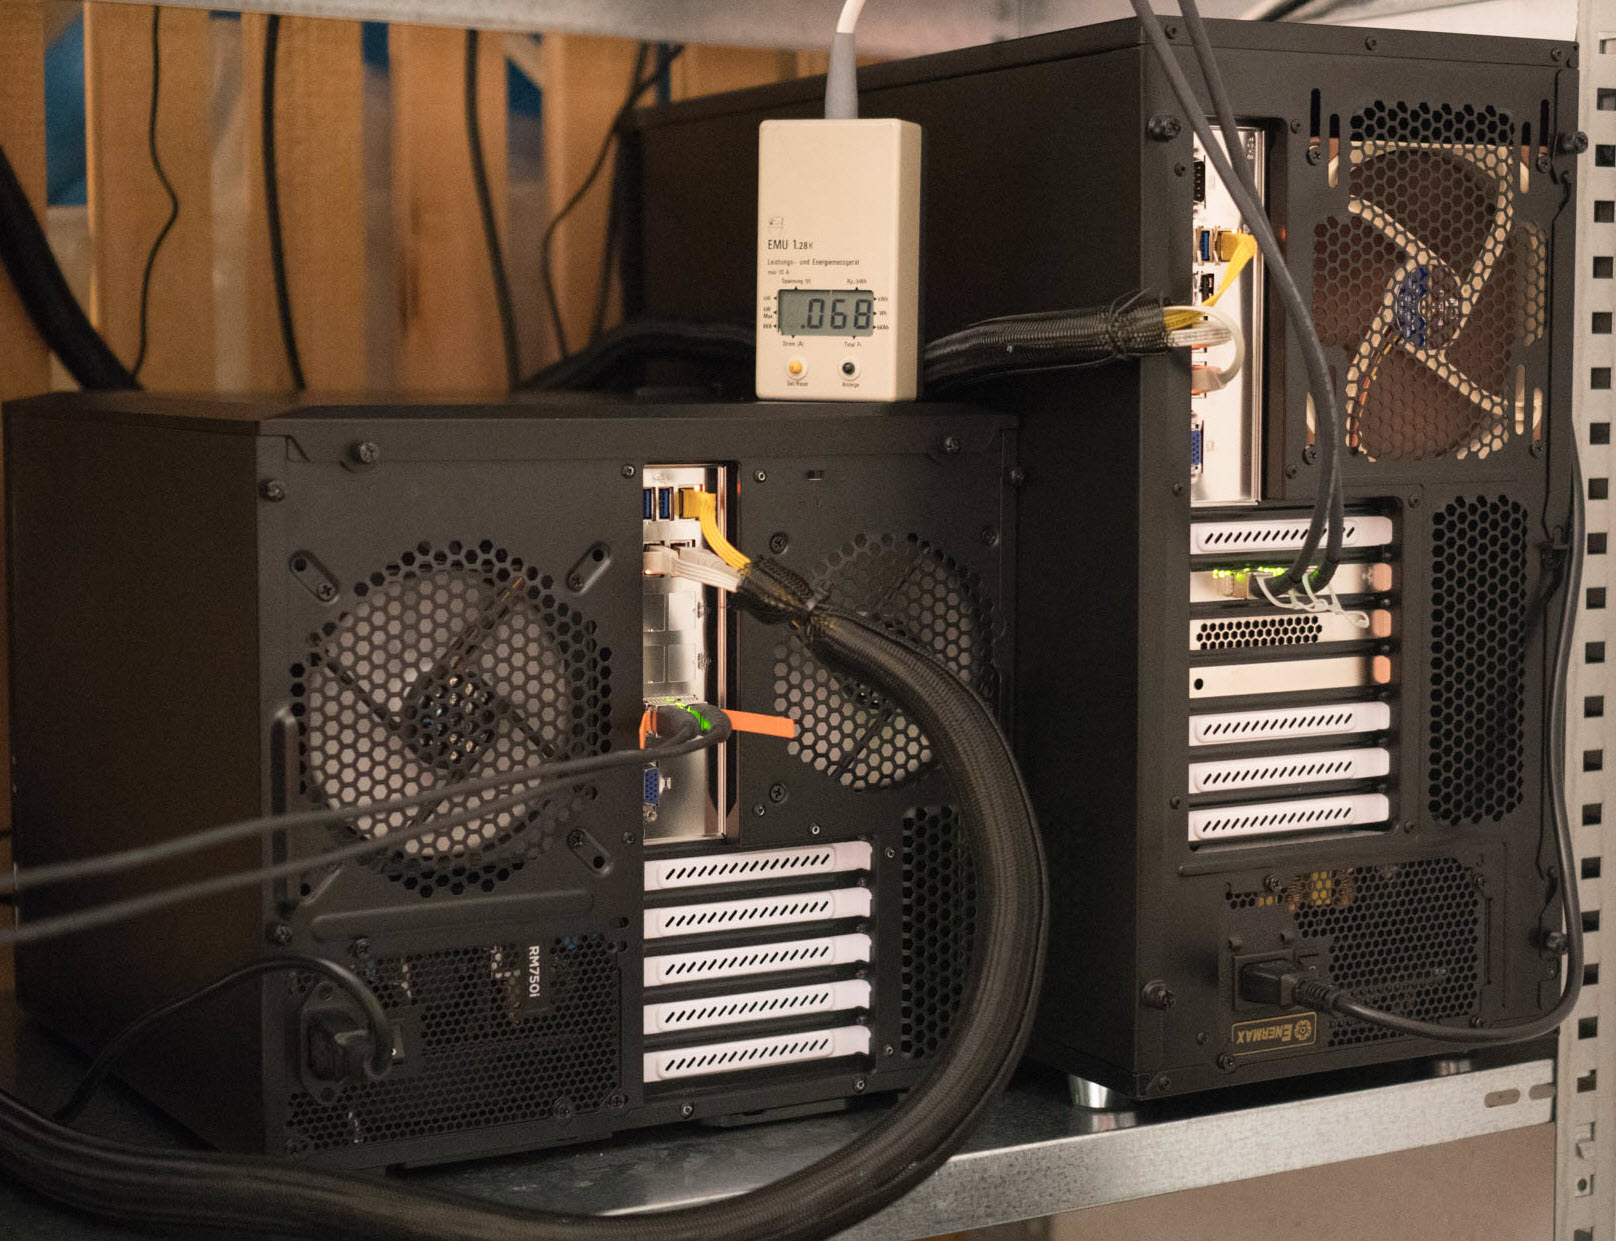
View from the back once all is assembled and powered up.
This server with an Intel Xeon D-1518 and 128GB is part of my Secondary Site chassis.
The last picture shows my HomeDC Secondary Site. The Fractal Design Node 804 is sitting next to a Fractal Design Define R5. The power consumption is rated at 68 Watts for a X10SDV-4C-7TP4F with two 10GbE SFP+ Passive Copper connection, two SSDs and a single 4TB SAS drive.
HomeDC Secondary Site