Running ScaleIO in the HomeDC

In this Post, I will describe how I have come about in deploying a ScaleIO Software-Defined Storage in the Home Datacenter. Over the course of 2016, I have upgraded my clusters from VMware Virtual SAN Hybrid (Flash for Caching Tier and SAS Enterprise disks for Capacity Tier) to an All Flash Tiering. This has released Multiple 4TB SAS Enteprise disk from the vSAN config. Rather than remove these from the hosts, I decided to learn and test the Free and Frictionless edition of DellEMC ScaleIO.

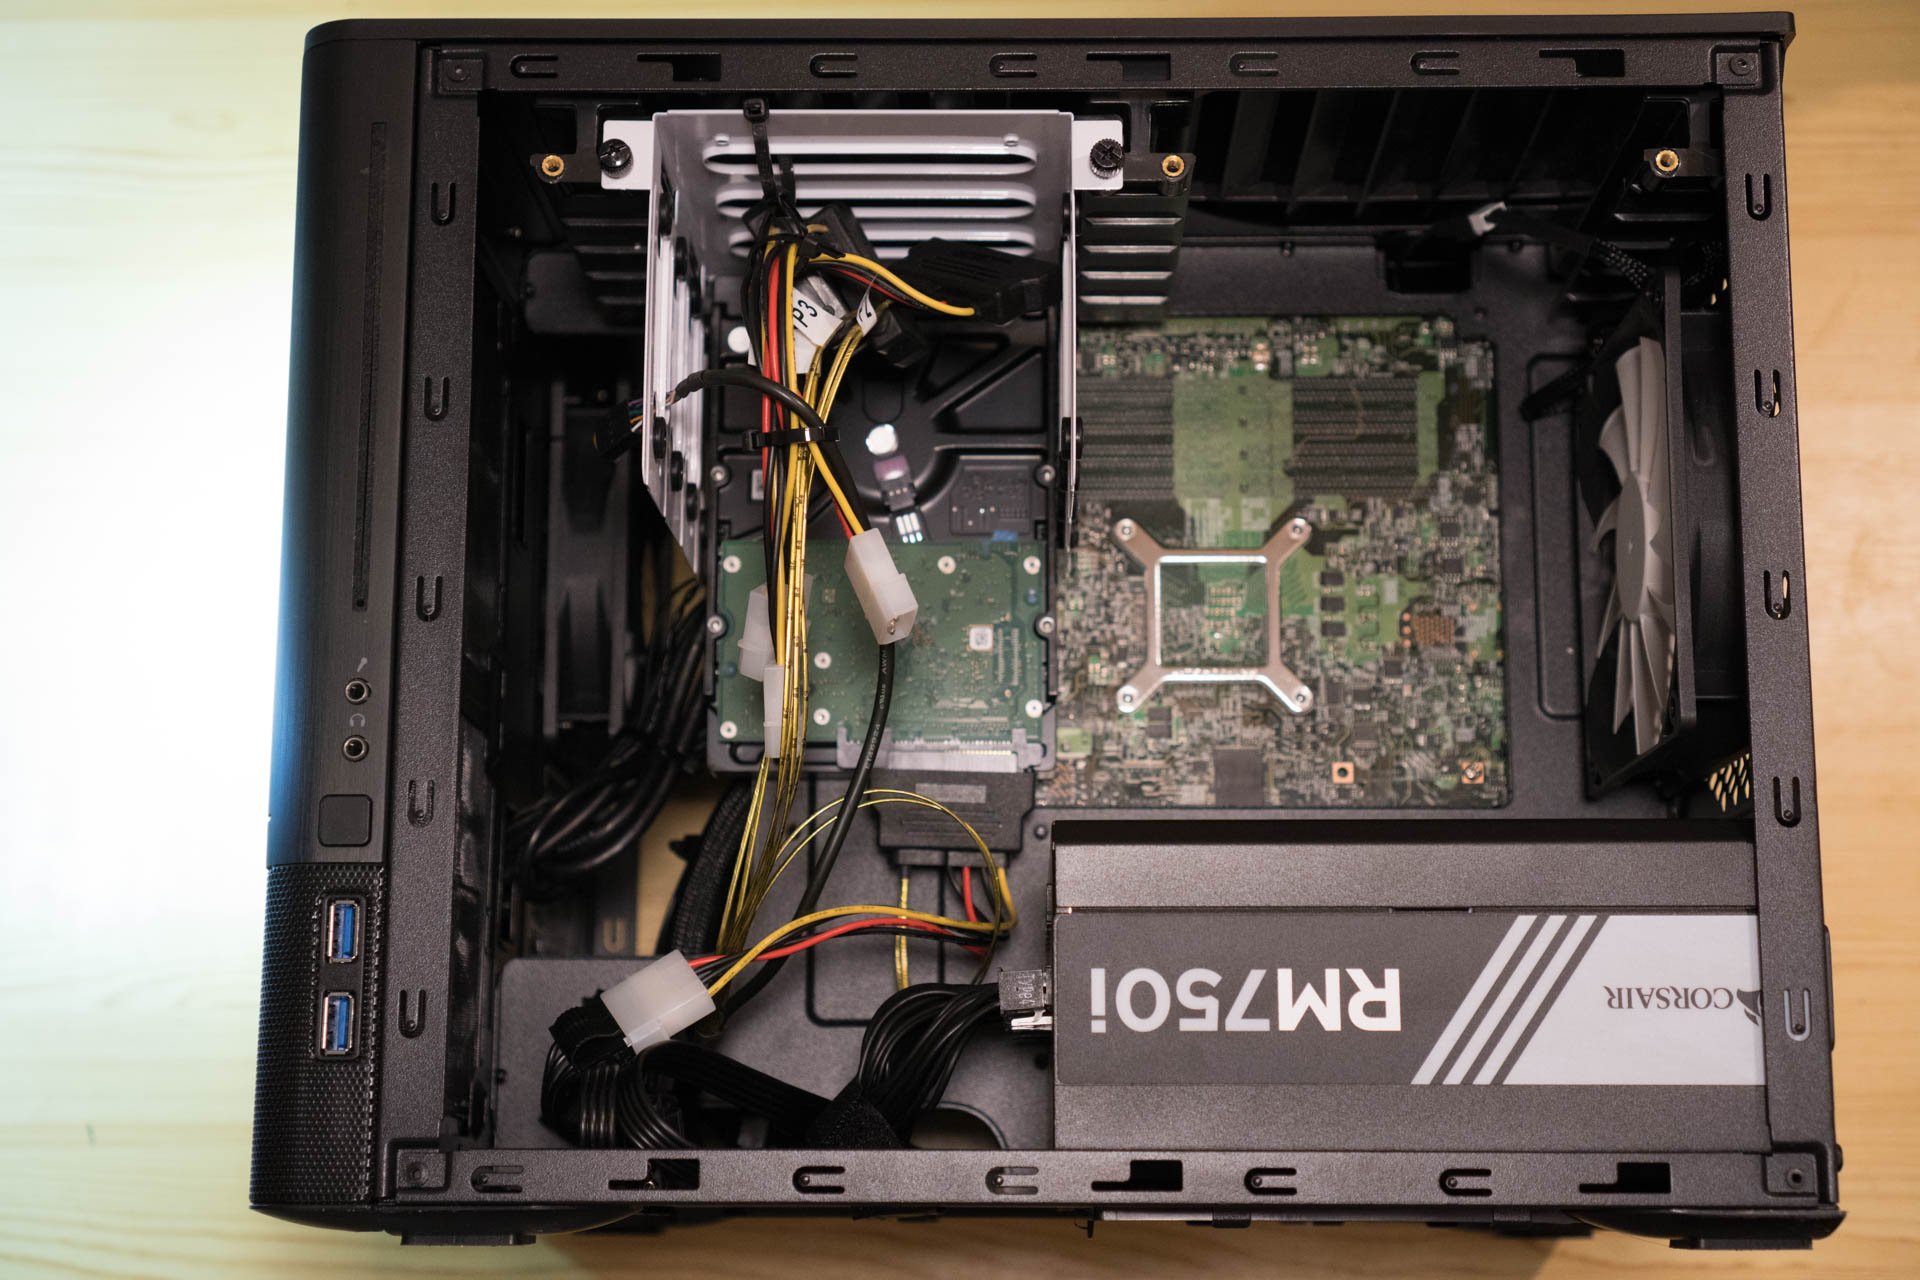
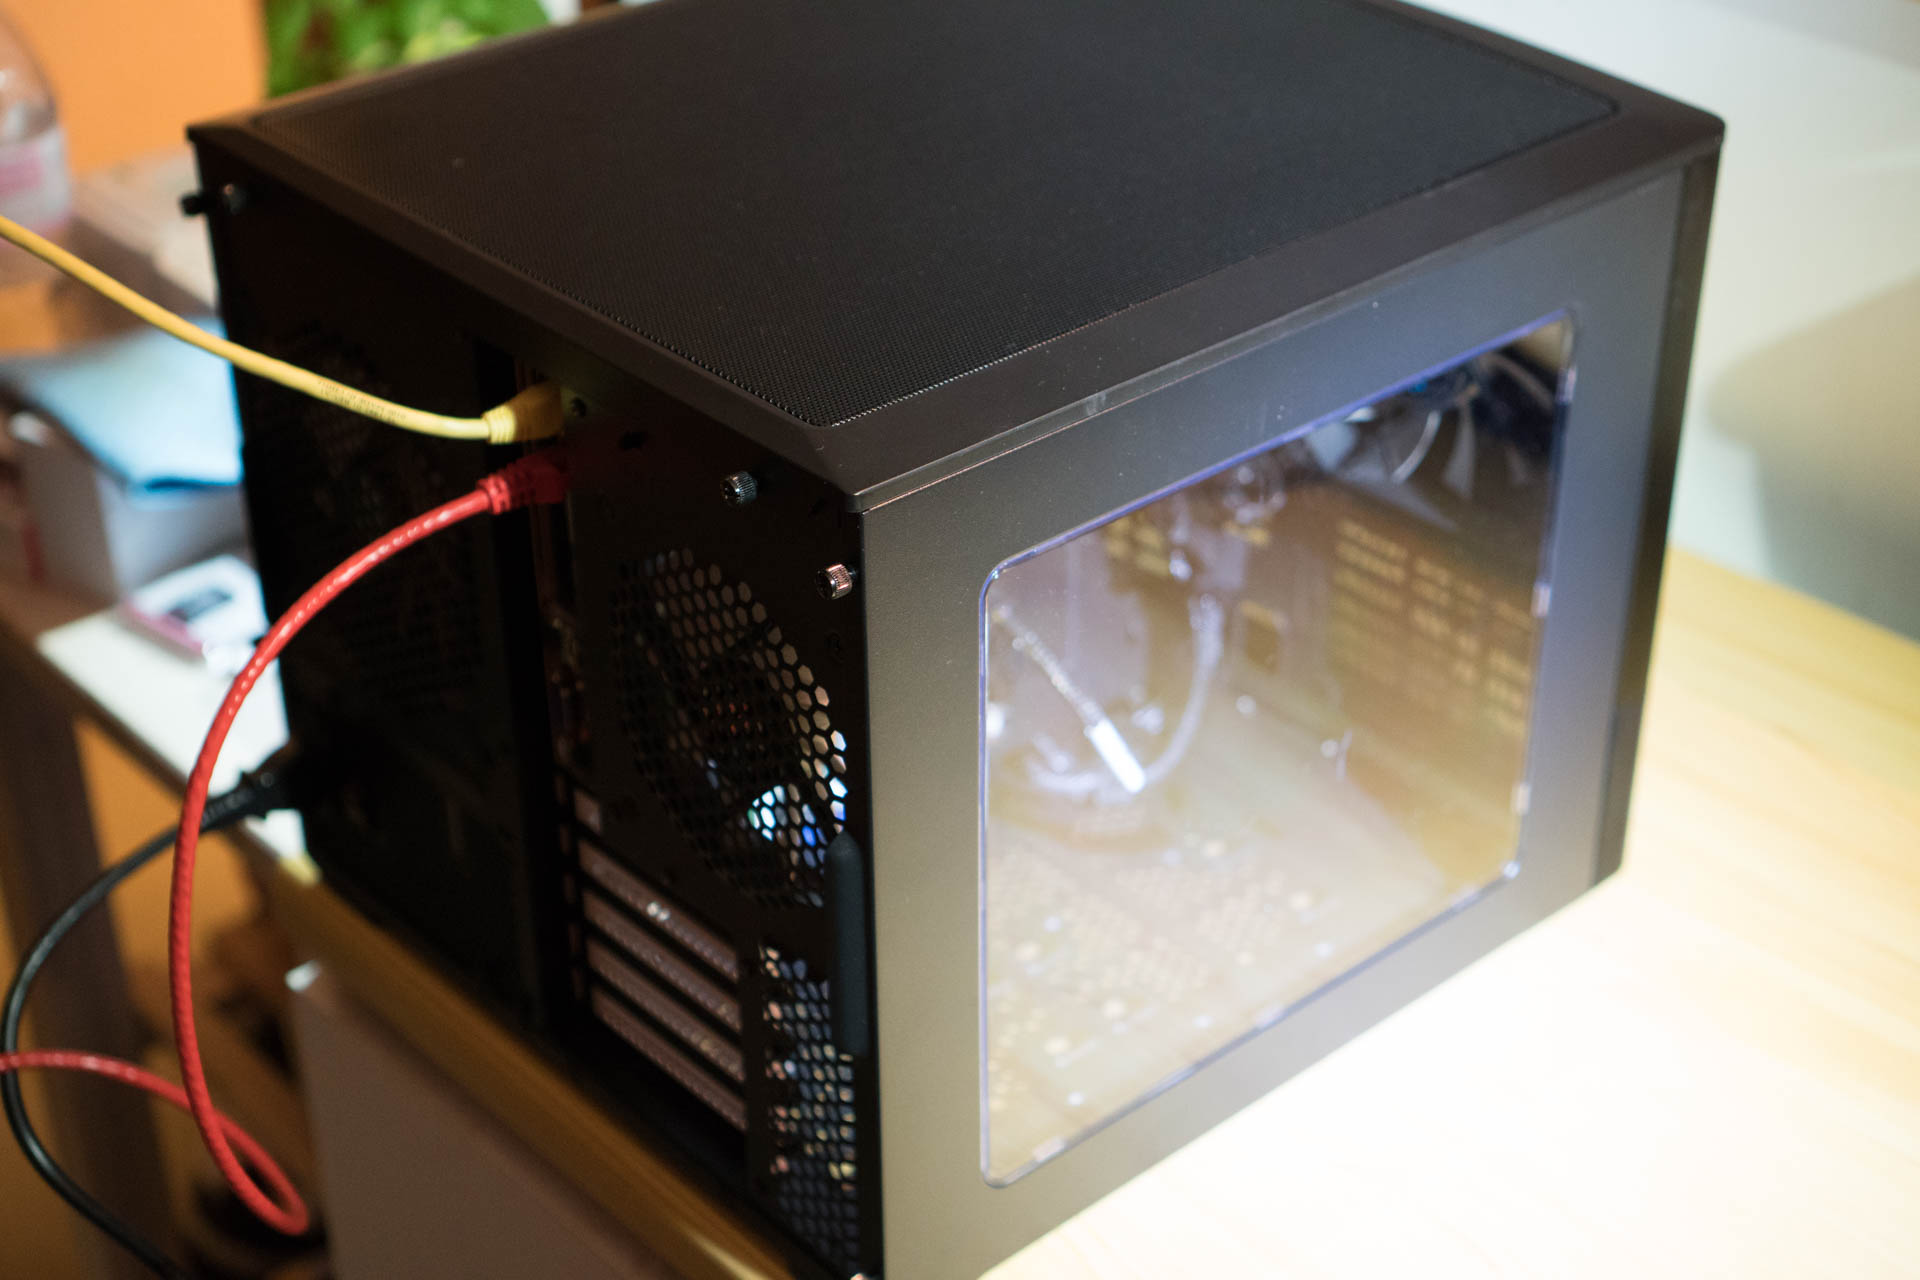
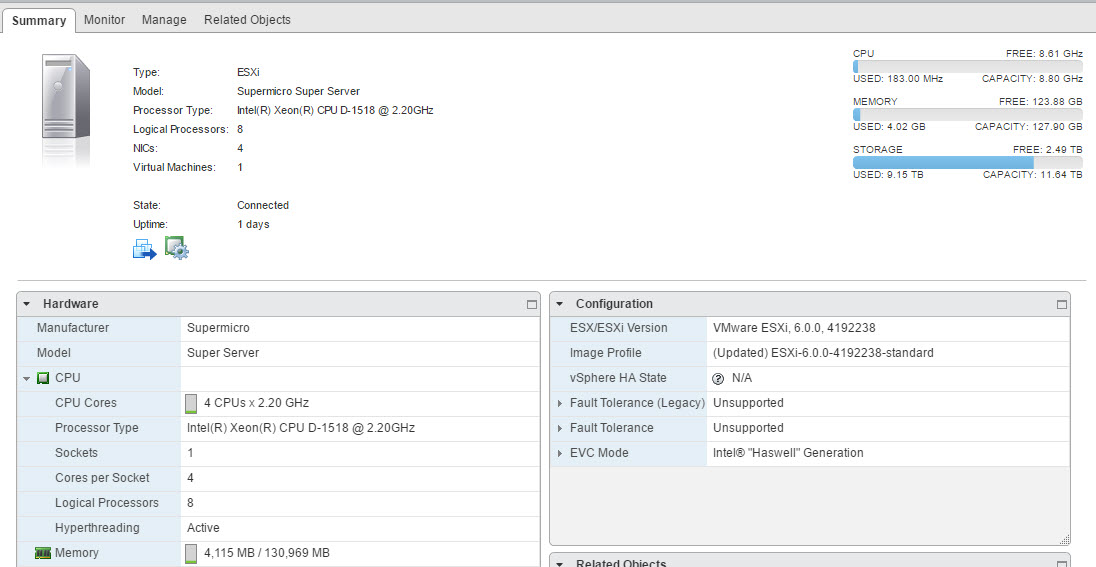
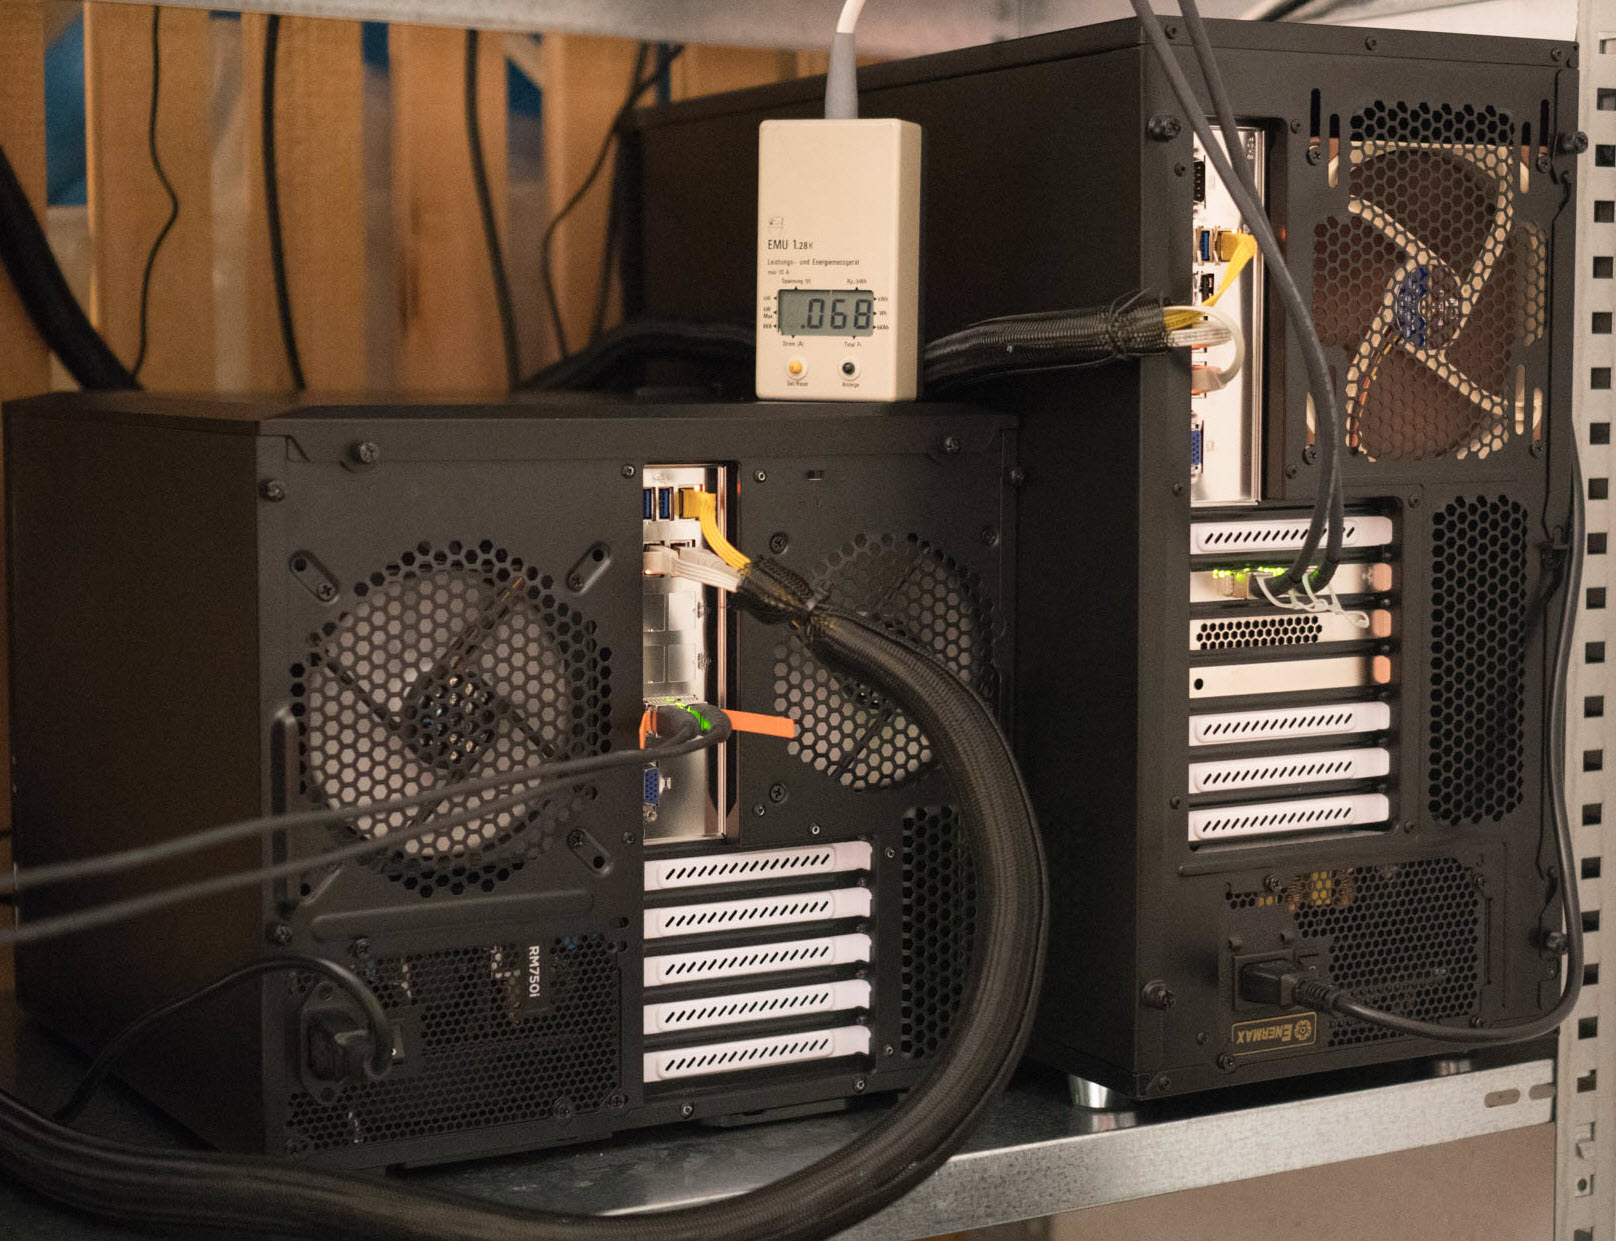
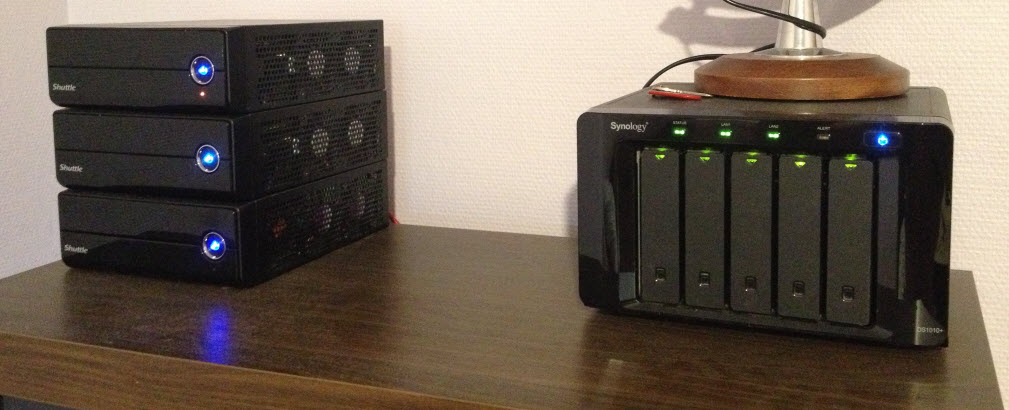
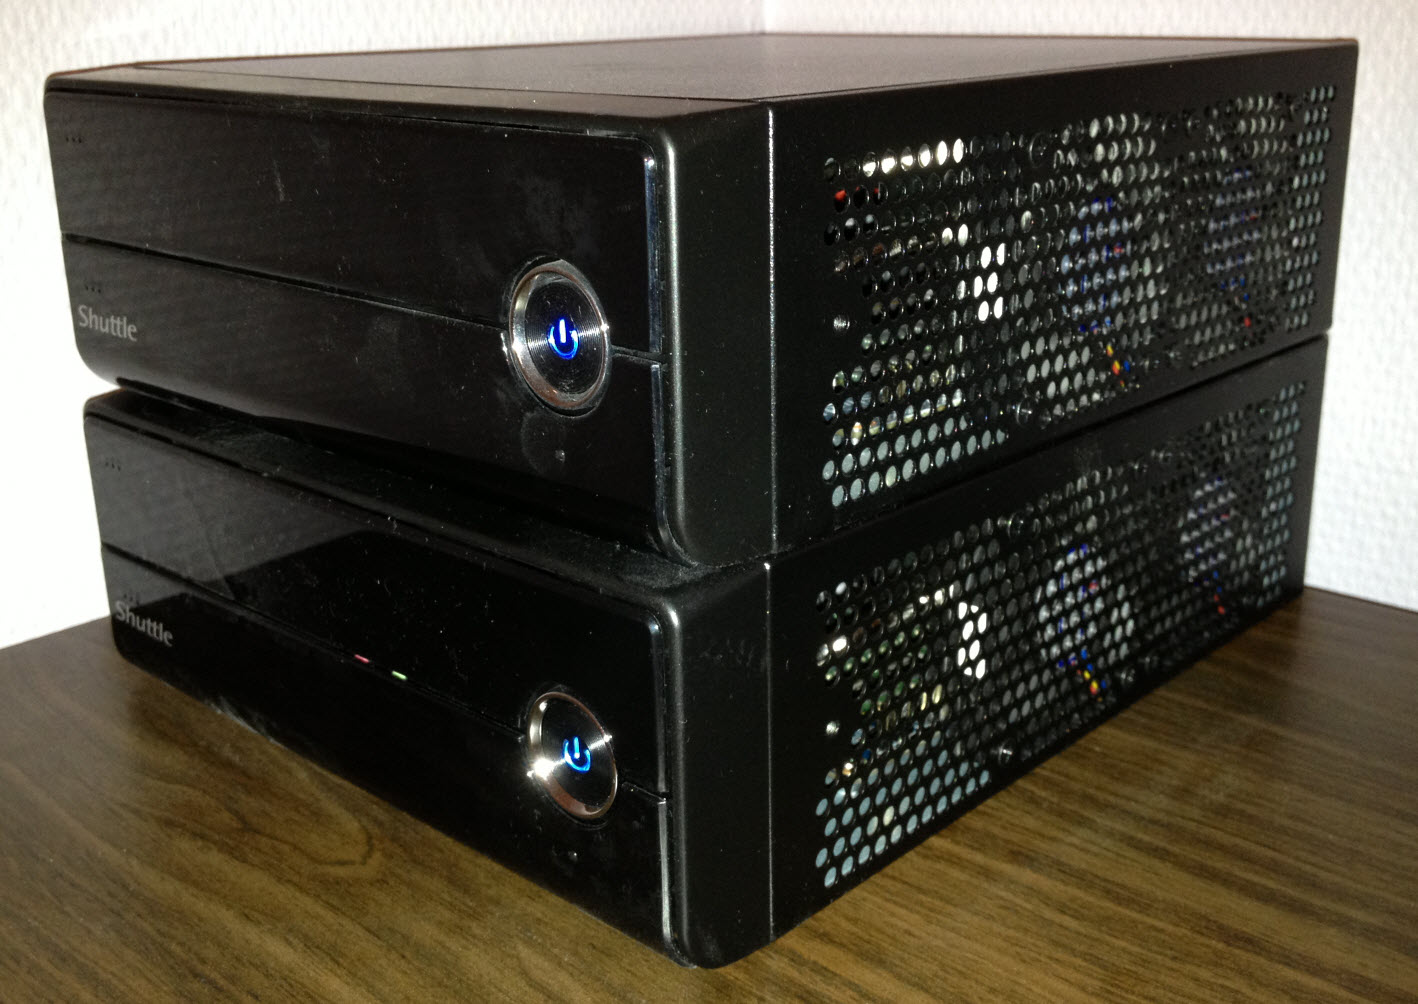
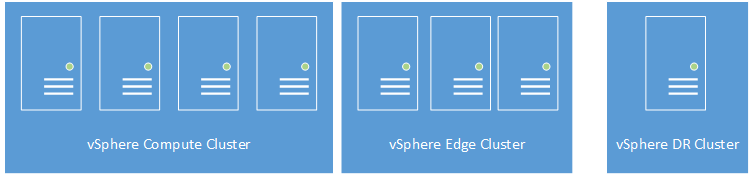
My ScaleIO design crosses the boundaries of three VMware vSphere Clusters, and is hosted across eight Tower case servers in the Home Datacenter. In a normal production ScaleIO cluster, the recommendation is to have a minimum of 6 disk drivers per  ScaleIO Data Server (the servers shading the storage). As you will see, in my design I spread the SAS Enterprise disks across the eight servers.

I’m not going to cover the definition of Protection Domains or Storage Pools in this article, but for this design, I have a single Protection Domain (pd1) with a single Storage Pool which I named SAS_pool. I did device the Protection Domain into three separate Fault Sets (fs1, fs2 and fs3), so as to spread failures across the hosts based on the power phase use in my datacenter.

I’ve run ScaleIO across my cluster for 10 months for some specific workloads that I just could not fit or did  not want to fit on my VMware vSAN All-Flash environment.

Here is a large screenshot of my ScaleIO configuration as it’s re-balancing the workload across the hosts. 


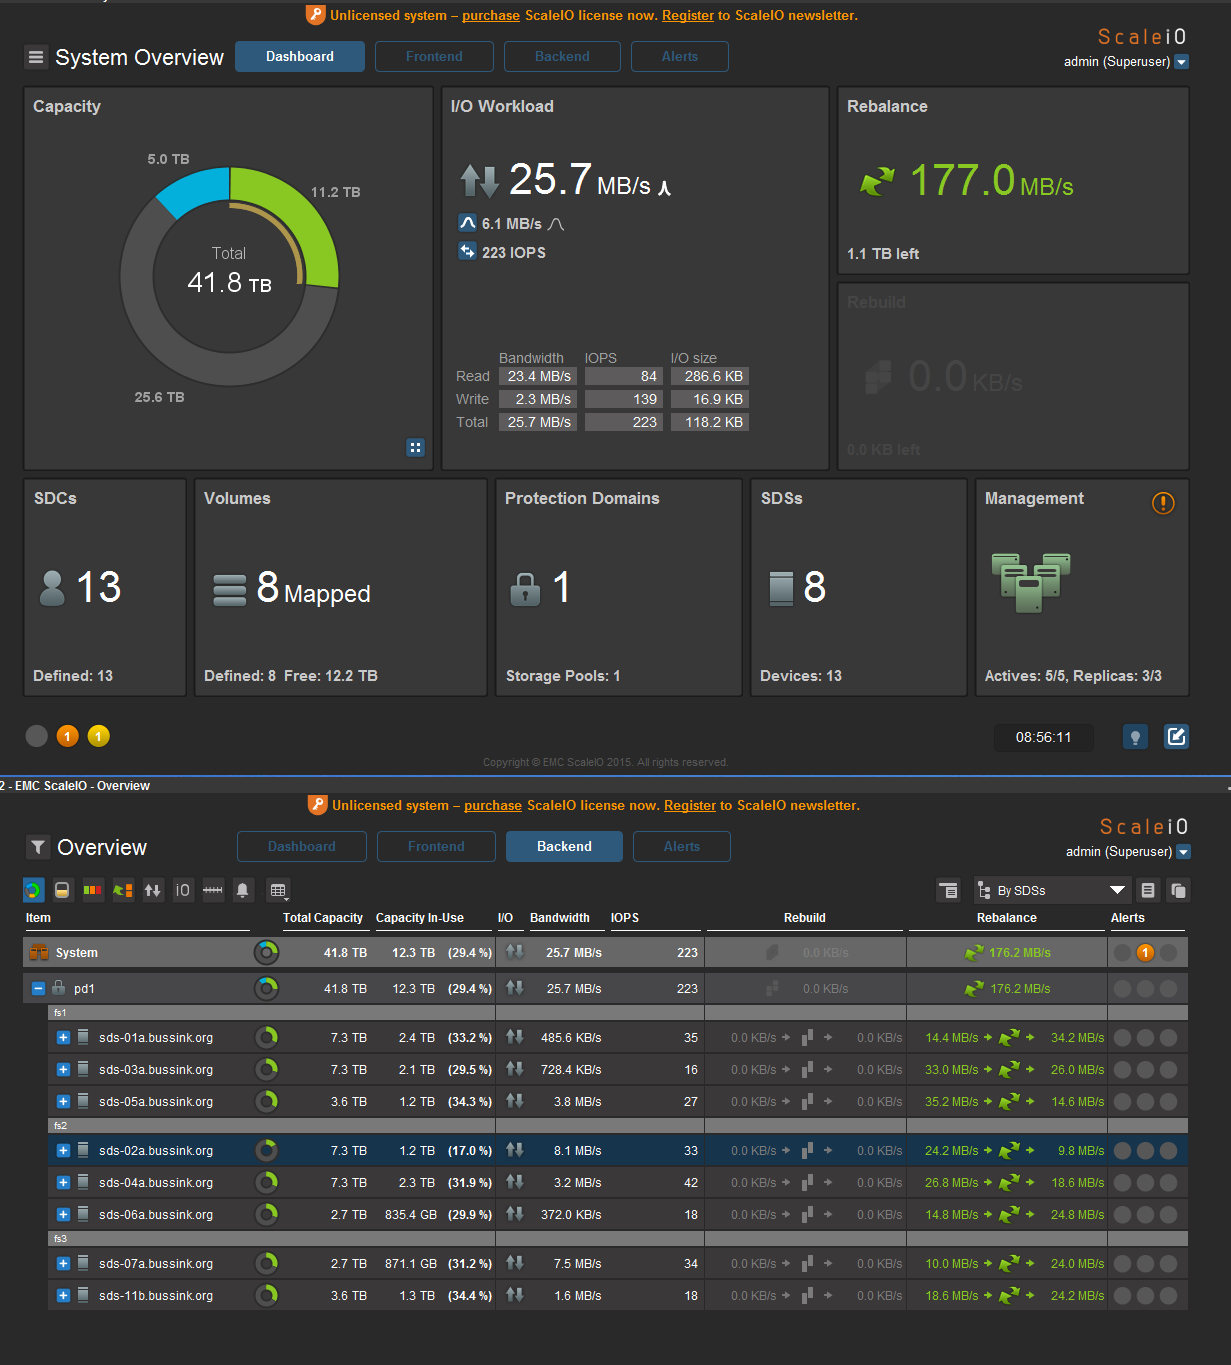
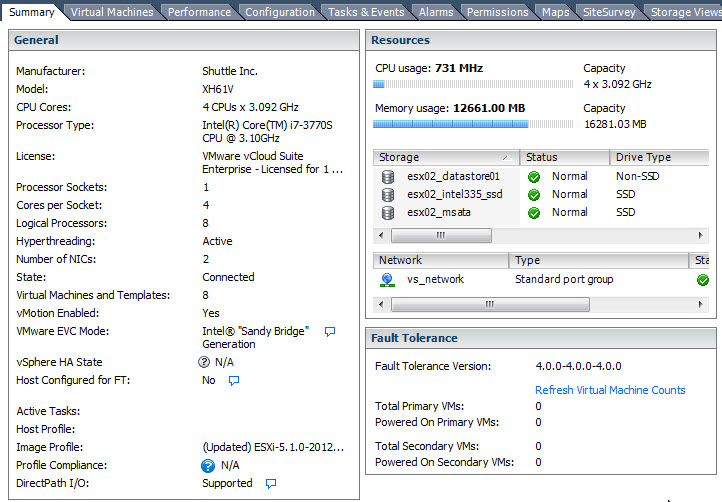
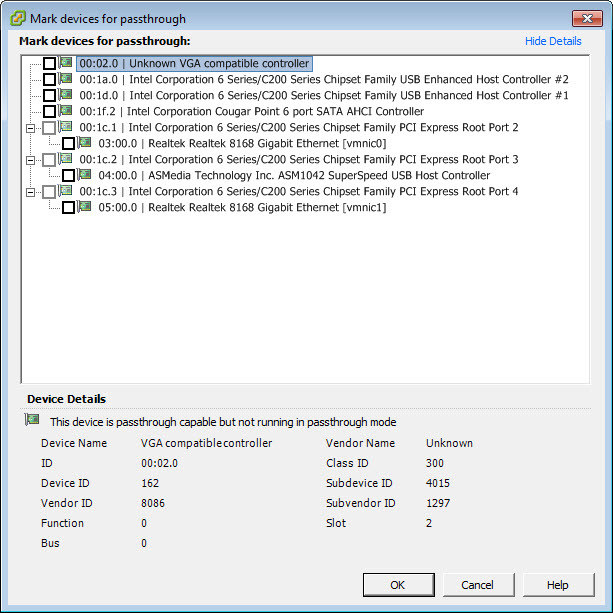
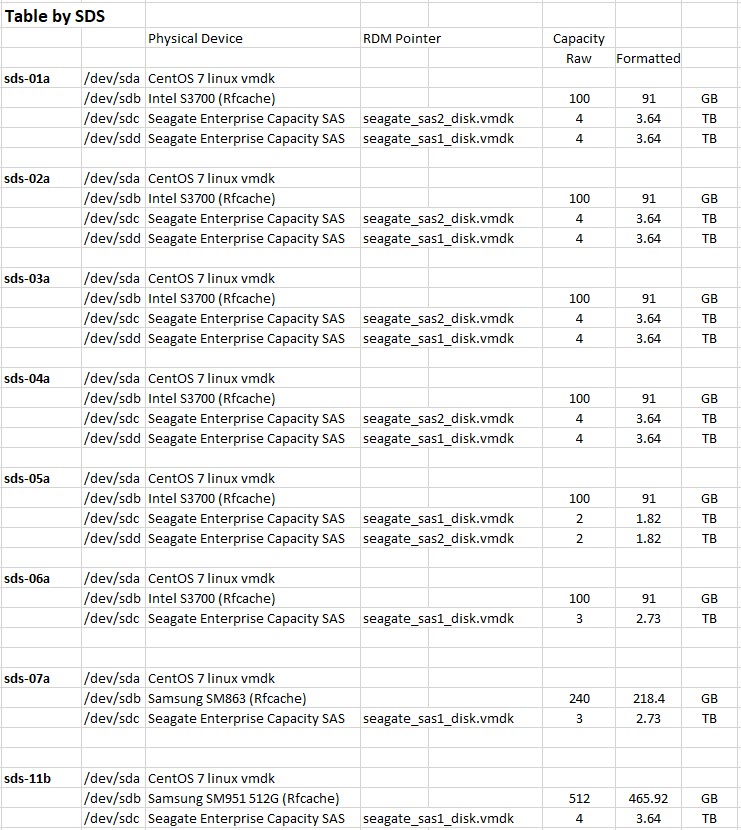
Each ScaleIO Data Server (SDS) was a CentOS 7 VM running on the ESXi and had two or three physical devices attached to it using RDM. Each SDS had a SSD device for the RFcache (Read Cache) and a single or dual SAS disk drive.

At the peak this deployment, the ScaleIO config had 41.8TB Usable Storage. I set the Spare Capacity at 8TB, leaving 34.5TB usable storage. With the double parity on the storage objects, I could only store 17.2TB of data to my VMs and my vSphere hosts.

Over the past 10 month of using ScaleIO, I’ve found two main limitations.

  1. The ScaleIO release cycle, and even more so for people using the Free & Frictionless version of ScaleIO. The release cycle is out of sync with the vSphere release. Some version are only released to Dell EMC customer with support contracts, and some version take between 6 and 8 weeks to move from the restricted access to a public access. At the end of March 2017, there was no version of ScaleIO that supports vSphere 6.5.
  2. Maintenance & Operations. As I wanted or needed to upgrade an ESXi host with a patch, a driver change or install a new version of NSX-v, I had to plan the power off the SDS VM running on the ESXi host. You can only put a single SDS in a planned maintenance mode per Protection Domain. So only one ESXi could be patched at a time. A simple cluster upgrade process with a DRS backed network, would now take much longer require more manual steps, put the SDS VM in maintenance mode, shutdown the SDS VM (and take the time to patch the Linux in the SDS VM), putting the host in maintenance mode, patching ESXi, restarting ESXi, exit maintenance mode, restart the SDS VM, exit the ScaleIO Maintenance mode, wait for the ScaleIO to rebuild the redundancy and move to the next host.

I’ve now decommissioned the ScaleIO storage tier as I needed to migrate to vSphere 6.5 for some new product testing.

Intel Xeon D-1518 (X10SDV-4C-7TP4F) ESXi & Storage server build notes

These are my build notes of my last server. This server is based around the Supermicro X10SDV-4C-7TP4F motherboard that I already described in my previous article (Bill-of-Materials). For the Case I select a Fractal Design Node 804 square small chassis. It is described as being able to handle upto 10x 3.5″ disks.

Fractal Design Node 804

Here is the side view where the motherboard can be fitted. It supports MiniITX, MicroITX and the FlexATX of the Supermicro motherboard. Two 3.5″ harddrives or 2.5″ SSD can be fitted on the bottom plate.

x10sdv_node804--2

The right section of the chassis, contains the space for eight 3.5″ harddrives, fixed in two sliding frame at the top.

x10sdv_node804--3

Let’s compare the size of the Chassis, the Power Supply Unit and the Motherboard in the next photo.

Fractal Design Node 804, Supermicro X10SDV-4C-7TP4F and Corsair RM750i

Fractal Design Node 804, Supermicro X10SDV-4C-7TP4F and Corsair RM750i

When you zoom in the the picture above, you can see three red squares on the bottom right of the motherboard. Before you inser the motherboard in the chassis, you might want to make sure you have moved the mSATA pin from the position on the photo to the 2nd position, otherwise you will not be able to attach the mSATA to the chassis. You need to unscrew the holding grommet from below the motherboard. People having purchased the Supermicro E300-8D will have a nasty surprise. The red square in the center of the motherboard is set for M.2 sticks at the 2280 position. If you have a M.2 storage stick 22110, you better move the holding grommet also.

Here is another closer view of the Supermicro X10SDV-4C-7TP4F motherboard with the two Intel X552 SFP+ connectors, and the 16 SAS2 ports managed by the onboard LSI 2116 SAS Chipset.

X10SDV-4C-7TP4F

In the next picture you see the mSATA holding grommet moved to accommodate the Samsung 850 EVO Basic 1TB mSATA SSD, and the Samsung SM951 512GB NVMe SSD in the M.2 socket.

X10SDV-4C-7TP4F

In the next picture we see the size of the motherboard in the Chassis.At the top left, you will see a feature of the Fractal Design Node 804. A switch that allows you to change the voltage of three fans. This switch is getting it’s electricity thru a SATA power connector. It’s on this power switch, that I was able to put a Y-power cable and then drive the Noctua A6x25 PWM CPU fan that fits perfectly on top of the CPU heatsink. This allowed me to bring down the CPU heat buildup during the Memtest86+ test from 104c to 54c.

X10SDV in Node 804

I used two spare Noctua Fan on CPU Heatsink fixer to hold the Noctua A6x25 PWM on the Heatsink, and a ziplock to hold those two fixers together (sorry I’m not sure if we have a proper name for those metal fixing brackets). Because the Noctua is getting it’s electricity from the Chassis and not the Motherboard, the Supermicro BIOS is not attemping to increase/decrease the Fan’s rpm. This allows me to keep a steady air flow on the heatsink.

Noctua A6x25 PWM fixed on heatsink

Noctua A6x25 PWM fixed on heatsink

I have fitted my server with a single 4TB SAS drive. To do this I use a LSI SAS Cable L5-00222-00 shown here.

lsi_sas_l5-00222-00_cable

This picture shows the 4TB SAS drive in the left most storage frame. Due to the length of the adapter, the SAS cable would be blocked by the Power Supply Unit. I will only be able to expand to 4x 3.5″ SAS disk in this chassis. Using SATA drives, the chassis would take upto 10 disks.

Node 804 Storage and PSU side

View from the back once all is assembled and powered up.

x10sdv_node804--12

This server with an Intel Xeon D-1518 and 128GB is part of my Secondary Site chassis.

ESXi60P03

The last picture shows my HomeDC Secondary Site. The Fractal Design Node 804 is sitting next to a Fractal Design Define R5. The power consumption is rated at 68 Watts for a X10SDV-4C-7TP4F with two 10GbE SFP+ Passive Copper connection, two SSDs and a single 4TB SAS drive.

HomeDC Secondary Site

HomeDC Secondary Site

Intel NUC Skull Canyon (NUC6I7KYK) and ESXi 6.0

As part of my ongoing expansion of the HomeDC, I was excited to learn about the availability of the latest Quad-Core Intel NUC a few months ago. Last friday I received my first Intel NUC Skylake NUC6I7KYK. I only started setting it up this afternoon. I usually do disabled a few settings in the BIOS, but following the warning from fellow bloggers that people had issues getting the Intel NUC running with ESXi [virtuallyghetto.com] I did take a deeper look prior to the install. I was able to install ESXi 6.0 Update 2 (Build 3620759) on my 4th try after disabling more settings in the BIOS.

Here is the screenshot of the ESXi Host Client of the Intel NUC6I7KYK with BIOS 0034.

nuc6i7kyk_ehc

Here is a quick screenshot of the physical machine. I was planning to use the SDXC slot with an SDXC 32GB card to store the boot configuration of ESXi, but unfortunately I did not see the SDXC as a valid target during the ESXi install process. So I keep the USB key I was boot from and select it as the target. On the screenshot below you will also notice an extra Network card, the StarTech USB3 Gigabit Ethernet Network Adapter which driver you can get from VirtuallyGhetto’s web page Functional USB 3.0 Ethernet Adapter (NIC) driver for ESXi 5.5 & 6.0. Thanks William for this driver.

nuc6i7kyk_startech

The Bill-of-Materials (BOM) of my assembly…

Here below you can see the Intel NUC with the two Samsung SM951 NVMe disks and the Crucial memory.nuc6i7kyk_open

To get ESXi 6.0 Update 2 to install I disabled the following BIOS Settings.But as people have commented back after more test, you really only need to disable the Thunderbolt Controller to get ESXi to install.

BIOS\Devices\USB

  • disabled – USB Legacy (Default: On)
  • disabled – Portable Device Charging Mode (Default: Charging Only)
  • not change – USB Ports (Port 01-08 enabled)

BIOS\Devices\SATA

  • disabled – Chipset SATA (Default AHCI & SMART Enabled)
  • M.2 Slot 1 NVMe SSD: Samsung MZVPV256HDGL-00000
  • M.2 Slot 2 NVMe SSD: Samsung MZVPV512HDGL-00000
  • disabled – HDD Activity LED (Default: On)
  • disabled – M.2 PCIe SSD LEG (Default: On)

BIOS\Devices\Video

  • IGD Minimum Memory – 64MB (Default)
  • IGD Aperture Size – 256MB (Default)
  • IGD Primary Video Port – Auto (Default)

BIOS\Devices\Onboard Devices

  • disabled – Audio (Default: On)
  • LAN (Default)
  • disabled – Thunderbolt Controller (Default: On)
  • disabled – WLAN (Default: On)
  • disabled – Bluetooth (Default: On)
  • Near Field Communication – Disabled (Default is Disabled)

BIOS\Devices\Onboard Devices\Legacy Device Configuration

  • disabled – Enhanced Consumer IR (Default: On)
  • disabled – High Precision Event Timers (Default: On)
  • disabled – Num Lock (Default: On)

BIOS\PCI

  • M.2 Slot 1 – Enabled
  • M.2 Slot 2 – Enabled
  • M.2 Slot 1 NVMe SSD: Samsung MZVPV256HDGL-00000
  • M.2 Slot 2 NVMe SSD: Samsung MZVPV512HDGL-00000

Cooling

  • CPU Fan Header
  • Fan Control Mode : Cool

Performance\Processor

  • disabled Real-Time Performance Tuning (Default: On)

Power

  • Select Max Performance Enabled (Default: Balanced Enabled)

Secondary Power Settings

  • disabled – Intel Ready Mode Technology (Default: On)
  • disabled – Power Sense (Default: On)
  • After Power Failure: Power On (Default was stay off)

Sample view of the BIOS Onboard Devices as I deactivate some Legacy Device Configuration.

nuc6i7kyk_bios_onboard


26/05 Update: Only the Thunderbolt Controller is stopping the ESXi 6.0 Update 2 installer to run properly. Re-activiting it after the install does not cause an issue in my limited testing.

Upgrading Mellanox ConnectX firmware within ESXi

Last summer, while reading the ServeTheHome.com website, I saw a great link to Ebay for Mellanox ConnectX-3 VPI cards (MCX354A-FCBT). These cards where selling at $299 on ebay. I took three of the awesome cards. These Mellanox ConnectX-3 VPI adapters where simply too good to be true… Dual FDR 56Gb/s or 40/56GbE using PCIe Generation 3 slots. Having three of these Host Card Adapters without a InfiniBand switch is limiting.

With my new Homelab 2014 design, I now have two vSphere hosts that have PCIe Generation 3 slots, and using a simple QSFP+ Fiber Cable, I can create a direct point-to-point connection between the two vSphere hosts.

The Mellanox Firmware Tools (MFT) that can run within the vSphere 5.5 and allow to check the state of the InfiniBand adapter and even update the firmware.

MFT for vSphere

Installing the tools is very straight forward.

# esxcli software vib install -d /tmp/mlx-fw/MLNX-MFT-ESXi5.5-3.5.1.7.zip

Install Mellanox MST

Unfortunately it requires a reboot.

The next steps going to be to start the MST service, check the status of the of the Mellanox devices and query them to check the current level of firmware.

I don’t need to have the Mellanox MST driver running all the time, so I will simply start it using /opt/mellanox/bin/mst start.

Next we will query the state of all Mellanox devices in the host using /opt/mellanox/bin/mst status -v from which we will get the path to the devices.

We then use the flint tool to query the devices to get their stats.

/opt/mellanox/bin/flint -d /dev/mt40099_pci_cr0 hw query

and

/opt/mellanox/bin/flint -d /dev/mt40099_pci_cr0 query

which returns us the current Firmware version and the GUIDs and MACs for the host card adapters.

Mellanox firmware upgrade 01

Well as I’m running only FW Version 2.10.700 its time to upgrade this firmware to release 2.30.8000

 /opt/mellanox/bin/flint -d /dev/mt4099_pci_cr0 -i /tmp/mlx-fw/fw-ConnectX3-rel-2_30_8000-MCX354A-FCB_A1-FlexBoot-3.4.151_VPI.bin burn does the trick.

Mellanox firmware upgrade 02

And we can quickly check the new running firmware on the InfiniBand adapter.


Adding Realtek R8168 Driver to ESXi 5.5.0 ISO

Update 20 March 2014. With the release of VMware ESXi 5.5.0 Update 1, this blog post is once again very popular. A lot of other articles, blogs and forum discussions have been using the Realtek R8168 driver link to my website, and this is starting to take an impact on my hosting provider. I therefore have had to removed the direct links to the R8168 & R8169 drivers on this page. These drivers are very easy to extract from the latest ESXi 5.1.0 Update 2 offline depot file which you can get from my.vmware.com . You just need to open the .zip file in a 7zip/winzip and extract the net-r8168 driver and use it with the ESXi Customizer.

vib_path

Sorry for the inconvenience.


The ESXi 5.5.0 Build 1331820  that came out yesterday, did not include any Realtek R8168 or R8169 driver in it. So if your homelab ESXi host only has these Realtek 8168 network cards, you need to build a custom ISO.

The most simple tool to use is Andreas Peetz’s (@VFrontDEESXi Customizer 2.7.2 tool. The ESXi Customizer tool allows you to select the ESXi 5.5.0 ISO file and include into it a new Driver in .vib format.

You can then download and extract the VMware Bookbank NET-R8168 driver from vSphere 5.1 ISO or download it from the following link for your conveniance.

VMware_bootbank_net-r8168_8.013.00-3vmw.510.0.0.799733

VMware_bootbank_net-r8169_6.011.00-2vmw.510.0.0.799733

Launch the ESXi Customizer and build your new .ISO file

ESXi-Customizer_ESXi-5.5.0_r8168

This will create a ESXi-Custom.ISO file that you can burn to a CD and use to install vSphere 5.5 on your host.

2013 Homelab refresh

Preamble

It’s now 2013, and it’s time to have a peak at my homelab refresh for this year.


Background

In the past three years, I’ve ran a very light homelab with VMware ESXi. I mainly used my workstation (Supermicro X8DTH-6F) with Dual Xeon 5520 @2.26Ghz (8-Cores) and 72GB of RAM to run most of the virtual machines and for testing within VMware Workstation, and only ran domain controllers and 1 proxy VM on a small ESXi machine, a Shuttle XG41. This gives a lot of flexibilty to run nearly all the virtual machines on a large beefed up workstation. There are quiet a few posts on this topic on various vExpert websites (I highly recommend Eric Sloof’s Super-Workstation).

I sometimes do play games (I’m married with a gamer), and when I do I have to ensure my virtual machines are powered down within VMware Workstation, as my system could and has crashed during games. Having corrupted VM is no fun.


Requirements

What I want for 2013 in the homelab, is a flexible environment composed of a few quiet ESXi hosts with my larger workstation being able to add new loads or test specific VM configuration. For this I need a infrastructure that is small, quiet and stable. Here are the requirements for my 2013 homelab infrastructure

  1. Wife Acceptance Factor (WAF)
  2. Small
  3. Quiet
  4. Power Efficient

Having purchased a flat, I don’t have a technical room (nothing like my 2006 computer room) or a basement. So having a few ESXi hosts on 24 hours a day, requires a high Wife Acceptance Factor. The system have to be small & quiet. In addition, if they are power efficient, it will make the utility bill easier.


Shuttle XH61V

The Shuttle XH61V is small black desktop based on the Intel H61 chipset. It comes in a 3.5L metal case with very quiet ventilators. You just need to purchase the Shuttle XH61V, a Intel 1155 Socket 65W processor, two memory SODIMMs (laptop memory) and local storage. Assembly can be done in less than 30 minutes.

Shuttle XH61V

Shuttle XH61V

The Shuttle XH61V comes with two NICs and support for a mSATA (Bootable) connector, a PCIe x1 slot, and two 2.5″ Devices. The Shuttle XH61V comes with two gigabit network cards. They are Realtek 8168 cards. These work flawlessly, but they do not support Jumbo frames.

Shuttle XH61V Back

Shuttle XH61V Back

For storage, I decided to boot from a mSATA device, and to keep a Intel SSD for a fast upper-tier local storage, and one large Hybrid 2.5″ Harddisk for main storage. I do have a Synology DS1010+ on the network that is the centralized NFS storage, but I want some fast local storage for specific virtual machines. It’s still early 2013, so I have not yet upgraded my older Synology or created a new powerful & quiet Nexenta Community Edition home server. On the next image you can see that three Shuttle XH61V take less space than a Synology DS1010+

Three Shuttle HX61V with Synology DS1010+

VMware ESXi installation

Installing VMware ESXi is done quickly as all the devices drivers are on the ESXi 5.1 VMware-VMvisor-Installer-5.1.0-799733.x86_64.iso install cdrom.

ESXi 5.1 on XH61V

ESXi 5.1 on XH61V

Here is the Hardware Status for the Shuttle XH61V

ESXi XH61V Hardware Status

Here is an updated screenshot of my vSphere 5.1 homelab cluster.

Management Cluster


Bill of Materials (BOM)

Here is my updated bill of materials (BOM) for my ESXi nodes.

  • Shuttle XH61V
  • Intel Core  i7-3770S CPU @3.1Ghz
  • Two Kingston 8GB DDR3 SO-DIMM KVR1333D3S9/8G
  • Kingston 16GB USB 3.0 Key to boot ESXi (Change BIOS as you cannot boot a USB key in USB3 mode)
  • Local Storage Intel SSD 525 120GB
  • Local Storage Intel SSD 520 240GB
  • Local Storage Seagate Momentus XT 750GB

Planned upgrade: I hope to get new Intel SSD 525 mSATA boot devices to replace the older Kingston SSDnow when they become available.


Performance & Efficiency

In my bill of materials, I selected the most powerful Intel Core i7 processor that I could fit in the Shuttle XH61V. Because I’m running virtual appliances and virtual machines like vCenter Operations Manager, SQL Databases, Splunk. There are some less expensive Core i3 (3M Cache), Core i5 (6M Cache) or Core i7 (8M Cache) processor that would work great.

What is impressive, is that the Shuttle XH61V comes with a 90W power adapter. We are far from the 300W mini-boxes/XPC or even the HP MicroServer with their 150W power adapters. Only the Intel NUC comes lower with a 65W power adapter and a single gigabit network (@AlexGalbraith has a great series of post on running ESXi on his Intel NUC ).

Just for info, the Intel Core i7-3770S has a cpubenchmark.net score of 9312. Which is really good for a small box that uses 90W.

The Shuttle XH61V is also very quiet... it’s barely a few decibels above the noise of a very quiet room. To tell you the thru… the WAF is really working, as my wife is now sleeping with two running XH61V at less than 2 meters away. And she does not notice them… 🙂


Pricing

The pricing for a Shuttle XH61V with 16GB memory and a USB boot device (16GB Kingston USB 3.0) can be kept to a about $350 on newegg. What will increase the price is the performance of the LGA 1155 Socket 65W processor ( Core i3-2130 from $130 to Core  i7-3770S at $300) and what additional local storage you want to put in.

vSphere 5.1 Cluster XH61V

The sizing of the homelab in early 2013 is so far from the end of 2006 when I moved out of my first flat, when I had a dedicated Computer room.

Update 18/03/2012. DirectPath I/O Configuration for Shuttle XH61v BIOS 1.04

XH61v DirectPath I/O Configuration

XH61v DirectPath I/O Configuration


Update 22/03/2013.  mSATA SSD Upgrade

I’ve decided to replace the Intel 525 30GB mSATA SSD that is used for booting ESXi and to store the Host Cache with a larger Intel 525 120GB mSATA SSD. This device will give me more space to store the Host Cache and will be used as a small Tier for the Temp scratch disk of my SQL virtual machine.

The ‘published’ performance for the Intel 525 120GB mSATA are

Capacity
Sequential
Read/Write (up to)
Random 4KB
Read/Write (up to)
Form Factor
30 GB SATA 6 Gb/s       500 MB/s / 275 MB/s  5,000 IOPS / 80,000 IOPS mSATA
60 GB SATA 6 Gb/s       550 MB/s / 475 MB/s 15,000 IOPS / 80,000 IOPS mSATA
120 GB SATA 6 Gb/s       550 MB/s / 500 MB/s 25,000 IOPS / 80,000 IOPS mSATA
180 GB SATA 6 Gb/s       550 MB/s / 520 MB/s 50,000 IOPS / 80,000 IOPS mSATA
240 GB SATA 6 Gb/s       550 MB/s / 520 MB/s 50,000 IOPS / 80,000 IOPS mSATA
 Show More Detailed Product Specifications >


Using vCenter Update Manager for HP ESXi installations

This post will explain how to use the vCenter Update Manager to create a custom Hewlett-Packard Extensions baseline, so that you can install the HP Drivers on your ESXi install and the HP CIM Management Tools.

Having just purchased a set of HP Proliant ML110 G7, I found out that HP has release at least two sets of drivers for ESXi 5.0.

The first one is the VMware ESXi 5.0 Driver CD for the HP SmartArray version 5.0.0-24.0 released on 2011/08/22. I recommend that you download this driver from the VMware website on your vCenter and extract it in a convenient place, as we will need the hpsa-500-5.0.0-offline_bundle-537239.zip file. We will come back to this file later.

The second one is the HP ESXi 5.0 Offline Bundle now in version 1.1 since December 2011. This bundle contains multiple drivers such as the HP Common Information Model (CIM) Providers, HP Integrated Lights-Out (iLO) driver and HP Compaq ROM Utility (CRU) driver. Download this file but don’t extract it. We will use the file hp-esxi5.0uX-bundle-1.1-37.zip as is.

On your vCenter, jump to the Update Manager Administration pane, and select the Import Patches option.

We first import the HP SmartArray Driver

Import hpsa-500-5.0.0-offline_bundle

Importing HP SmartArray Driver for ESX

We then import the HP ESXi 5.0 Offline Bundle

Import HP-ESXi5.0-bundle-1.1.37

Import HP-ESXi5.0-bundle-1.1.37

And we now see both offline bundles in the Patch Repository

Patch Repository

We will now create a new Baseline Extension for these offline patches so we can apply them to our HP servers.

Create a new Baseline - Host Extension

Add the HP Drivers and Tools to the new Host Extension

Add HP Drivers to Host Extension

And save the New Baseline

Save new Baseline

Lets attach this new Baseline Host Extension to our HP ML110 G7 Cluster and Scan the Cluster.

Attach new Baseline to Cluster and Scan

We can now Remediate our HP Proliant ML110 G7 host with the new Host Extension. Please note that you cannot remediate VMware Patches and the Host Extensions at the same time. You will need to do this in two passes.

Here is the Hardware Status of an HP ML110 G7 before applying the HP Host Extension patches

ML110G7 Prior to HP Drivers and Tools

and after having the remediation.

ML110G7 with Storage Information & SmartArray Driver

Thanks to these drivers, we could now see the HP SmartArray Array Status if there where any disks attached to it.


vSphere 5.0 on HP ML110 G7

Last friday, I came across this very interesting deal, Two HP ProLiant ML110 G7 with Xeon E3-1220 (Quad-Core @3.1Ghz) for the price of one. So Two HP ML110 G7 for $960 seemed a great bargain to me. I got some extra Kingston memory and I should have some decent lab servers.

But when I started installing VMware ESXi 5.0.0 Build 504980 on the HP ML110 G7 it kernel dumped.

HP ML110 G7 crashing during ESXi 5.0 Build 504890 startup

After having filmed the crash, the last thing that came up before the crash was ACPI.

I looked up the Performance Best Practices for VMware vSphere 5.0 PDF for specific ACPI settings and Power States. It does have some specific tuning tips on page 14/15

  • In order to allow ESXi to control CPU power-saving features, set power management in the BIOS to “OS Controlled Mode” or equivalent. Even if you don’t intend to use these power-saving features, ESXi  provides a convenient way to manage them.
  • NOTE Some systems have Processor Clocking Control (PCC) technology, which allows ESXi to manage power on the host system even if its BIOS settings do not specify “OS Controlled mode.” With this technology, ESXi does not manage P-states directly, but instead cooperates with the BIOS to determine the processor clock rate. On HP systems that support this technology, it’s called Cooperative Power Management in the BIOS settings and is enabled by default. This feature is fully supported by ESXi and we therefore recommend enabling it (or leaving it enabled) in the BIOS.
  • Availability of the C1E halt state typically provides a reduction in power consumption with little or no impact on performance. When “Turbo Boost” is enabled, the availability of C1E can sometimes even increase the performance of certain single-threaded workloads. We therefore recommend that you enable  C1E in BIOS.
  • However, for a very few workloads that are highly sensitive to I/O latency, especially those with low CPU  utilization, C1E can reduce performance. In these cases, you might obtain better performance by disabling C1E in BIOS, if that option is available
  • C-states deeper than C1/C1E (i.e., C3, C6) allow further power savings, though with an increased chance of performance impacts. We recommend, however, that you enable all C-states in BIOS, then use ESXi host power management to control their use

So I modified the Power Management settings in the HP ML110 G7 BIOS.

[box]

HP Power Profile: Custom

HP Power Regulator: OS Control Mode

Advanced Power Management Options \ Minimum Processor Idle Power State: C6 States[/box]

Just changing the No C-States to the C6 States will allow you to install and run ESXi 5.0 on the HP ML110 G7.

ML110 G7 BIOS Advanced Power Management Options C6 States

And here is the beautifully screenshot of the ML110 G7 in the vCenter

ESXi 5.0 on ML110 G7

And a closer look at the Power Management Settings tab from vCenter 5.0. You can now change the power settings without having to reboot and modify the BIOS.

ESXi 5.0 Power Management with ML110 G7

I hope this will be usefull to other people in preparing their VCP5 Certification and for a great home lab equipment.

And for those that want to test further, the ML110 G7 supports Intel VT-d.

ESXi Multi-NIC & Multi-VLAN vMotion on UCS

I’ve been deploying a Cisco UCS Chassis with multiple Cisco B230 M2 Blades. Yet the uplinks switches of the Fabric Interconnect are medium-Enterprise sized Switches, and not some Nexus 5K or better. In a vSphere 5.0 cluster designs you add one or more NICs to the vMotion interface. With the enhancements of Sphere 5.0 you can combine multiple 1G or 10G network cards for vMotion, and get better performance.

Duncan Epping wrote on the 14th December 2011 on his site
[quote]”I had a question last week about multi NIC vMotion. The question was if multi NIC vMotion was a multi initiator / multi target solution. Meaning that, if available, on both the source and the destination multiple NICs are used for the vMotion / migration of a VM. Yes it is!”[/quote]

I was a bit worried by having my ESXi 5.0 vMotion traffic go up the Fabric Interconnect from my source Blade, across the network switches and back down the Fabric Interconnect and the target Blade. I decided to create two vmkernel port for vMotion per ESXi, and segregate them in two VLAN. Each VLAN is only used inside one Fabric Interconnect.

vNIC Interface eth4 for vMotion-A on Fabric A (VLAN 70)

vNIC Interface eth4-vMotionA

vNIC Interface eth5 for vMotion-B on Fabric B (VLAN 71)

vNIC Interface eth5-vMotionB

And now let’s try this nice configuration.

The VM that would be used for testing purposes is a fat nested vESX with 32 vCPU and 64GB of memory (named esx21). It is vMotion’ed from esx12 (Source network stats in Red) towards esx11 (Target network stats in Blue).

The screenshot speaks for itself… we see that the vMotion uses both NICs and VLANs to transfer the memory to esx11. It flies at a total speed of 7504MbTX/s to 7369MbRX/s in two streams. One stream cannot pass the 5400Mb/s rate, because of the limitation of the Cisco 2104XP FEX and the 6120XP Fabric Interconnect. Each 10Gb link is used by two B230 M2 blades.

If you want to learn how to setup Multi-NIC vMotion, check out Duncan’s post on the topic.

Thanks go to Duncan Epping (@duncanyb) and Dave Alexander (@ucs_dave) for their help.