In this post, I will quickly explain, how I created my Virtual Machine under Linux, that I have and will use to benchmark some aspects of my new 2014 Homelab. First I download from the CentOS website, the latest version of the CentOS 6.5 64bit Net Install .ISO. This will allow me to install the Virtual Machine quickly with the packages I need.
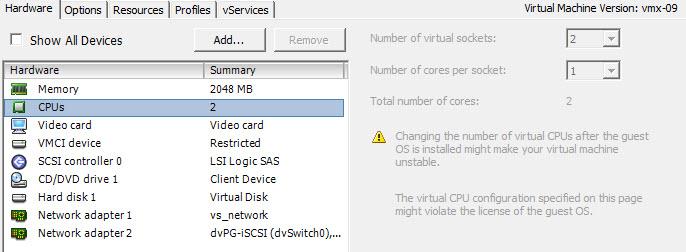
The next step is to create a two Linux 64bit VMs on my vCenter. I selected to create a VMX-09 virtual machine, so that I can edit the network properties from the vCenter 5.5 Windows Client or the vSphere Web client. I create a two vCPU machine, because the application that I will be running for my network benchmarks is iperf, and is a single-threaded process, so the 2nd vCPU will be consumed by the operating system of the VM.
For Network Adapters, I select two VMXNET3 adapters, the first one will be used for management and baselining my perfs on a 1Gbps Ethernet, the 2nd one can be moved around from vSwitch to dVSwitch and from VMNIC to VMNIC. Note that I rather give two virtual sockets with one core, than one virtual socket with two cores. This will give you about 6% more performance for the VM.
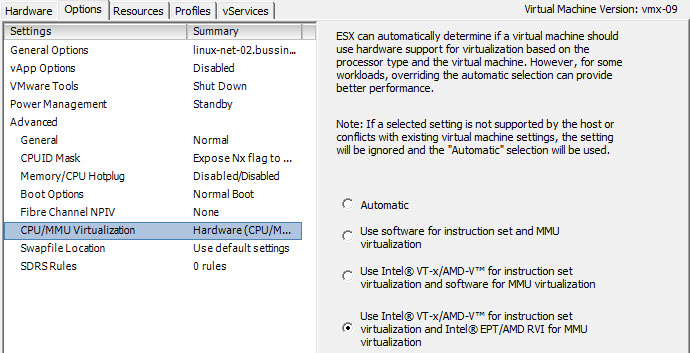
Another small change I always do, is to optimize the Virtual Machine Monitor for the VMs. The VMM is a thin layer for each VM that leverages the the scheduling, memory management and the network stack in the VMkernel. So I change in the Options tab, the CPU/MMU Virtualization settings to force the use of Intel VT-x/AMD-V for instruction set virtualization and Intel EPT/AMD RVI for MMU virtualization. This will ensure that the VM gets the best optimized hardware supportfor the CPU and MMU. This should only be done on recent processors, when you are sure that your CPU/MMU supports EPT and VT-X. If that is not the case, then leave this setting to Automatic.
If you want to know more about these settings and many others, I highly recommend you read the great “vSphere High Performance Cookbook” by Prasenjit Sarkar (@stretchcloud) at Packt Publishing.
I just need to say that in the past few years, all my VMs and Templates get this setting by default on all my systems and my customer clusters.
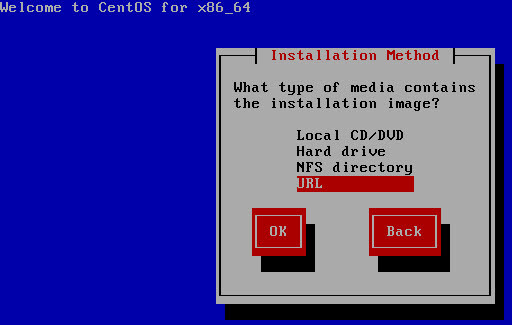
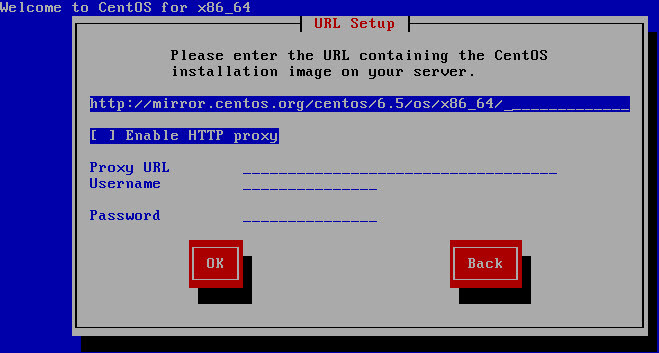
Next, we need to boot the Linux machine with the CentOS Net Installer. I’m not going to explain all the steps needed for every Linux settings, just a few points. When you get the option to select the installation method we select the URL option.
It will then ask you to select the network card and will fetch an IP address from the network via DHCP before asking you to enter the URL. We will use the following URL
http://mirror.centos.org/centos/6.5/os/x86_64/
Once the install GUI has started make sure not to forget to put the 2nd Ethernet interface where you will be doing your iperf testing to a 9000 MTU. Otherwise your network performance results will be skewed.

For my performance testing VMs, I let the OS select the default file partition scheme, this is not a VM requiring special sizing.

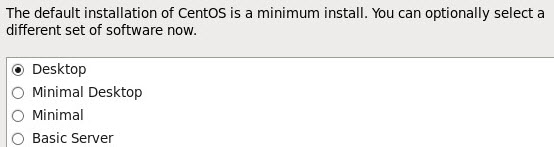
I select the Desktop installation config for these test platforms.
Once you have finished installing the virtual machine, install the latest VMware Tools on it, before modifying the grub menu. I add the key work VGA=0x317 to all my linux machines kernel settings in grub.conf or menu.lst (OpenSuSE), so that the VM boots think it has a 1024×768 monitor. Even if I stay in the Console mode of Linux, it gives me more screen estate.
When you have Linux machines that run on 1Gbps ethernet, the default settings in the Linux kernel are fine, but if you want to optimize the network traffic for Linux for 10Gbps, there are a few System variables that we can fine tune. Lets edit the /etc/sysctl.conf and add six fields:
# Minimum, initial and max TCP Receive buffer size in Bytes
net.ipv4.tcp_rmem = 4096 87380 134217728
# Minimum, initial and max buffer space allocated
net.ipv4.tcp_wmem = 4096 65536 134217728
# TCP Moderage Receive Buffer Auto-Tuning
net.ipv4.tcp_moderate_rcvbuf=1
# Maximum Receive socket buffer size (size of BDP)
net.core.rmem_max = 134217728
# Maximum Send socket buffer size (size of BDP)
net.core.wmem_max = 134217728
# Maximum number of packets queueed on the input side
net.core.netdev_max_backlog = 300000
I’m going to use iperf to test the links between two machines, so for this set of machines, I disable the IPtables as I have multiple ports being used between the two linux test platforms. chkconfig iptables off will do the trick. A quick reboot and all the modifications will take effect.
Also as we will test the 10G Ethernet performance, both virtual machines are on a Distributed vSwitch (dVS), and the PortGroup is configured with a MTU set at 9000 (Jumbo Frames).
And before finishing this blog, I also make sure to use DRS Rules, so that the Linux VM 01 should runs on my ESX01 server, and the Linux VM 02 should run on my ESX02 server. Using the Should rule, allows me to quickly put a host in maintenance mode, while ensure that my performance virtual machines stay where they should.
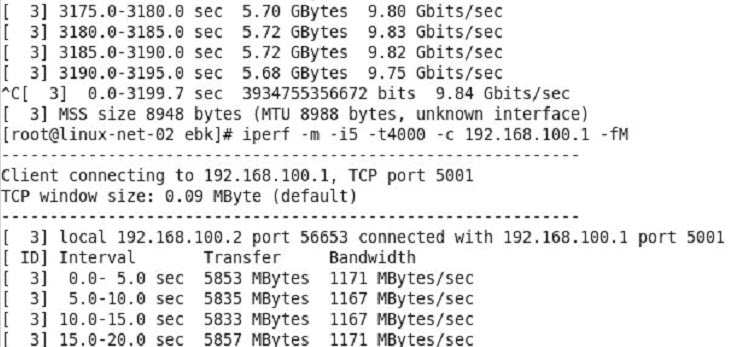
To use the iperf (a very single threaded program) between two test hosts, start iperf on the first one as a service iperf -s , and on the second one, we use the commands iperf -m -i t300 -c IP_of_other_VM or iperf -m -i t300 -c IP_of_other_VM -fM to have the same results but in Bytes instead of bits.
Here is preliminary results using a 10G Ethernet interface between the two hosts (both hosts have an Intel X540-T2 adaper).