Generating SSL Certificates for usage with vCenter, Update Manager and the ESXi host is one of those tasks that keeps being push away. Accepting the self-signed certificates is fine in most situation, but getting validated certificates means a whole lot of pop-ups disappear and surprise surprise, I have also found that the vCenter Operations Manager feels smother and faster.
I recently followed Julian Wood’s excellent series on how to sign certificates for vCenter and Update Manager. Generating the SSL Certificates for vCenter Operations Manager goes along the same lines, but there are changed and maybe some configuration changes on the vCOPS UI-VM.
Julian recommends to install the latest 64-bit version of the OpenSSL Windows Binaries. Retrieve the Win64 OpenSSL v1.0.1 Light for Windows tool on the vCenter with it’s per-requisite Visual C++ 2008 Redistributables (x64) from Microsoft.com
Once the OpenSSL v1.0.1 Light is installed, we can add an System Environment Variable, so that the OpenSSL tool can find the path to the OpenSSL configuration file. Because I’m going to use the OpenSSL tool on the vCenter to generate the SSL Certificates for various VMware appliance, I need the variable to stay permanent. From the Control Panel on the vCenter, I add a new System Environment Variable like follows.
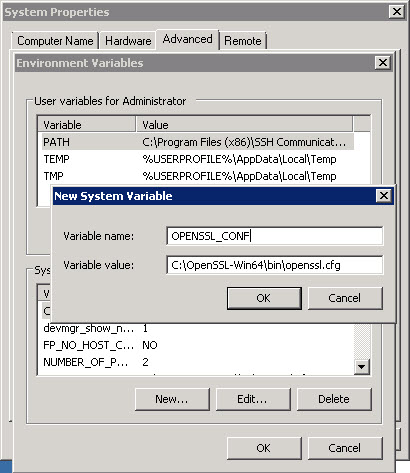
Adding the OPENSSL_CONF environment variable in the Control Panel
So that the next time you start the Command Prompt to generate OpenSSL Certificates, the variable is already present.

Checking OPENSSL_CONF variable
One of the best information I learned from Julian’s document is the modification of the openssl.cfg to add the option to use two subjectAltName for the DNS resolution. This allows the user to get a valid certificate when you connect to the vCenter Operations Manager 5.0, using the Fully Qualified Domain Name or simply the short name of the server.
To use this feature you will need to edit the C:\OpenSSL-Win64\bin\openssl.cfg and add “req_extensions = v3_req” to the “[ req ]” section, and add “subjectAltName = DNS:vcops.vsphere.bussink.local,DNS:vcops” to the “[ v3_req]” section. I need to add that I also modify the default key length in the certificate request to 2048 bits.
[box] [ req ]
default_bits = 2048
req_extensions = v3_req
[ v3_req ]
subjectAltName = DNS:vcops.vsphere.bussink.local, DNS:vcops, DNS:192.168.1.18
subjectAltName = DNS:vcops.vsphere.bussink.local, DNS:vcops
[/box]
Update (29/03/2012): I added to my subjectAltName, the iPAddress of my vCenter Operations Manager UI. You will get the information from the vCenter Managed Object Reference portal ExtensionManager value (See screenshot at the bottom of the post). The entry is of format DNS:192.168.1.18
Update (02/04/2012): Thanks to Josh Perkins excellent article “vCenter Operations Manager 5 vCenter Plugin uses IP instead of DNS hostname“. I have removed the IP address subjectAltName in the certificate request in the code above.
To create the Certificate file I used the following commands. Go to the bin directory of the OpenSSL tools. Generate a new Certificate Request while keeping the Cert Private key on your vCenter server. I’m generating the vCOPS private key with the 2048bit RSA algorithms and the SHA256 Message Digest algorithms.
[box] cd C:\OpenSSL-Win64\bin
openssl req -new -nodes -newkey rsa:2048 -sha256 -out vcops.csr -keyout vcops.key
[/box]
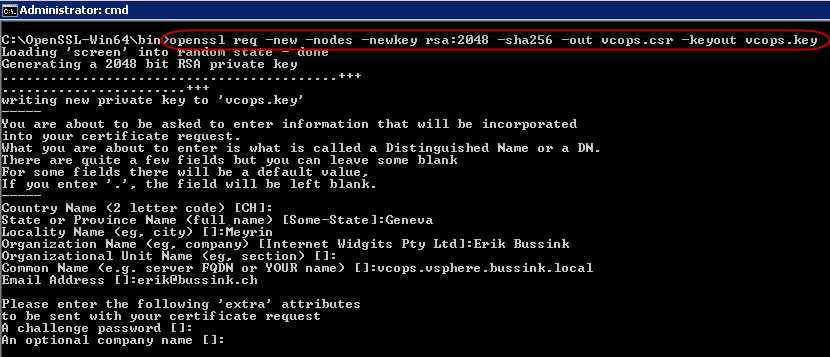
Generate vCOPS Certificate Request
Once we have the Certificate Request for the vCenter Operations Manager, we can submit it to the Public Key Infrastructure for certification. There are two ways to it, once from the command prompt and via the Web interface of the PKI.
Command Prompt Certificate Request
Windows Server 2008 R2 has a simple tool, to submit the Certificate Request directly the Microsoft Root CA (Enterprise Mode).
On my Certificate Authority I have cloned the default WebServer Certificate Template, and named it OpenSSL. I have also modified it’s Validity Period, Renewal Period. See completely at the bottom of this post to get an explanation and description of these changes.
My Microsoft Certificate Authority implementation is configured so that Certificate Requests need to be authorized, so the Submit/Retrieve process is composed of two commands here: certreq -submit and certreq -retrieve, if your Certificate Authority is not setup with validation, the submission/retrieval process is done in a single command.
[box]
certreq -submit -attrib “CertificateTemplate:WebServer” vcops.csr
or
certreq -submit attrib “CertificateTemplate:OpenSSL” vcops.csr[/box]

Submitting vCOPS Certificate Request from Command Prompt
At this point the Certificate has been submitted to the Root CA authority in the domain. Please note the RequestId number when you submit the Certificate Request. Once the Certificate has been authorized and generated you can retrieve it back to the vCenter.
[box]certreq -retrieve 16 vcops.cer [/box]
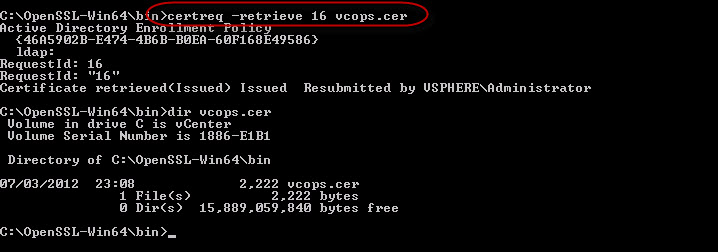
Retrieve vCOPS Certificate from Command Prompt
If we open the vcops.cer in Windows, we can see that the Certificate has also proper Certificates in the Certification Path. This is important to ensure that browsers can validate the vCOPS Certificate all the way up to the Certificate Authority (with the Issuing CA is it’s an Intermediate Certification Authority).
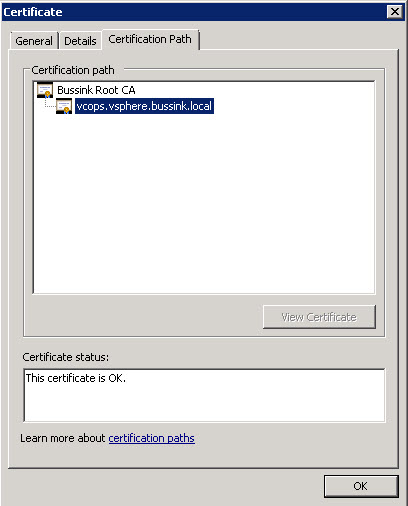
Verify your vCOPS Certificate for the Certification Path
We now need to build a PKCS#12 container file with the Certificate, the Private Key and output it to the .PFX file.
[box] openssl pkcs12 -export -in vcops.cer -inkey vcops.key -name vcops -out vcops.pfx[/box]

Build vCOPS PKCS12 Container
vCenter Operations Manager 5.0 does not use the PKCS#12 file format, but the PEM format, and requires that the Private Key is not protect by password. So we re-transform the the .PFX with the Private Key into the .PEM format.
[box] openssl pkcs12 -in vcops.pfx -inkey vcops.key -out vcops.pem -nodes[/box]

Transform vCOPS from PKCS12 Container to PEM format
At this point open the Administrator interface of vCenter Operations Manager on the SSL pane, and import the PEM certificate.
The url is https://vcops.<your-domain>/admin/
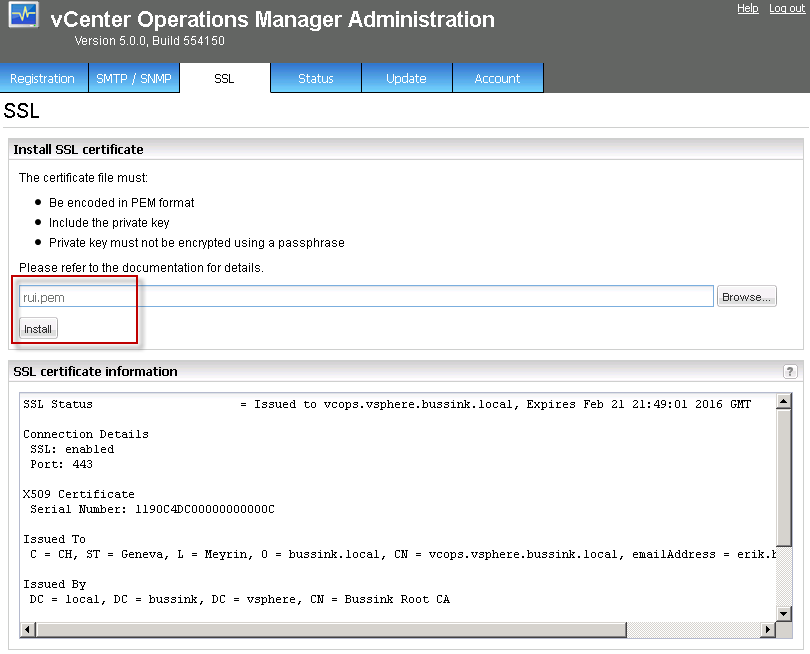
Importing SSL Certificate in vCOPS
But here comes a tricky part. It’s debugging time.
It is very possible that your Import of the OpenSSL Certificate fails with a General error occured. Like below.
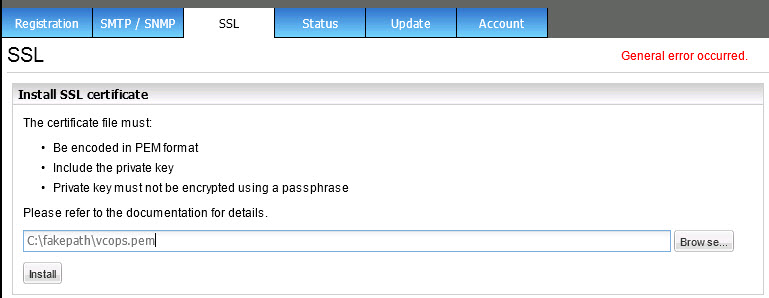
OpenSSL Import General Error Occurred
What I found is that the apache2 Web Server on vCOPS did not like loading my SSL Certificate, because it saw that the certificate was for a FQDN that it could not figure out. I modified the /etc/hosts file to ensure apache2 got the proper hostname while starting up and therefore accepted the OpenSSL Certificates.

Modify /etc/hosts file on vCOPS
In the next screenshot you see the error messages from the apache2 at startup when it cannot figure out it’s name and when it does.
[box]/sbin/service apache2 restart [/box]

vCOPS apache2 startup with default /etc/hosts and modified /etc/hosts
You can always check the vCOPS log files at /var/log/vmware/ for issues.
In the screnshot below we see that I tried to install onces the vcops.pfx format, and then the vcops.pem certificate (@23:38:15), I then restarted the vCOPS Web Service and all is good after 23:46:13.
[box] tail /var/log/vmware/vcops-admin.log[/box]

Checking the vcops-admin.log for SSL install issues
We can now connect to vCenter Operations Manager using the FQDN or the short-name.
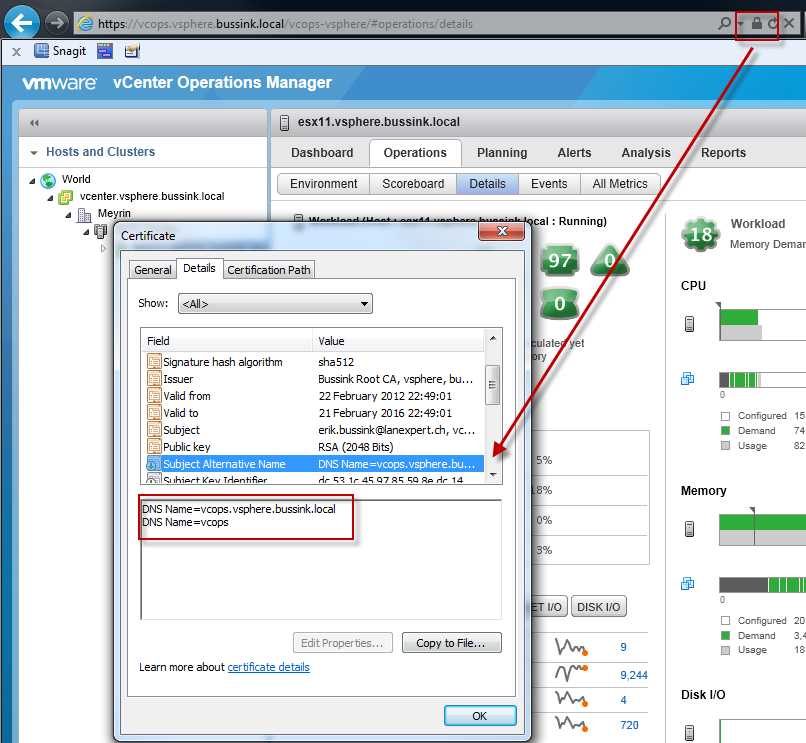
Valid SSL Certificate for vCOPS
I have also found that once the OpenSSL Certificate has been changed, that the vCOPS Interface feels much more reactive.
Appendix 1) – My OpenSSL Certificate Template
On my Active Directory Certificate Services I have cloned the default WebServer Certificate Template, and named it OpenSSL. I have also modified it’s Validity Period, Renewal Period and the need for the Certificate Authority Manager to approve all Certificate Requests.I highly recommend that you set the Validity Period for your Certificate Template. The CA Manager Approval really depends on your environment. As I sometimes do Auto-Enrollment tests for devices, I don’t want to pollute my Root CA with hundreds of superseding certificates.
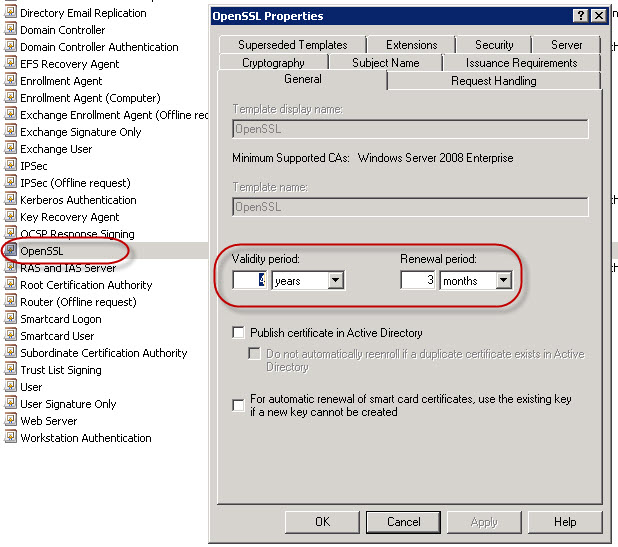
OpenSSL Certificate Template Properties - Validity Period
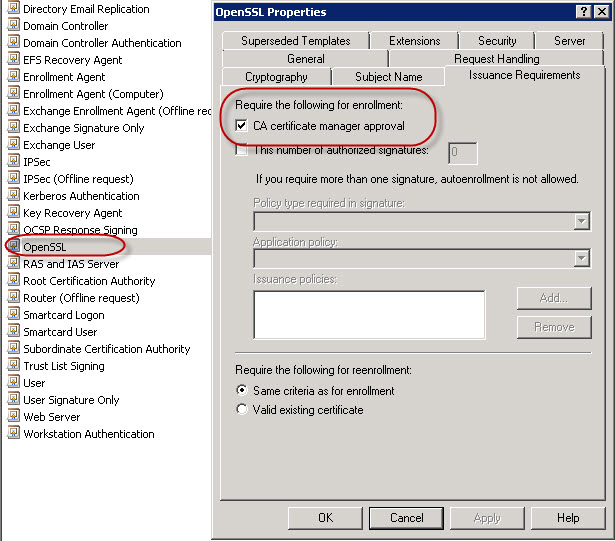
- OpenSSL Certificate Template Properties – CA Manager Approval
Appendix 2) – Retrieve the Root & Intermediate Certificate Authority Public Key using CertUtil
In this second appendix, I will briefly show how to retrieve the Root Certificate Authority Public Key from the command prompt. You should also retrieve the Intermediate CA if you have one.
[box] certutil -ca.cert -config “domctrl01.vsphere.bussink.local\Bussink Root CA” RootCA.cer[/box]
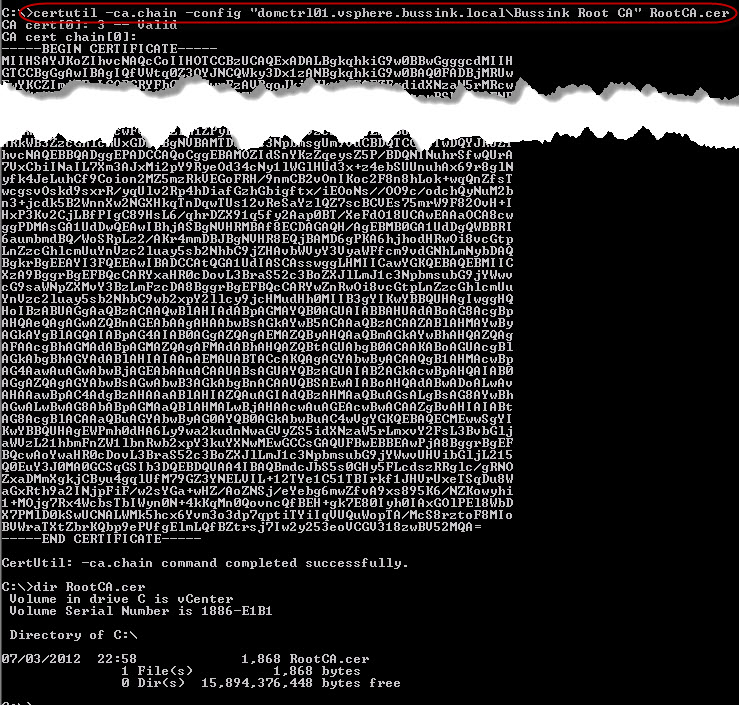
Retrieve Certificate Authority Public Key RootCA.cer
Update on 16/03/2012. Changed the Win64 OpenSSL v1.0.1 Light tools.
Update 27/03/2012. Added a additional subjectAltName to the Certificate request. But my had my parameters wrong.
Update (27/03/2012): I have added a new subjectAltName on the to my openssl.cfg. I added the FQDN name of my vCenter server in the Certificate request. With vCenter Operations Manager 5.0, you get the integration within the vCenter Client in the Solutions & Applications section. The SSL Certificates will therefore be checked by the vCenter Client against the vCenter FQDN name.
Update 29/03/2012. Thanks for Kinsei for having raises the question on the topic of the SSL Certificate usage via the vCenter Client. The vCenter Operations Manager is connected to the vCenter Server not by an FQDN name, but by an IP Address. You can find the value when you connect to your vCenter server’s Managed Object Reference (mob) settings portal.
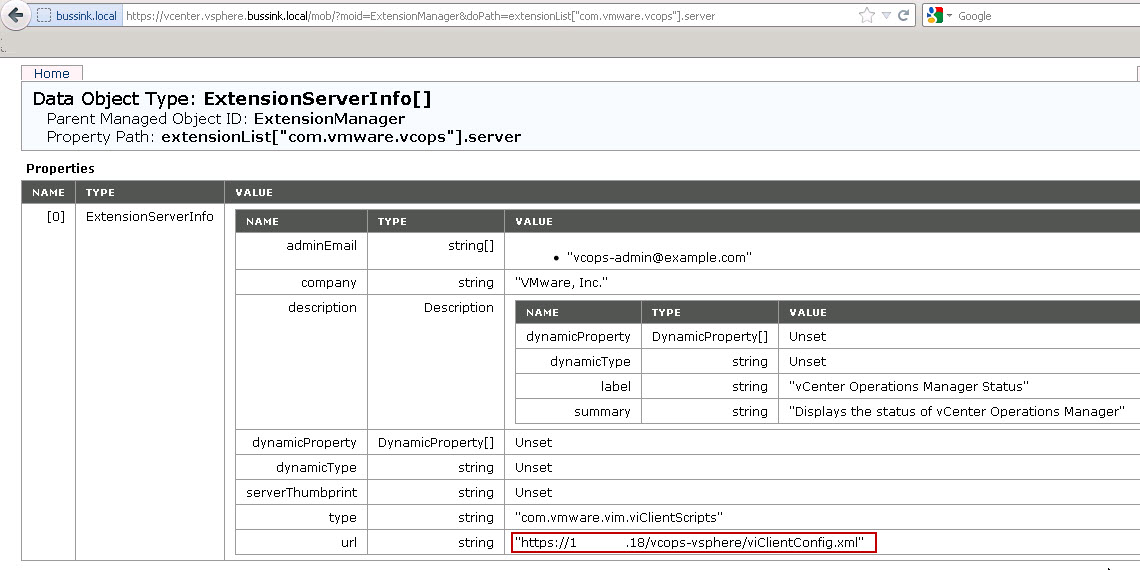
https://vcenter/mob/ Content ExtensionManager ExtensionList com.vmware.vcops
Update (02/04/2012). Here is another update. Josh Perkins has written up a great article on how to ensure that your vCenter uses a FQDN or shortname to speak to your vCenter Operations Manager. This means that administrators and user on the vSphere Client do not get invalid SSL Certificate requests anymore. Thanks Josh !!
