There is a german proverb “Ubung macht den Meister” that I have always tried to apply to my day to day computer science skills. While dealing with my Public Key Infrastructure in the home datacenter (#HomeDC), this means having a proper multi-tier PKI infrastructure with a Standalone Root CA, an Issuing CA, a PKI Web publishing server for Certificates and Certificate Revocation List. Nearly everyone can setup a PKI infrastructure with Microsoft Windows Server using Next Next Next and a 40 years Root Certificate Authority, but I had to make this a bit more challenging and make it so that it needs a yearly maintenance process to keep my PKI skills fresh.
My PKI Certificate Lifecycle is based on the following schema:
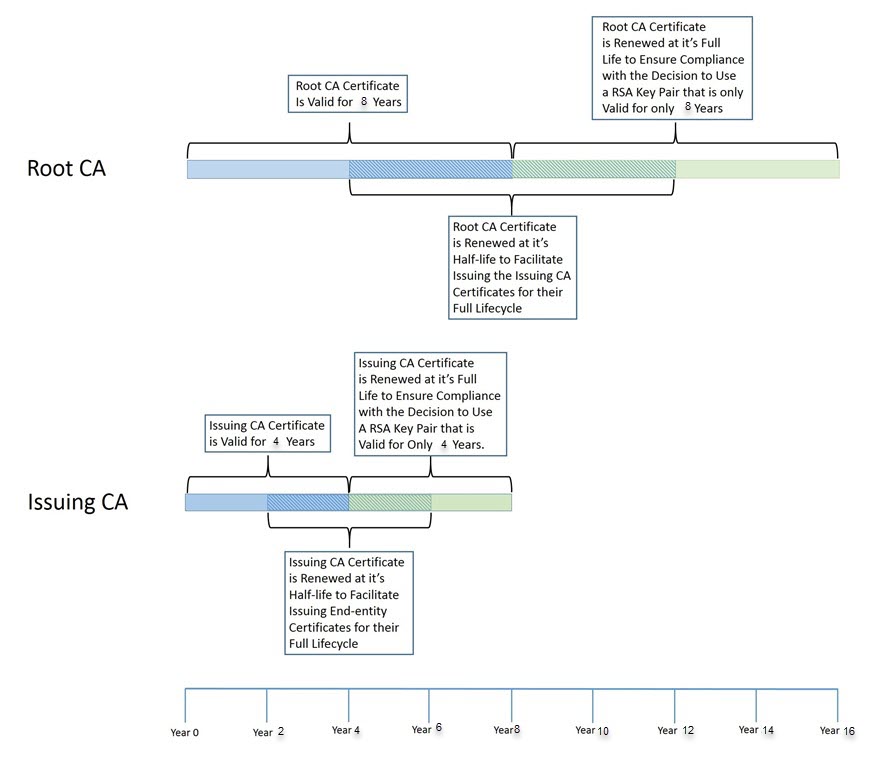
You can find the original diagram on this Microsoft PKI Certificate Lifecycle article. So instead of having a Root CA that is valid for 20 years and an Issuing CA that is valid for 10 years, I went with smaller validity periods, like 8 years for the Root CA and 4 years with the Issuing CA.
I use two different set of Generation PKI Infrastructure. The G1 on which this article is written is using a Root CA with a RSA (4096 Bits) Public Key and a sha512RSA Signature Algorithm for my G1 tier and the same for my Issuing CA. The G2 that you will see on some of the screenshots is based on a Root CA with a Elliptic curve cryptography (ECC) P521 and a sha512ECDSA Signature Algorithm.
Since my infrastructure is now running since 2015, I’m now closing in to the half-time of the Issuing CA validity period. What I decided to do is the following renewal:
- At T+4 years the Issuing CA certificate will be renewed with a new key pair. This action enforces the 4 year lifetime of the RSA key pair as agreed to when designing the PKI and PKI security. This will create a new CA certificate with a new key pair. This will also force the CA to generate a new CRL file, since there is a new key pair. A CRL signed by the “old” key pair will continue to be generated as long as the CA certificate associated with the “old” key pair is still time valid.
When you do a certificate renewal, the new version has a (1) behind it. The certificate request would now be called Issuing CA G1(1).req
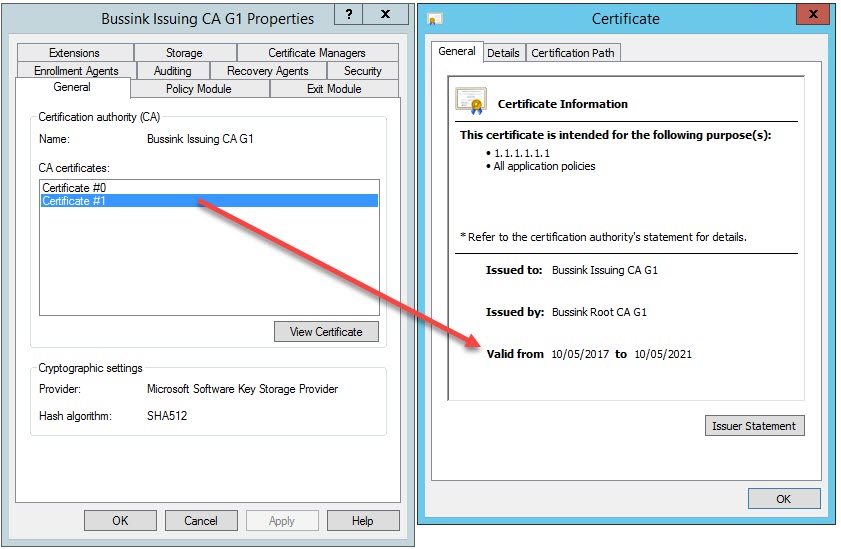
Let’s have a look at the original Issuing CA certificate on the Root CA.

And the Issuing CA detail is
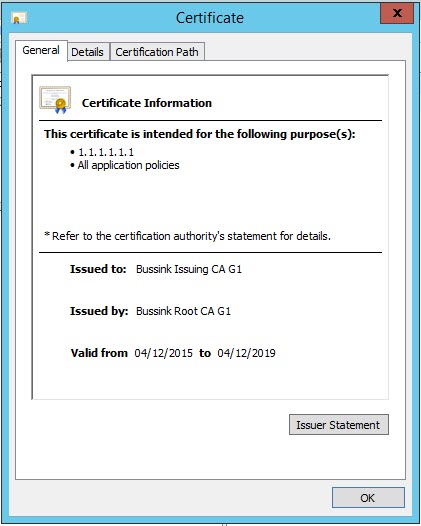
This is now impacting me when I attempt to sign new certificates with a validity of over 24 months. Because those are now limited in their validity until the 4th December 2019.
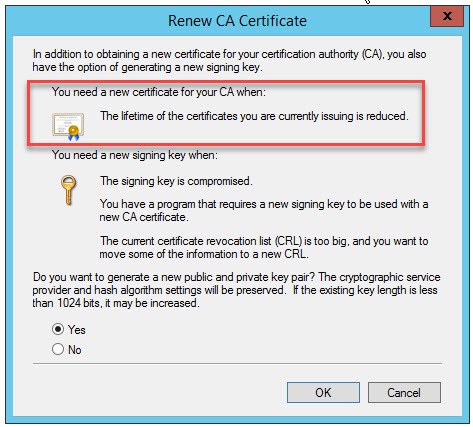
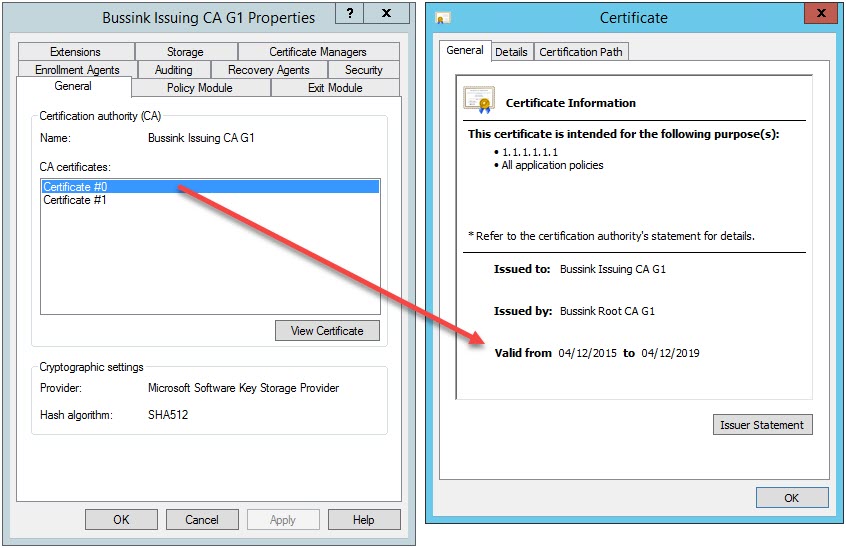
The first step on the Issuing CA is to Stop Service of the PKI and launch the Renew CA Certificate process. I decided to generate a new public and private key, so my new Issuing CA request file is now named Issuing CA G1(1). Take the certificate request to the Root CA. On the Root CA, Revoke the current Issuing CA certificate as it’s Superseded and Submit new request of the Issuing CA(1) request file. Issue the new SubCA certificate. We now have a Issuing CA certificate with two fields.
I need to export the signed certificate (I used the PKCS #7 .p7b with certificate path format), move it to the Issuing CA and Import CA Certificate.
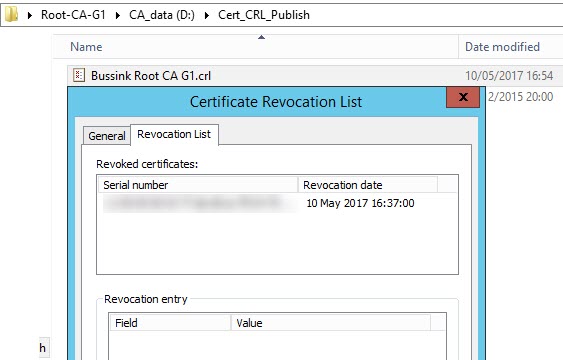
In the following steps I’m doing a few more operations on the Root CA. Now that I have Revoked (Yeah with insight I might better have not revoked the original Issuing CA… might need to update this article if I run into issues…) it’s time to do the annual publishing of the Certificate Revocation List (CRL).

I can see in my Root CA CRL now the old revoked Issuing CA certificate serial number.
Moving along on the Issuing CA in the Active Directory, I’m publishing the update Root CA CRL using certutil -dsPublish RootCA.crl RootCA

For the computers and operating systems that are not in the Active Directory and that cannot check the state of the Certificates from the AD, I have a Windows server with the IIS Web server running that publishes the CRLs. This server while having the FQDN of pki-web.bussink.org is also referred by the alias pki.bussink.org on my network. I copied the updated Issuing CA(1) certificate and the Root CA CRL on the directory mapped by the IIS server.
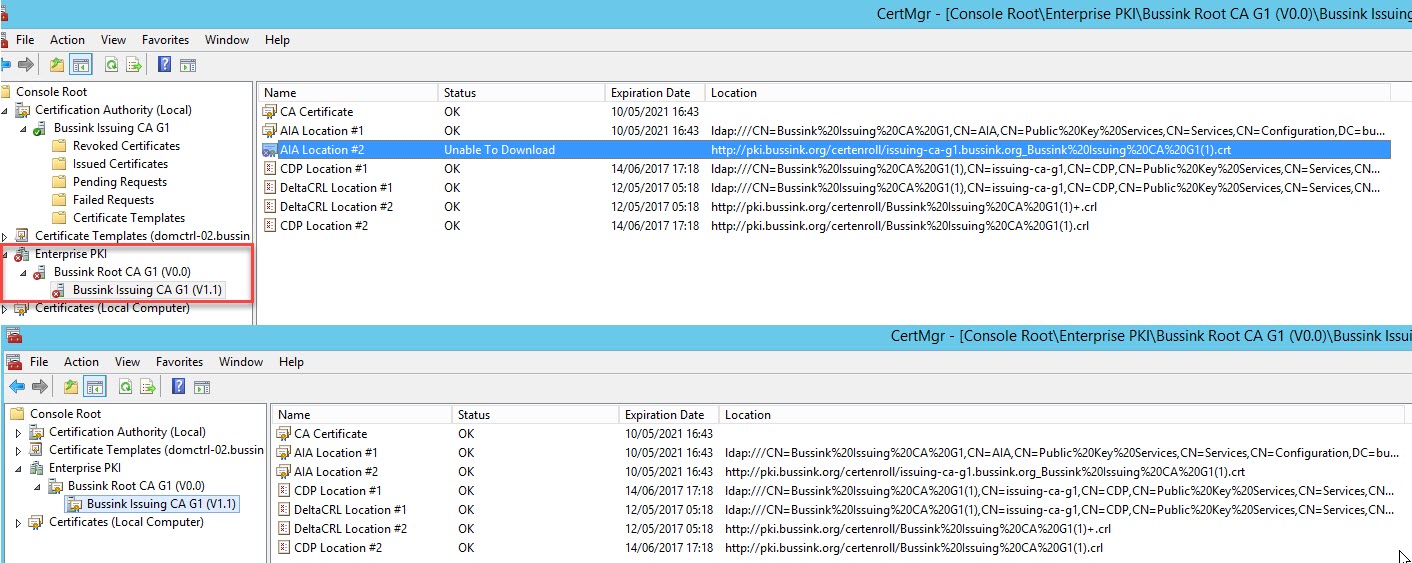
On the Issuing CA in the Enterprise PKI tab, you can ensure that all paths to the Certificates, Certificate Revocation List and Delta CRL work. As you see in the top part of the following screenshot I had not yet copied the Issuing CA(1) certificate. That is corrected in the bottom part of the screenshot.
Having the Issuing CA running again, I forced a Publishing of the Issuing CA CRLs. You can now see them below on the Web server in Purple. There are two sets of the CRL, the ones for the original Issuing CA certificate and the set for the updated Issuing CA(1) certificate.
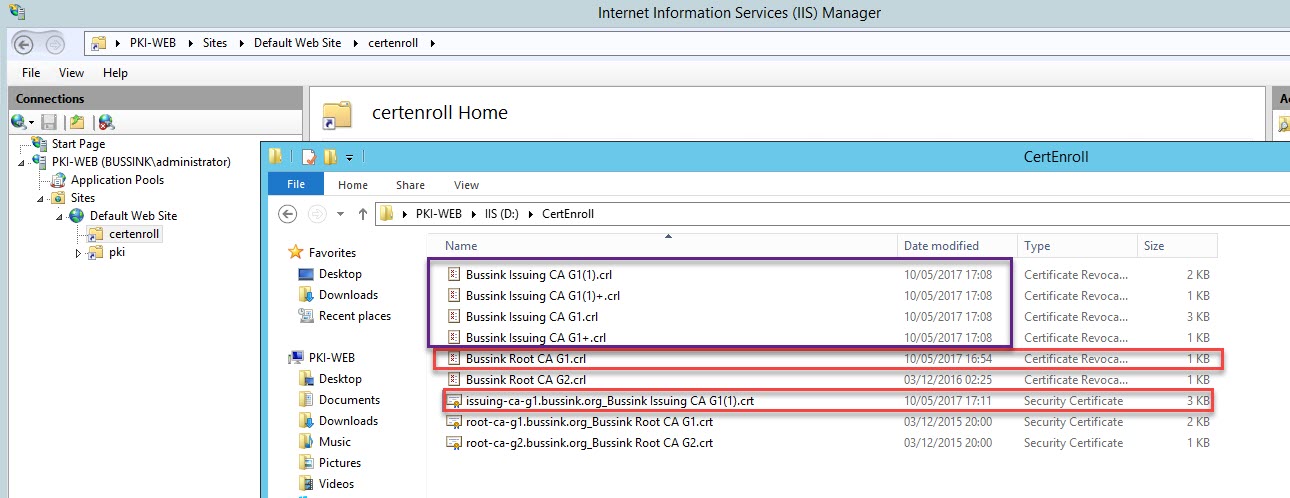
The files in the red boxes are the ones I manually added to my PKI-WEB repository. They are the annual Root CA CRL and the new Issuing CA G1(1) certificate (I already mentionned it above, I might have been a bit premature in removing the original Issuing CA G1 certificate. I will update this article if I run into serious issues).
I wrote this blog article more for myself as a recap of the operations, as I will have to redo it before 2021. While this is only 4 years down the road, I have already I had the opportunity once in my career to setup a Root CA infrastructure in 2004 with Windows Server 2003 and have to renew it completly 10 years later in 2014. This was a lot more complicated as I had to change the PKI CryptoProvider from the old one only support SHA1 to one that supported SHA2. This is a reminder to all professionals, if you setup a PKI, you might have to work on it again a decade later.