Using vCenter Update Manager for HP ESXi installations

This post will explain how to use the vCenter Update Manager to create a custom Hewlett-Packard Extensions baseline, so that you can install the HP Drivers on your ESXi install and the HP CIM Management Tools.

Having just purchased a set of HP Proliant ML110 G7, I found out that HP has release at least two sets of drivers for ESXi 5.0.

The first one is the VMware ESXi 5.0 Driver CD for the HP SmartArray version 5.0.0-24.0 released on 2011/08/22. I recommend that you download this driver from the VMware website on your vCenter and extract it in a convenient place, as we will need the hpsa-500-5.0.0-offline_bundle-537239.zip file. We will come back to this file later.

The second one is the HP ESXi 5.0 Offline Bundle now in version 1.1 since December 2011. This bundle contains multiple drivers such as the HP Common Information Model (CIM) Providers, HP Integrated Lights-Out (iLO) driver and HP Compaq ROM Utility (CRU) driver. Download this file but don’t extract it. We will use the file hp-esxi5.0uX-bundle-1.1-37.zip as is.

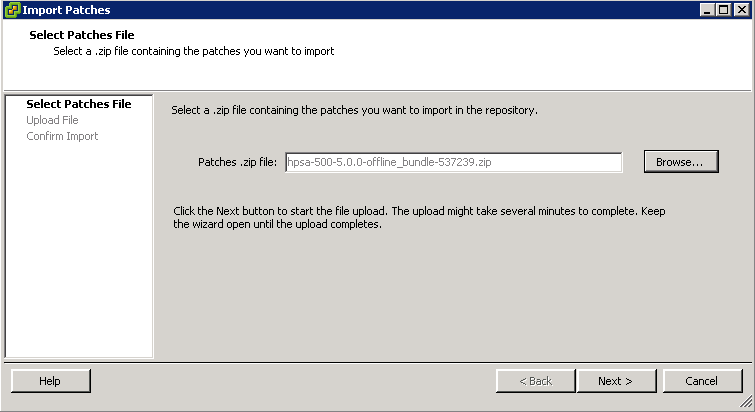
On your vCenter, jump to the Update Manager Administration pane, and select the Import Patches option.

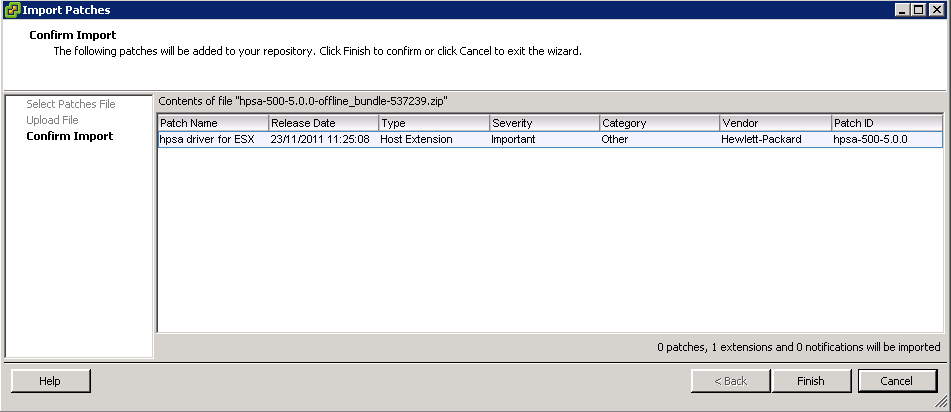
We first import the HP SmartArray Driver

Import hpsa-500-5.0.0-offline_bundle

Importing HP SmartArray Driver for ESX

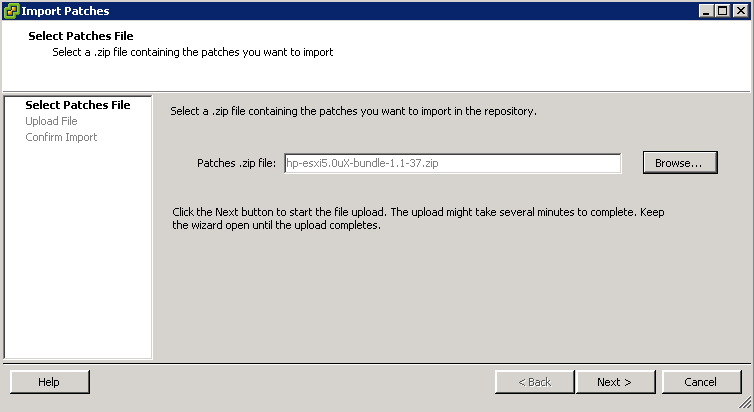
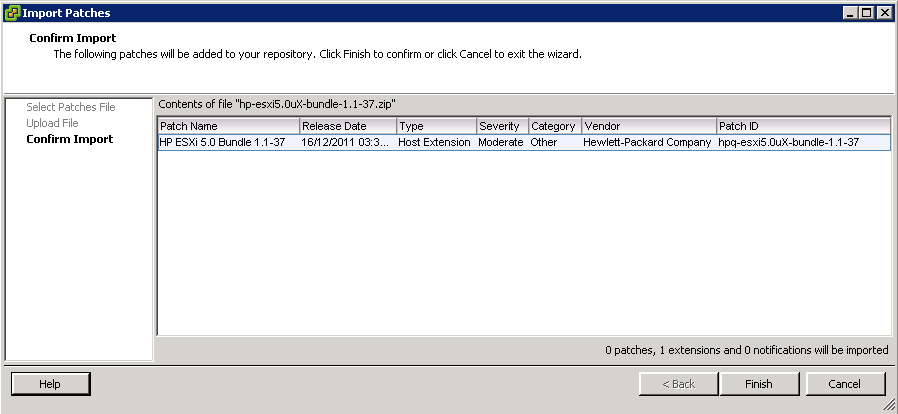
We then import the HP ESXi 5.0 Offline Bundle

Import HP-ESXi5.0-bundle-1.1.37

Import HP-ESXi5.0-bundle-1.1.37

And we now see both offline bundles in the Patch Repository

Patch Repository

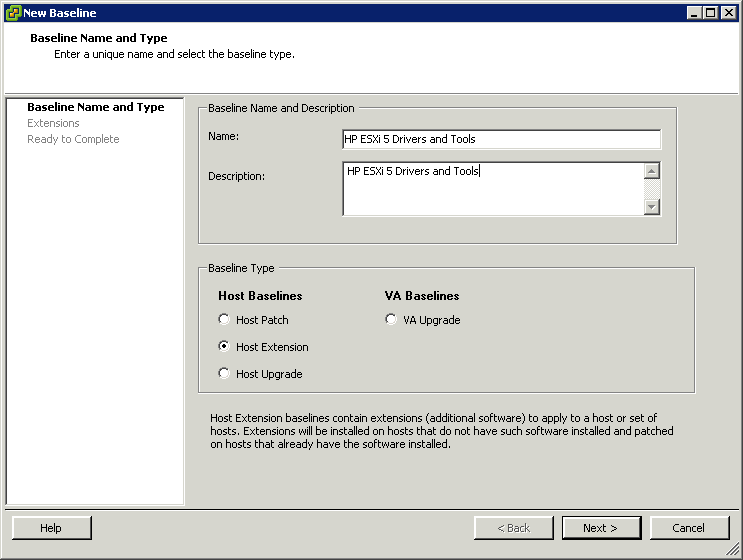
We will now create a new Baseline Extension for these offline patches so we can apply them to our HP servers.

Create a new Baseline - Host Extension

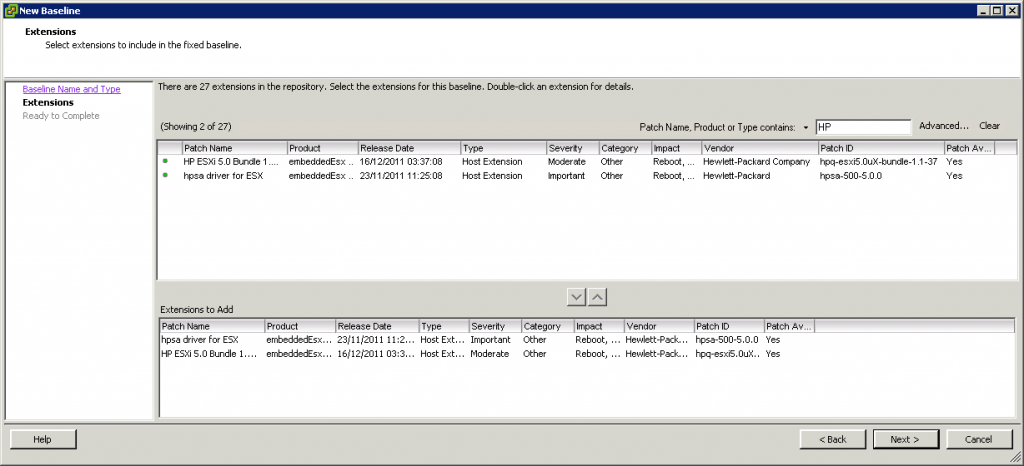
Add the HP Drivers and Tools to the new Host Extension

Add HP Drivers to Host Extension

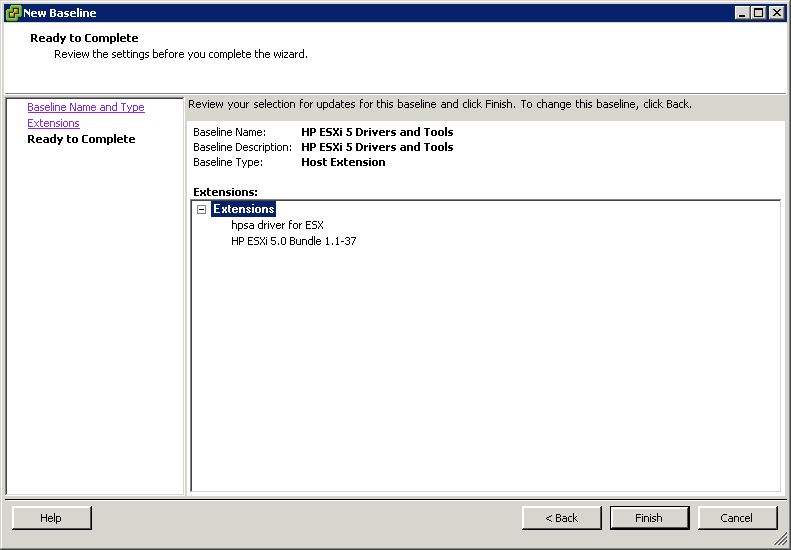
And save the New Baseline

Save new Baseline

Lets attach this new Baseline Host Extension to our HP ML110 G7 Cluster and Scan the Cluster.

Attach new Baseline to Cluster and Scan

We can now Remediate our HP Proliant ML110 G7 host with the new Host Extension. Please note that you cannot remediate VMware Patches and the Host Extensions at the same time. You will need to do this in two passes.

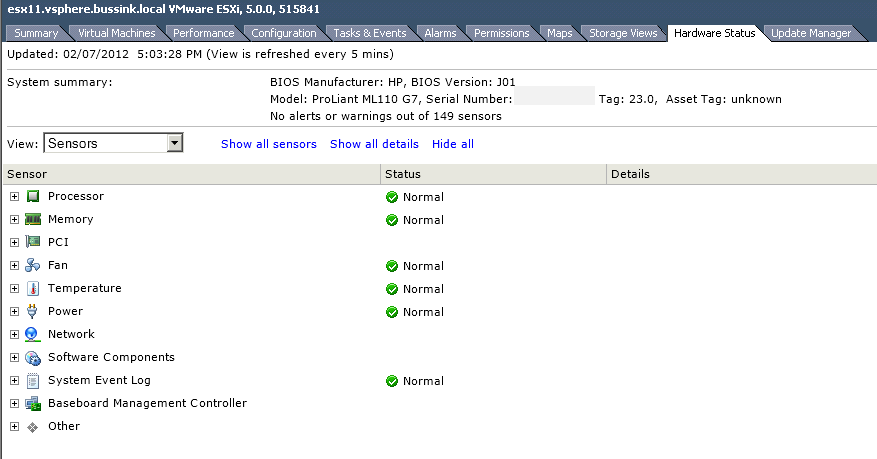
Here is the Hardware Status of an HP ML110 G7 before applying the HP Host Extension patches

ML110G7 Prior to HP Drivers and Tools

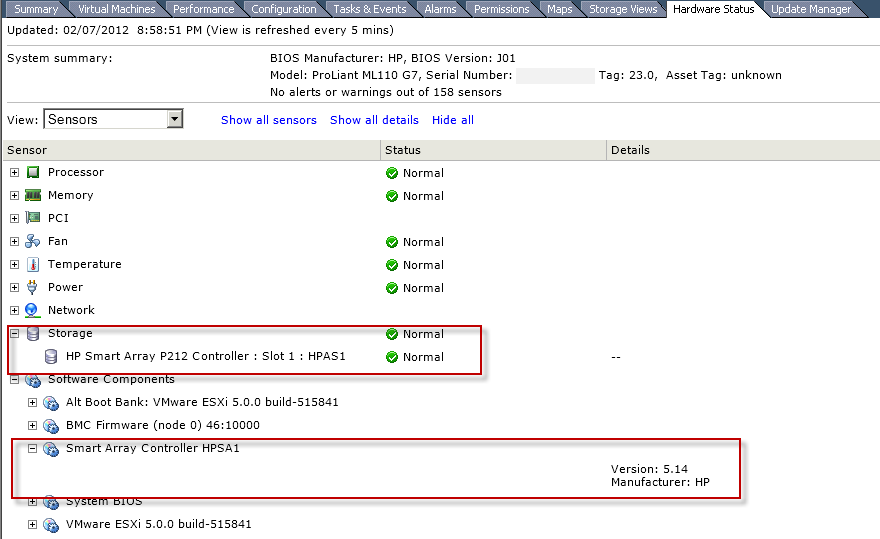
and after having the remediation.

ML110G7 with Storage Information & SmartArray Driver

Thanks to these drivers, we could now see the HP SmartArray Array Status if there where any disks attached to it.

 

HP ML110 G7 and Power Management (iLO3 & vSphere DPM)

The HP ML110 G7 works great with VMware vSphere 5.0 once the C-States has been modified.

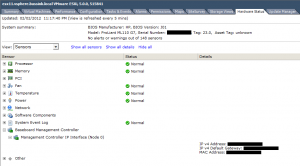
In the following screenshot we can have a glimpse of the Hardware Status of the ML110 G7. We can clearly see that this ML110 G7 with it’s integrate iLO3 controller gives the same information as the more expensive HP Proliant servers.

ML110 G7 Hardware Status and ILO3

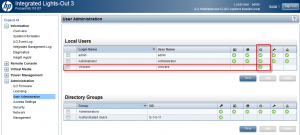
And such as it’s bigger brothers, if we access the ILO3 Administration Console

ML110 G7 ILO3 Overview

and create a dedicate vmware user with Power Controls.

ML110 G7 ILO3 User Administration

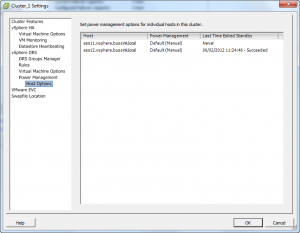
Once this is done we just need to add in the IPMI/ILO Settings for Power Management

IPMI/iLO Settings for Power Management

And to test the functionality. Now we can use Distributed Power Management on the ML110 G7 Cluster.

Distributed Power Management

The more I test the ML110 G7, the more I like it.
vSphere 5.0 on HP ML110 G7

Last friday, I came across this very interesting deal, Two HP ProLiant ML110 G7 with Xeon E3-1220 (Quad-Core @3.1Ghz) for the price of one. So Two HP ML110 G7 for $960 seemed a great bargain to me. I got some extra Kingston memory and I should have some decent lab servers.

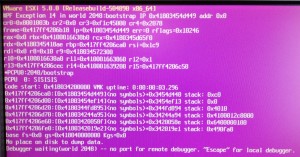
But when I started installing VMware ESXi 5.0.0 Build 504980 on the HP ML110 G7 it kernel dumped.

HP ML110 G7 crashing during ESXi 5.0 Build 504890 startup

After having filmed the crash, the last thing that came up before the crash was ACPI.

I looked up the Performance Best Practices for VMware vSphere 5.0 PDF for specific ACPI settings and Power States. It does have some specific tuning tips on page 14/15

  • In order to allow ESXi to control CPU power-saving features, set power management in the BIOS to “OS Controlled Mode” or equivalent. Even if you don’t intend to use these power-saving features, ESXi  provides a convenient way to manage them.
  • NOTE Some systems have Processor Clocking Control (PCC) technology, which allows ESXi to manage power on the host system even if its BIOS settings do not specify “OS Controlled mode.” With this technology, ESXi does not manage P-states directly, but instead cooperates with the BIOS to determine the processor clock rate. On HP systems that support this technology, it’s called Cooperative Power Management in the BIOS settings and is enabled by default. This feature is fully supported by ESXi and we therefore recommend enabling it (or leaving it enabled) in the BIOS.
  • Availability of the C1E halt state typically provides a reduction in power consumption with little or no impact on performance. When “Turbo Boost” is enabled, the availability of C1E can sometimes even increase the performance of certain single-threaded workloads. We therefore recommend that you enable  C1E in BIOS.
  • However, for a very few workloads that are highly sensitive to I/O latency, especially those with low CPU  utilization, C1E can reduce performance. In these cases, you might obtain better performance by disabling C1E in BIOS, if that option is available
  • C-states deeper than C1/C1E (i.e., C3, C6) allow further power savings, though with an increased chance of performance impacts. We recommend, however, that you enable all C-states in BIOS, then use ESXi host power management to control their use

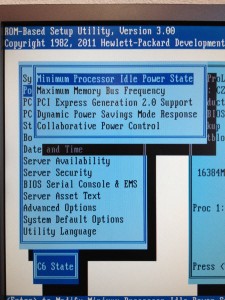
So I modified the Power Management settings in the HP ML110 G7 BIOS.

[box]

HP Power Profile: Custom

HP Power Regulator: OS Control Mode

Advanced Power Management Options \ Minimum Processor Idle Power State: C6 States[/box]

Just changing the No C-States to the C6 States will allow you to install and run ESXi 5.0 on the HP ML110 G7.

ML110 G7 BIOS Advanced Power Management Options C6 States

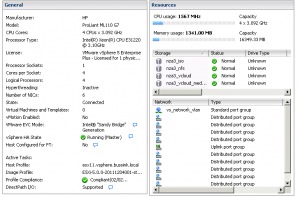
And here is the beautifully screenshot of the ML110 G7 in the vCenter

ESXi 5.0 on ML110 G7

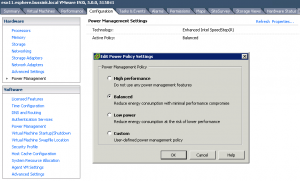
And a closer look at the Power Management Settings tab from vCenter 5.0. You can now change the power settings without having to reboot and modify the BIOS.

ESXi 5.0 Power Management with ML110 G7

I hope this will be usefull to other people in preparing their VCP5 Certification and for a great home lab equipment.

And for those that want to test further, the ML110 G7 supports Intel VT-d.

First Steps with PowerCLI


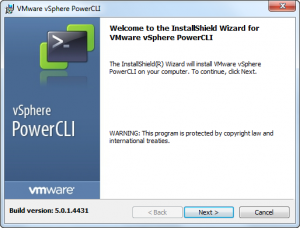
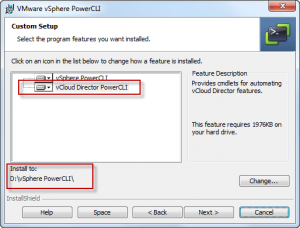
When starting to use PowerCLI 5.0.1 for the first time, there are a few things that will help you start off a good foot. I for one, have decided when installing the PowerCLI on my system to modify the installation to add the vCloud Director PowerCLI feature and to change the path of installation, so that I can quickly find my .PS1 on my development machine.

Installing PowerCLI 5.0.1 Build 4431

Selecting vCloud Director PowerCLI feature & changing install Path

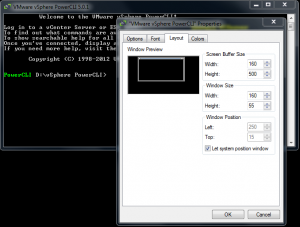
Once installed on my development machine, I add start the PowerCLI to my taskbar and start it. I then modify the Layout settings to get a better usable window.
Modifying PowerCLI Layout

And now we are getting to the two basic commands you add to your PowerCLI to ensure you can run RemoteSigned code.

[box] set-ExecutionPolicy RemoteSigned[/box]

Set-ExecutionPolicy RemoteSigned

As I’m developping my code on a system other than the vCenter Server. I will get SSL Certificates warnings if I remotely connect to my vCenter. To ignore the Certificate warnings I use to following command

[box] Set-PowerCLIConfiguration -InvalidCertificateAction Ignore -WarningAction SilentlyContinue[/box]

Set-PowerCLIConfiguration -InvalidCertificateAction Ignore -WarningAction SilentlyContinue

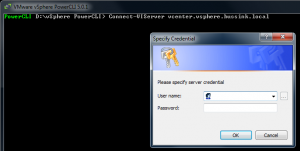
When connecting to my vCenter I now only get a pop-uo for the User Credentials.

Connect-VIServer will request Credentials

I can also save my credentials for future use.

Connect-VIServer with Credentials saving

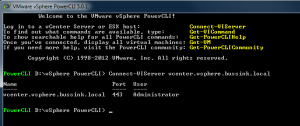
And so the next time I don’t even need to re-enter these credentials.

Connect-VIServer using saved Credentials


Create vCenter database quickly with Transact-SQL

Creating new databases for VMware vCenter is something I have to do over and over again. I use mostly Microsoft SQL Server 2008 R2 so here are six quick procedures to simplify the creation and make all your vCenter databases to the same standard. I keep my Transact-SQL scripts in Evernote, so I just need to make six Copy & Paste and my vCenter database is created within 3 minutes. You can find the Transact-SQL to download at the bottom of this post.
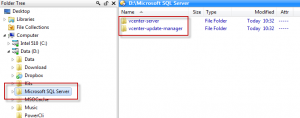
My general rule when I create the VMware vCenter database is to have my user database on a separate disk from the operating system. This disk is formatted with 64K block size. SQL Server works with two specific IO request size 8K and 64K in general, so having 64K block size is optimum for SQL Server databases (See Disk partition alignment Best Practice for SQL Server ). I usually create a directory path for my SQL database D:\Microsoft SQL Server in which I will create two directories for the vCenter databses, vcenter-server and vcenter-update-manager.
Microsoft SQL Server directory structure for User Databaes

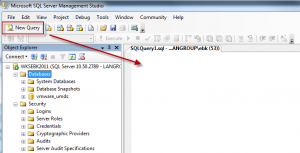
Using the Microsoft SQL Server Management Studio interface we can start a New Query, in which we will add the Transact-SQL code.

SQL Server Management Studio – Open a New Query

Now let’s insert the Transact-SQL script to create the new vcenter-server database. My database settings limit the database to grow past 16GB, and increases the database as it grows by blocks of 512MB. The initial size starts at 1GB. The code below is a bit wide for this blog, but you can find the full Transact-SQL code at the bottom.

USE [master]
GO
CREATE DATABASE [vcenter-server] on PRIMARY
(NAME = N’vcenter-server’, FILENAME = N’D:\Microsoft SQL Server\vcenter-server\vcenter-server.mdf’, SIZE = 1024MB, MAXSIZE = 16384MB, FILEGROWTH = 512MB)
LOG ON
(NAME = N’vcenter-server_log’, FILENAME = N’D:\Microsoft SQL Server\vcenter-server\vcenter-server.ldf’, SIZE = 512MB, MAXSIZE = 2048MB, FILEGROWTH = 256MB)
COLLATE SQL_Latin1_General_CP1_CI_AS
GO

vCenter SQL Database creation with settings

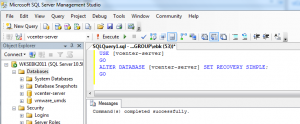
Lets now change the Recovery mode of our database for our needs, to Simple.

USE [vcenter-server]
GO
ALTER DATABASE [vcenter-server] SET RECOVERY SIMPLE;
GO

vCenter SQL Database alter recovery mode to Simple

Lets create a dedicated vCenter database user such as vpxdb.

USE [vcenter-server]
GO
CREATE LOGIN [vpxdb] WITH PASSWORD = ‘insert-a-password-here’, DEFAULT_DATABASE = [vcenter-server], DEFAULT_LANGUAGE=[us_english], CHECK_POLICY=OFF
GO
CREATE USER [vpxdb] for LOGIN [vpxdb]
GO

SQL Database vpxdb user creation

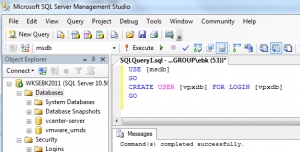
Now we let the newly create database user connect to the vCenter database.

USE [msdb]
GO
CREATE USER [vpxdb] FOR LOGIN [vpxdb]
GO

SQL Database vpxdb user login for vCenter Database

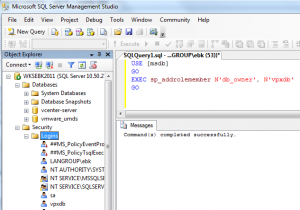
We allow the newly create vpxdb database user have db_owner rights to the [MSDB] database, so that the user can create the SQL Agent jobs in SQL.

USE [msdb]
GO
EXEC sp_addrolemember N’db_owner’, N’vpxdb’
GO

SQL Database user vpxdb db_owner rights to MSDB

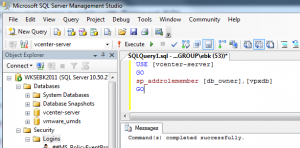
And last we change the ownership of the vCenter Database for the vpxdb user.

USE [vcenter-server]
GO
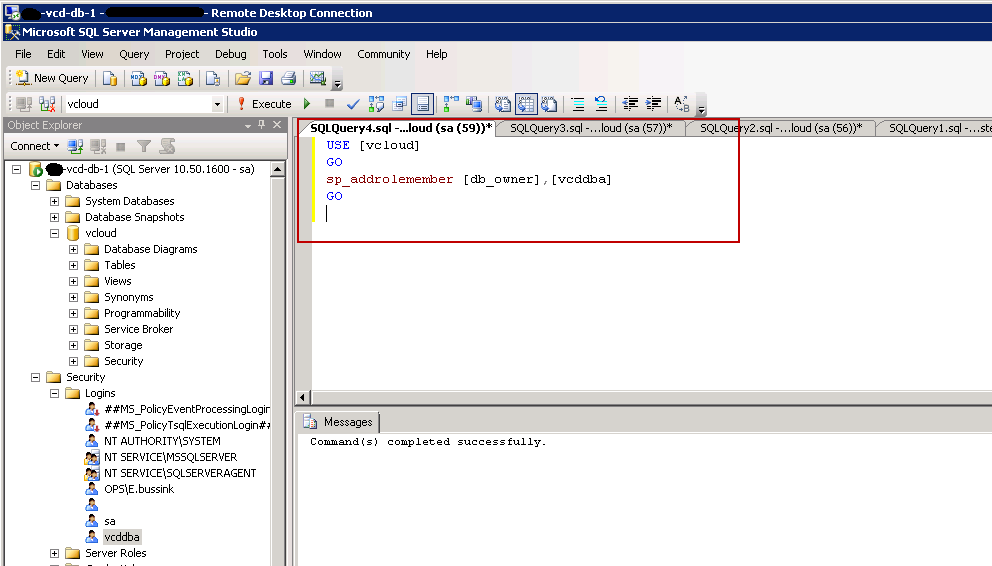
sp_addrolemember [db_owner],[vpxdb]
GO

SQL Database user vpxdb db_owner rights to vcenter-database

You can find the all the Transact-SQL code in this simple text file vCenter-SQL-TransactSQL-database.txt. If you want the same type of Transact-SQL script to help you setup the vCenter Update Manager database check out this text file vCenter-Update-Manager-SQL-TransactSQL-database.txt

ESXi Multi-NIC & Multi-VLAN vMotion on UCS

I’ve been deploying a Cisco UCS Chassis with multiple Cisco B230 M2 Blades. Yet the uplinks switches of the Fabric Interconnect are medium-Enterprise sized Switches, and not some Nexus 5K or better. In a vSphere 5.0 cluster designs you add one or more NICs to the vMotion interface. With the enhancements of Sphere 5.0 you can combine multiple 1G or 10G network cards for vMotion, and get better performance.

Duncan Epping wrote on the 14th December 2011 on his site
[quote]”I had a question last week about multi NIC vMotion. The question was if multi NIC vMotion was a multi initiator / multi target solution. Meaning that, if available, on both the source and the destination multiple NICs are used for the vMotion / migration of a VM. Yes it is!”[/quote]

I was a bit worried by having my ESXi 5.0 vMotion traffic go up the Fabric Interconnect from my source Blade, across the network switches and back down the Fabric Interconnect and the target Blade. I decided to create two vmkernel port for vMotion per ESXi, and segregate them in two VLAN. Each VLAN is only used inside one Fabric Interconnect.

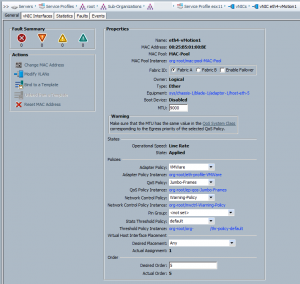
vNIC Interface eth4 for vMotion-A on Fabric A (VLAN 70)

vNIC Interface eth4-vMotionA

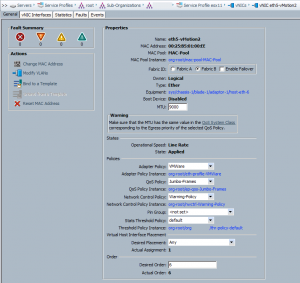
vNIC Interface eth5 for vMotion-B on Fabric B (VLAN 71)

vNIC Interface eth5-vMotionB

And now let’s try this nice configuration.

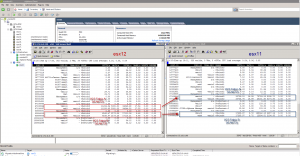
The VM that would be used for testing purposes is a fat nested vESX with 32 vCPU and 64GB of memory (named esx21). It is vMotion’ed from esx12 (Source network stats in Red) towards esx11 (Target network stats in Blue).

The screenshot speaks for itself… we see that the vMotion uses both NICs and VLANs to transfer the memory to esx11. It flies at a total speed of 7504MbTX/s to 7369MbRX/s in two streams. One stream cannot pass the 5400Mb/s rate, because of the limitation of the Cisco 2104XP FEX and the 6120XP Fabric Interconnect. Each 10Gb link is used by two B230 M2 blades.

If you want to learn how to setup Multi-NIC vMotion, check out Duncan’s post on the topic.

Thanks go to Duncan Epping (@duncanyb) and Dave Alexander (@ucs_dave) for their help.

vCloud Director 1.5 database creation using Transact-SQL

In the past few weeks I have had to reinstall and clean up the vCloud Director 1.5 database on SQL Server 2008 R2. After a few times doing it using the SQL Server Management Studio GUI, I decided to automated it using four simple Transact-SQL scripts, so it would save me time and make it less error prone, and to better document it. I did modify the Transact-SQL part for the ALTER Database section, and I’m using a Simple Recovery mode for my database.

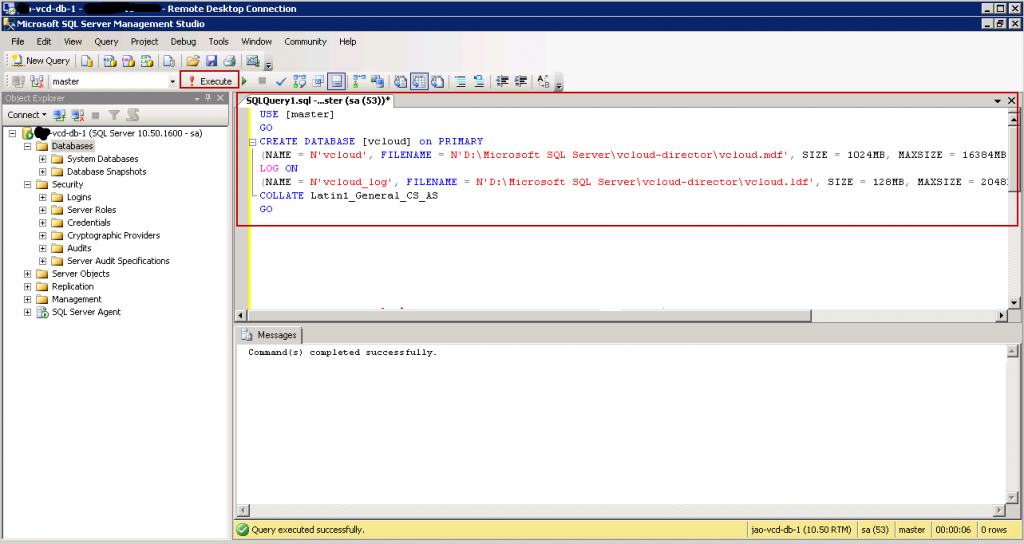
Create [vcloud] database
USE [master]
GO
CREATE DATABASE [vcloud] on PRIMARY
(NAME = N’vcloud’, FILENAME = N’D:\Microsoft SQL Server\vcloud-director\vcloud.mdf’, SIZE = 1024MB, MAXSIZE = 16384MB, FILEGROWTH = 512MB)
LOG ON
(NAME = N’vcloud_log’, FILENAME = N’D:\Microsoft SQL Server\vcloud-director\vcloud.ldf’, SIZE = 128MB, MAXSIZE = 2048MB, FILEGROWTH = 128MB)
COLLATE Latin1_General_CS_AS
GO

SQL vCD Database – Create vcloud database

Alter [vcloud] Database
This is the step 4 on Page 17 for the vCloud Director 1.5 Installation and Configuration Guide.
VMware Version:
USE [vcloud]
GO
ALTER DATABASE [vcloud] SET SINGLE_USER WITH ROLLBACK IMMEDIATE;
ALTER DATABASE [vcloud] SET ALLOW_SNAPSHOT_ISOLATION ON;
ALTER DATABASE [vcloud] SET READ_COMMITTED_SNAPSHOT ON WITH NO_WAIT;
ALTER DATABASE [vcloud] SET MULTI_USER;
GO
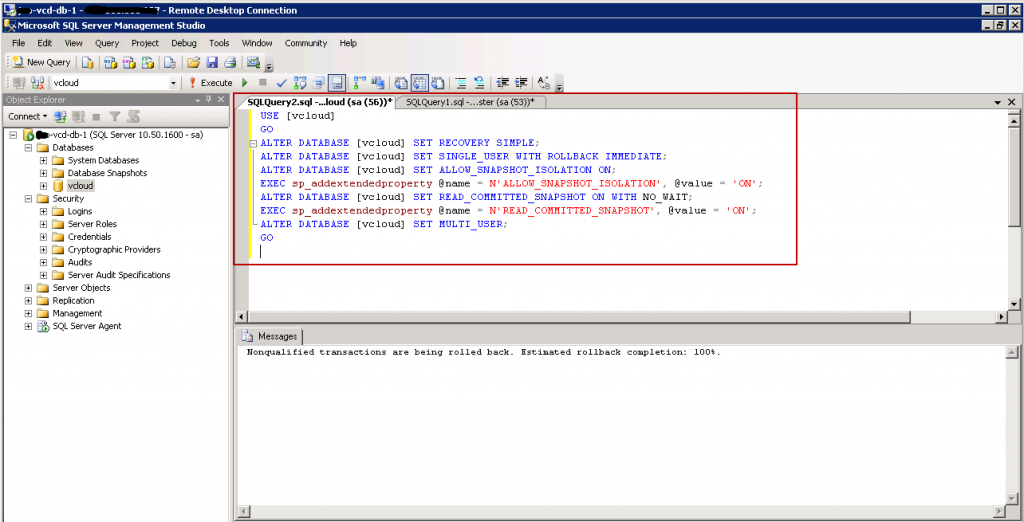
My modified version with the database in Simple Recovery mode.
USE [vcloud]
GO
ALTER DATABASE [vcloud] SET RECOVERY SIMPLE;
ALTER DATABASE [vcloud] SET SINGLE_USER WITH ROLLBACK IMMEDIATE;
ALTER DATABASE [vcloud] SET ALLOW_SNAPSHOT_ISOLATION ON;
EXEC sp_addextendedproperty @name = N’ALLOW_SNAPSHOT_ISOLATION’, @value = ‘ON’;
ALTER DATABASE [vcloud] SET READ_COMMITTED_SNAPSHOT ON WITH NO_WAIT;
EXEC sp_addextendedproperty @name = N’READ_COMMITTED_SNAPSHOT’, @value = ‘ON’;
ALTER DATABASE [vcloud] SET MULTI_USER;
GO

SQL vCD Database – Alter vcloud database


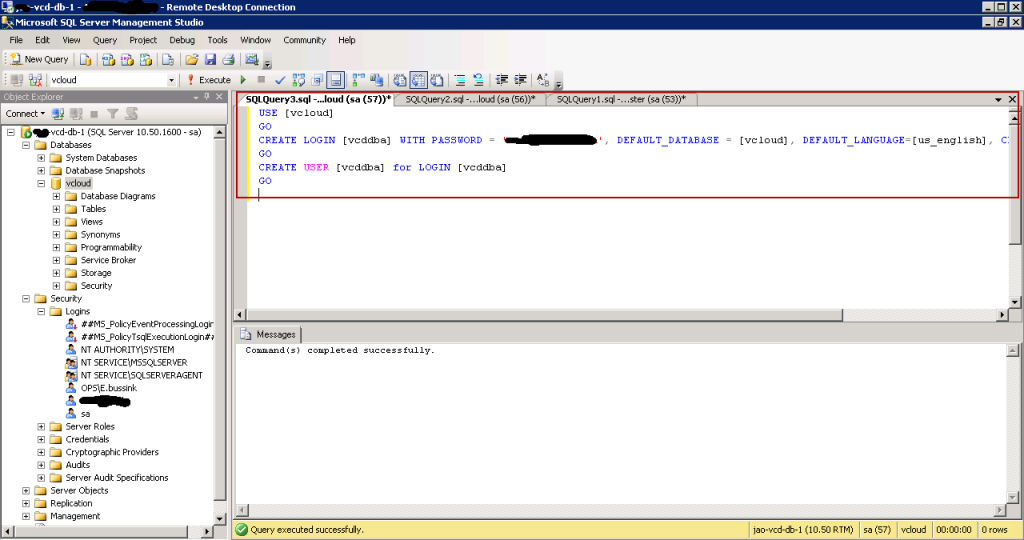
Create user vcddb
USE [vcloud]
GO
CREATE LOGIN [vcddb] WITH PASSWORD = ‘PASSWORD’, DEFAULT_DATABASE = [vcloud], DEFAULT_LANGUAGE=[us_english], CHECK_POLICY=OFF
GO
CREATE USER [vcddb] for LOGIN [vcddb]
GO

SQL vCD Database – Creat vcddba account

Modify user to add db_owner Role 
USE [vcloud]
GO
sp_addrolemember [db_owner],[vcddb]
GO
SQL vCD Database - Add db_owner role to vcddba

WordPress upgrade done.

I have been running WordPress 2.2 (patched to 2.4) for the past 3 years. I guess it was time to clean-up and take the opportunity to upgrade WordPress to the latest release 3.1

Just need to figure out some of the widgets and the themes, but I’ll get there sooner than later this time.

I do have some interesting post ideas about vCloud Director and other VMware products in my head, so it was the perfect opportunity to get it together here.

HTC Hero – a quick review

This is only a quick review of the 1 day I had the HTC Hero with me. There are plenty of other reviews online about the screen, the interface and the inputs etc… I will only quickly address the things I had the time to test and use.

I purchased a HTC Hero for my fiancé. Luckily I was allowed the usage of the phone for one day. So I was able to compare it with my aging HTC x7500 Advantage brick with Windows Mobile 6.1 Pro. I was able to use my very old 1997 SIM card in the HTC Hero.

The combined Android and HTC Sense UI is very powerful, and the reactivity to finger movements on the screen is really impressive. Having the 7 screens available to test. I really liked the way you can design you’re Scenes (Profile) with the different widgets. I didn’t have the time to look on the Android market for interesting new apps. I did like the Peep twitter application, but if you are following a few very active VMware tweeters, it becomes to read.

Delivery & Language

I ordered a HTC Hero White English model from Expansys, and I’m sure they send me the HTC Hero White German version, with German documentation. While you can select the language during setup (I used English, but my fiancé uses French). There are some places in the HTC Hero that don’t change language. For example, I was able to use a English Calendar, but the Personal Calendar was still named “Persönliche Kalender”. So one bad point to Expansys for sending me the wrong HTC Hero box, and one bad point to HTC for making some elements language agnostic.

UMTS Connectivity & Telecom Provider

APN. It’s the term used by HTC in the HTC Hero for configuring the Access Point Name, or the way you communicate with your telecom provider. Why this menu is buried under Wireless Controls, Mobile network settings, Access Point Names escapes me. It should be me clearer and higher up the menu, as it’s so important.
My telecom provider is Swisscom in Switzerland, and the HTC Hero did not pickup any automatic configuration for the UMTS/3G/GPRS connectivity. I had to manually enter all the information in the APN settings, after having spend 15 minutes searching on the Internet. For my fiancé’s telecom provider, Orange, it seems to pick up about 80% of the APN configuration online. I just modified the Server settings. The lesson learned: blaming HTC for poor APN integration is not exactly correct, this seems to be the resort of the Telecom providers.

HTC Hero & Exchange 2007

I use mostly my HTX x7500 Advantage with my corporate connectivity, as my company uses an Exchange 2007 infrastructure with Direct Push Technology. So I’m used to having my phone integrated with Exchange. It really simplifies my life concerning my Contacts, Calendar events and Emails. Setting up the HTC Hero to connect with my companies Exchange server was relatively simple. Yet the HTC Hero is not a Windows Mobile platform and it does not support the Direct Push Technology. The HTC Hero automatically checks my Exchange server every 15 minutes. I personally prefer having the Direct Push Emails. But I can live with it. The Emails where easy to read with both portrait and landscape mode. Managing the emails was rather easy. The point that disturbed me in my usage of the HTC Hero with Exchange integration came at the end of my 1 day review. I acted with the phone, like I had lost it. I connecter to my Outlouk Web Access, went to the options, selected the Mobile Devices and tried to remote wipe the device (Wipe All Data from Device…). it didn’t work immediately. The first attempt was not successful. On the next scheduled Email synchronization (15 minutes later), the HTC Hero noticed something was off, and opened the Exchange configuration panel. It said that the details were not correct and proposed to save the config. I didn’t even have to re-enter my password on the HTC Hero, just select the SAVE button, and off the HTC Hero was again synchronizing with Exchange. That’s no good. A 2nd attempt to wipe all data using OWA, made the HTC Hero query if Yes or No the user should accept the synchronization that would wipe the data. I select Yes in this case and the removal of all the data took 6 minutes, during which I could have cancelled the wiping job on the HTC Hero. The HTC Hero therefore is able to work with Exchange 2007, but a corporation cannot entrust these endpoints for remote data wipe. I guess to have the proper remote data wipe functionality you really need the Direct Push Technology, where the OWA portal or Exchange server forces the mobile devices to reset.

At this point, I had to do a wipe using the factory default settings, so that I could give the HTC Hero back to my fiancé. I helped her setup her own Scenes, import her music, install the HTC Sync on her desktop and synchronize all her outlook contacts to the phone. As the evening progressed she was getting more and more impressed by this small jewel. My fiancé has short nails, making the usage of the phone difficult when you attempt to send SMS or Emails, so she had to recalibrate the keyboard.

I guess I will ask her how she fares with the phone in a few days.

Oops forgot…

One nice feature on the HTC Hero is the clock. Each time you come back to the main screen see how it adjusts the time (scroll the numbers or dial the wheels) ? Well that is getting tedious very very quickly… Why is my phone always on UTC time and needs to correct the graphics to get the right time ?