I’ve had a few questions about my Homelab 2014 upgrade hardware and settings. So here is a follow-up. This is just a photo collection of the various stages of the build. Compared to my previous homelabs that where designed for a small footprint, this one isn’t, this homelab version has been build to be a quiet environment.
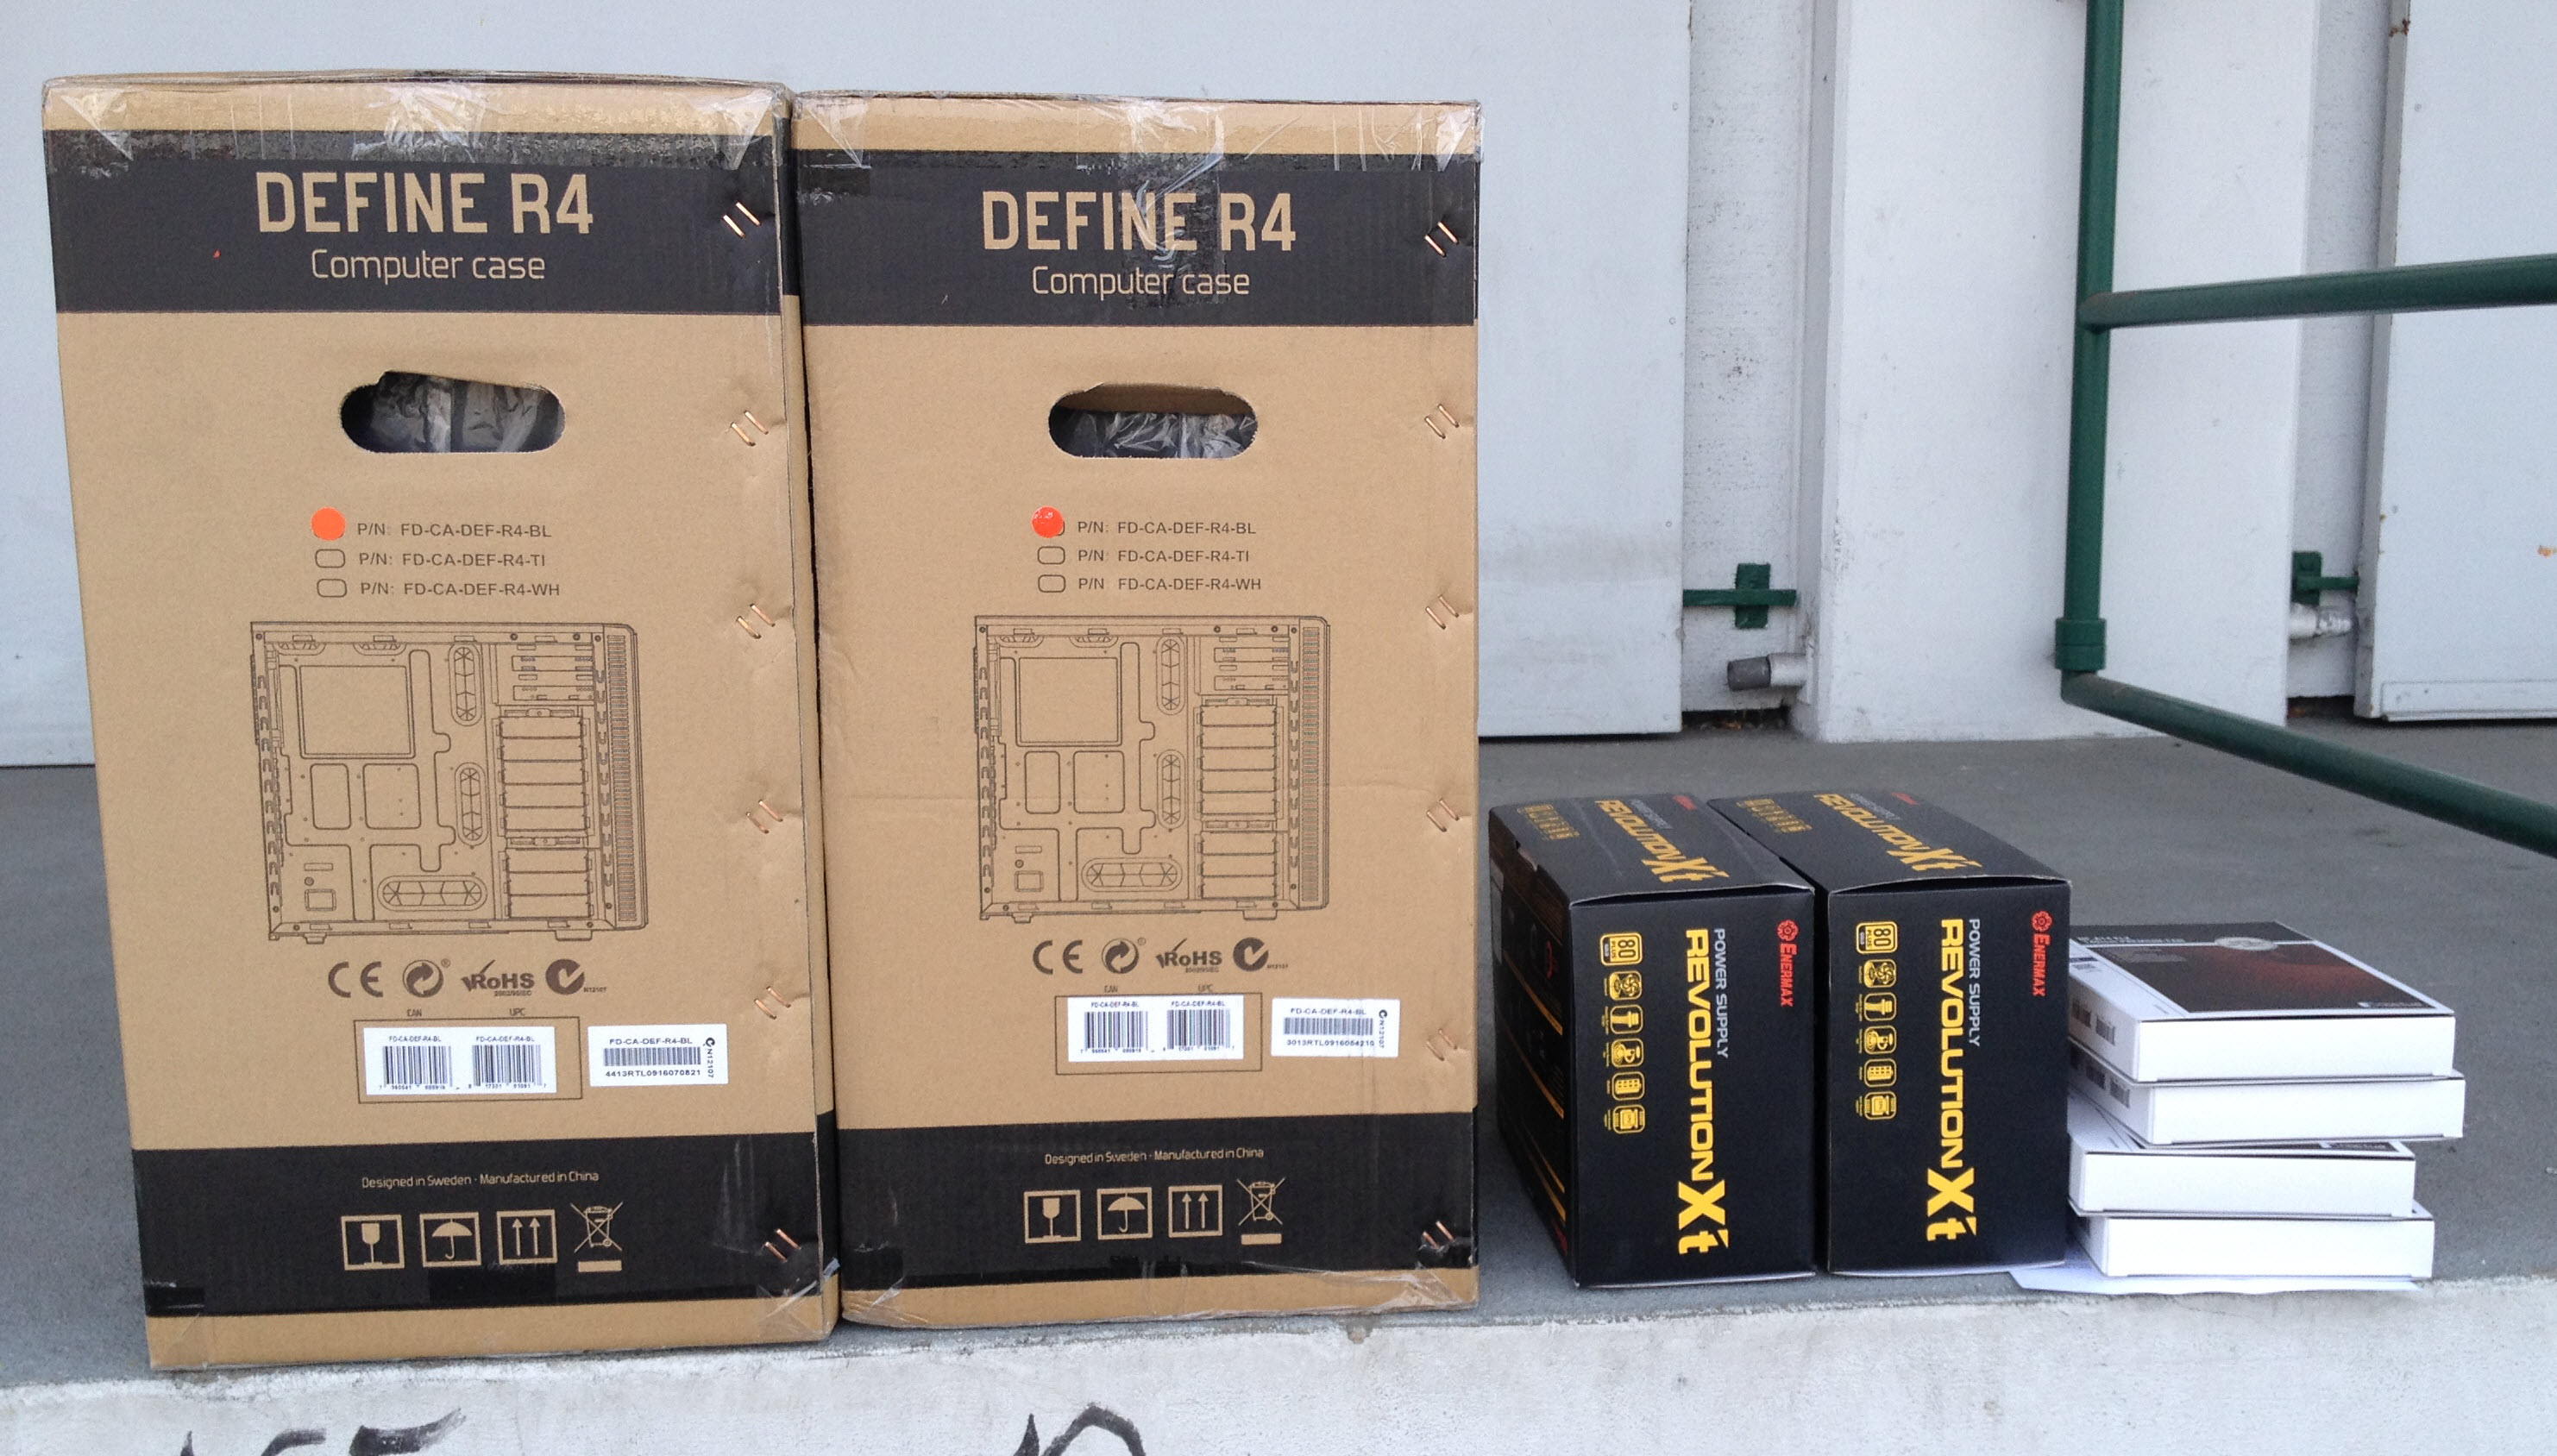
I started my build with only two hosts. For the cases I used the very nice Fractal Design Define R4. These are ATX chassis in a sleek black color, can house 8x 3.5″ disks, and support a lot of extra fans. Some of those you can see on the right site, those are Noctua NF-A14 FLX. For the power supply I picked up some Enermax Revolution Xt PSU.
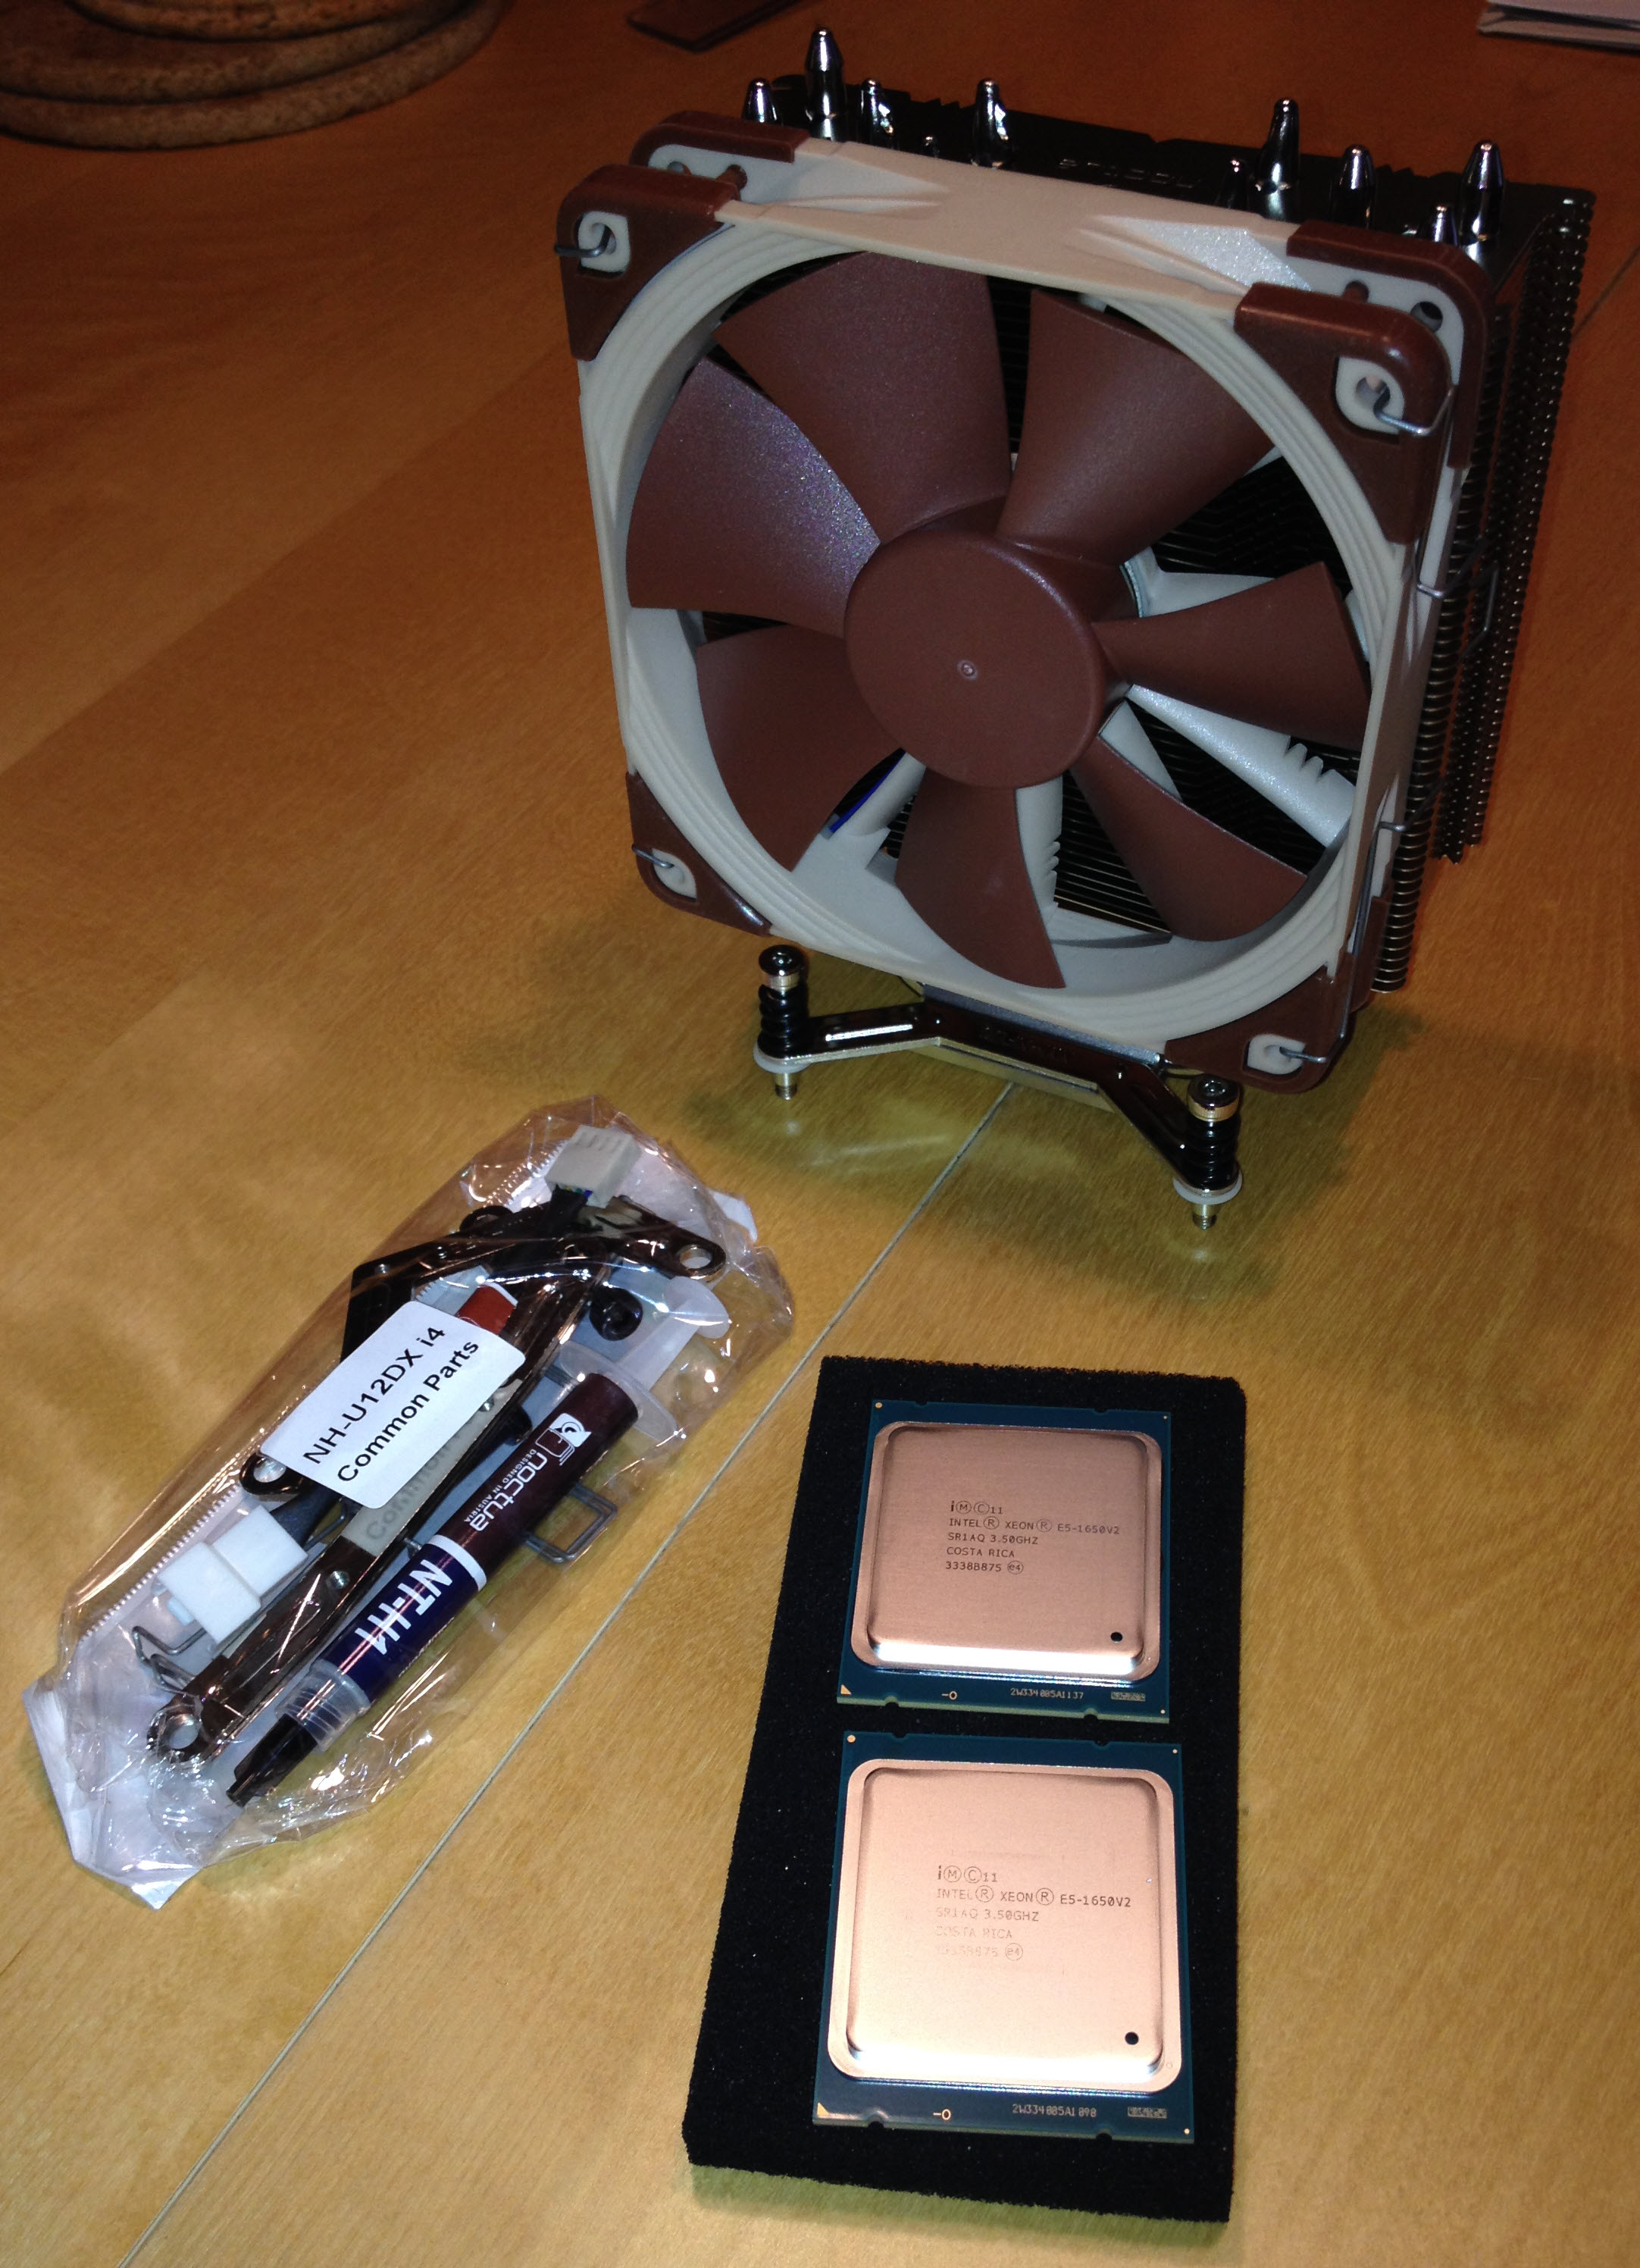
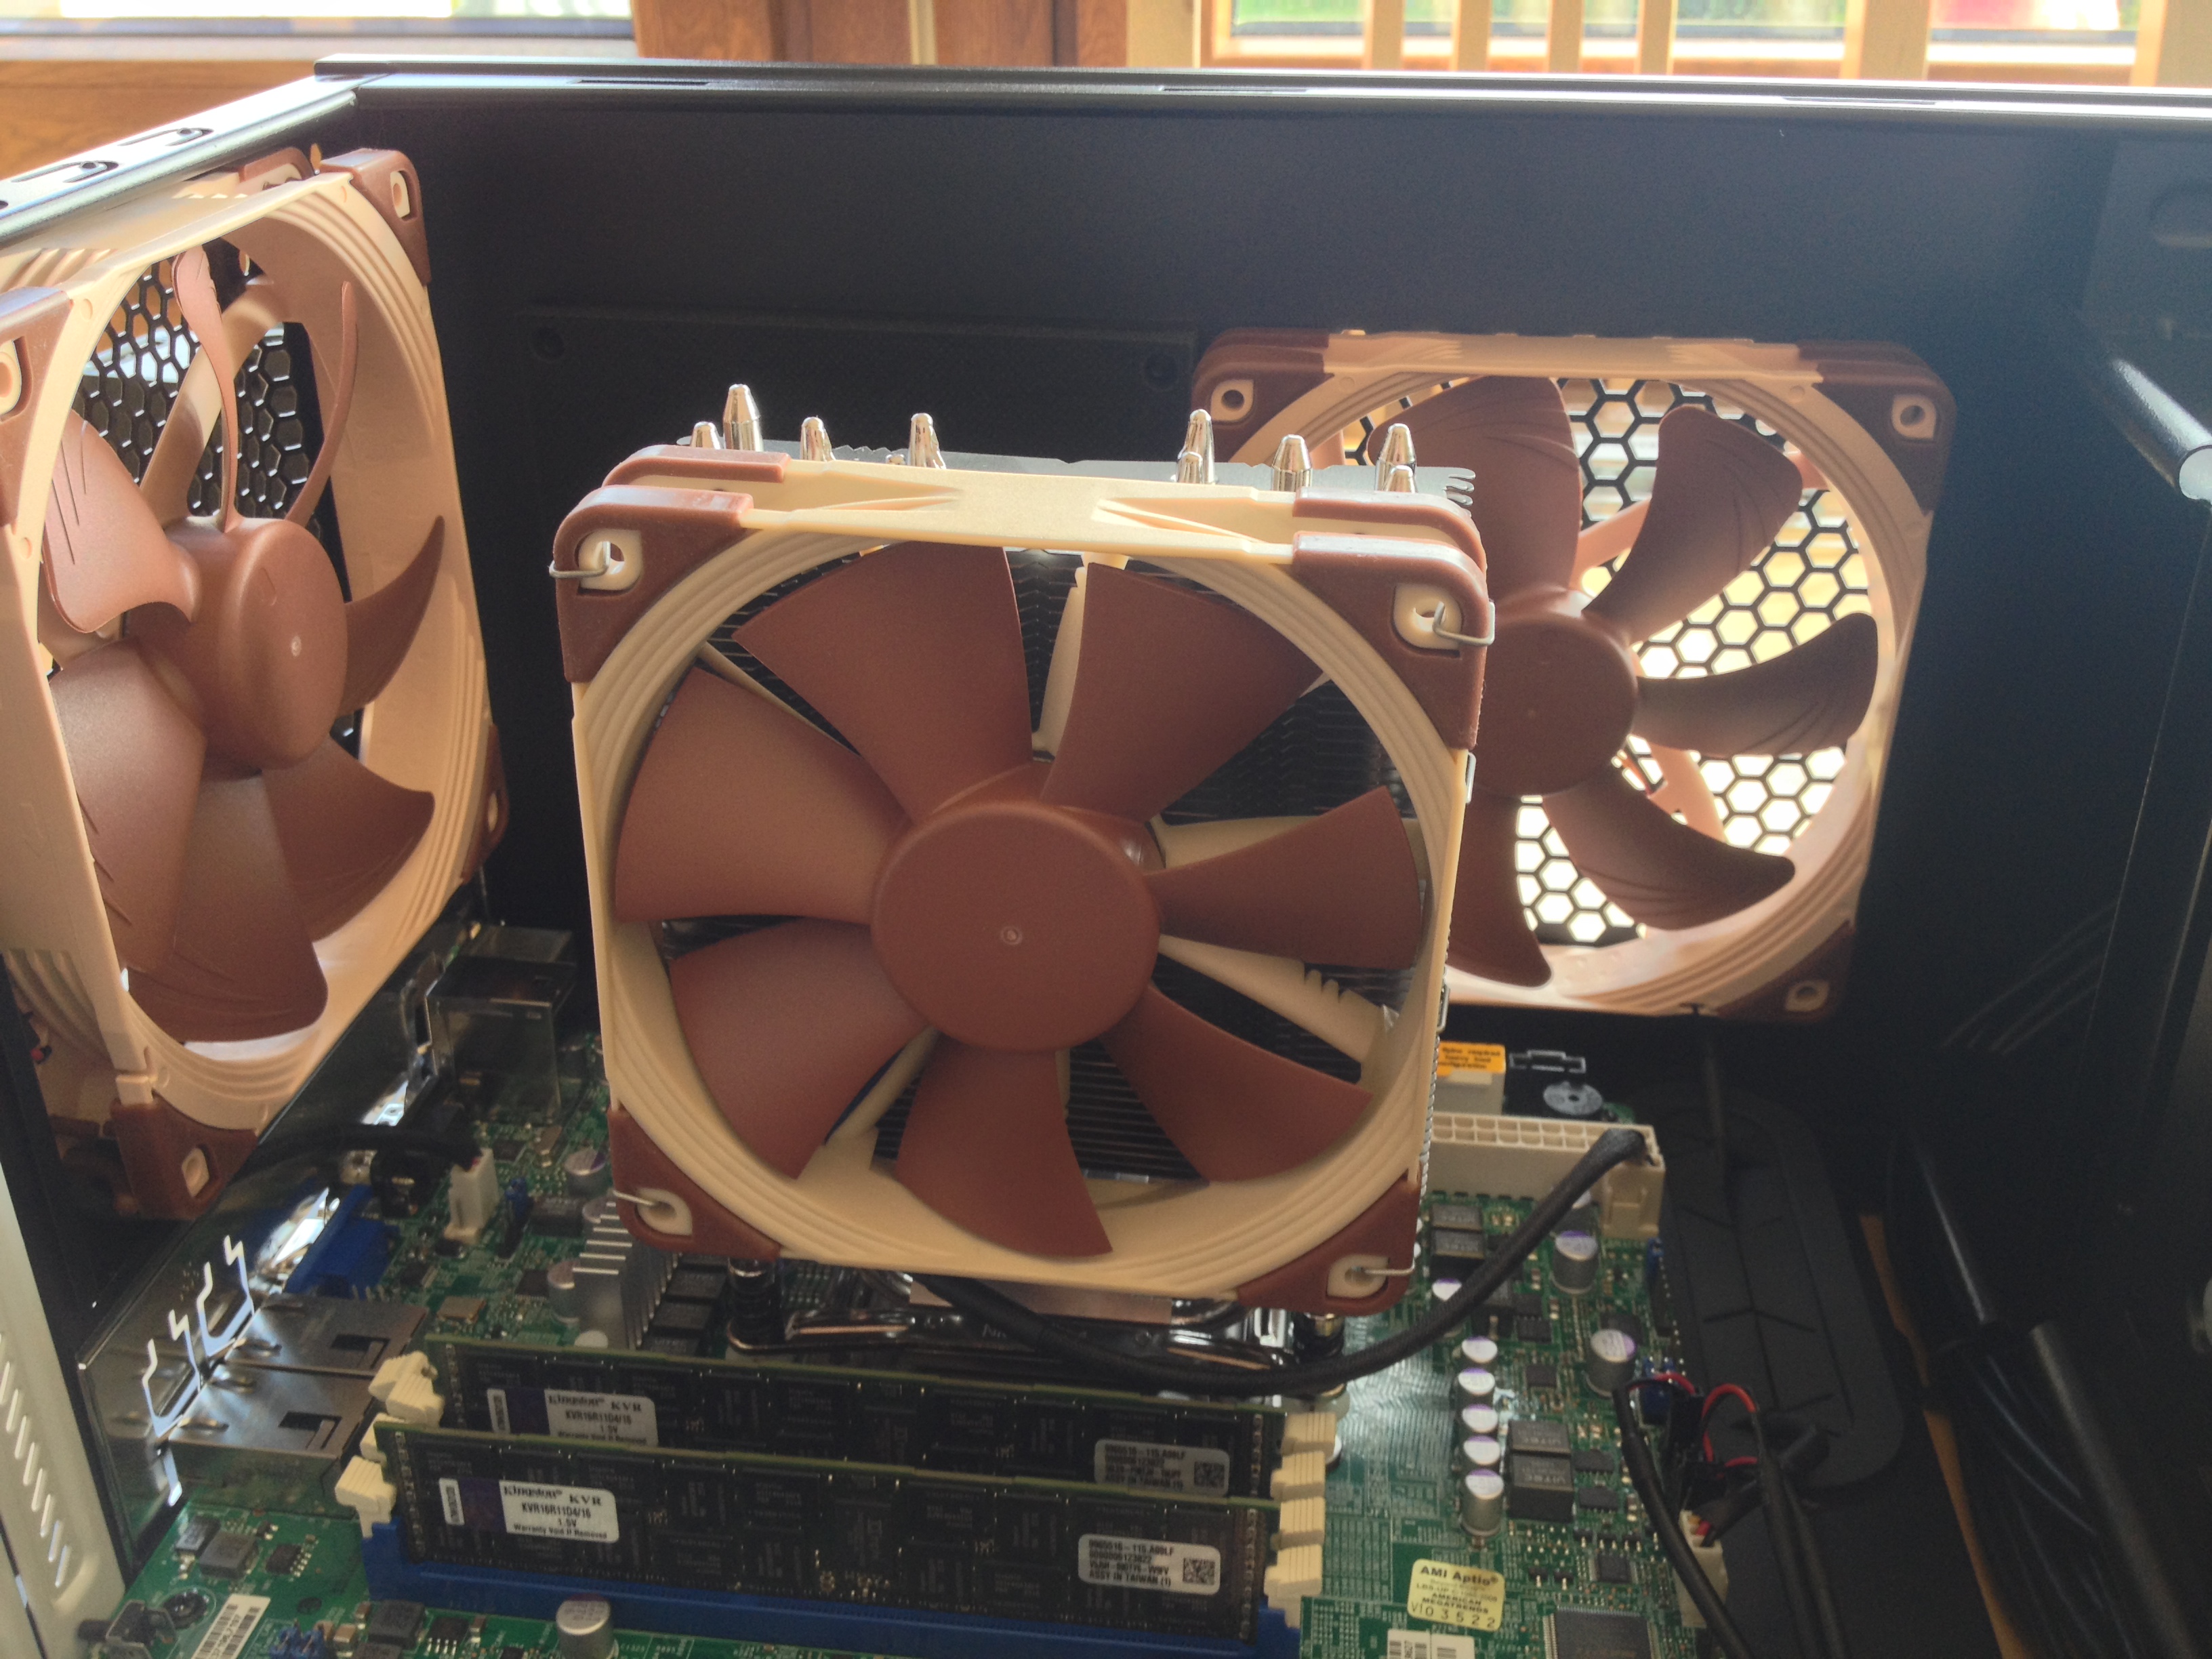
For the CPU I went with the Intel Xeon E5-1650v2 (6 Cores @3.5GHZ) and a large Noctua NH-U12DX i4. The special thing about the NH-U12DX i4 model is that it comes with socket brackets for the Narrow-Brack ILM that you find on the Supermicro X9SRH-7TF motherboard.
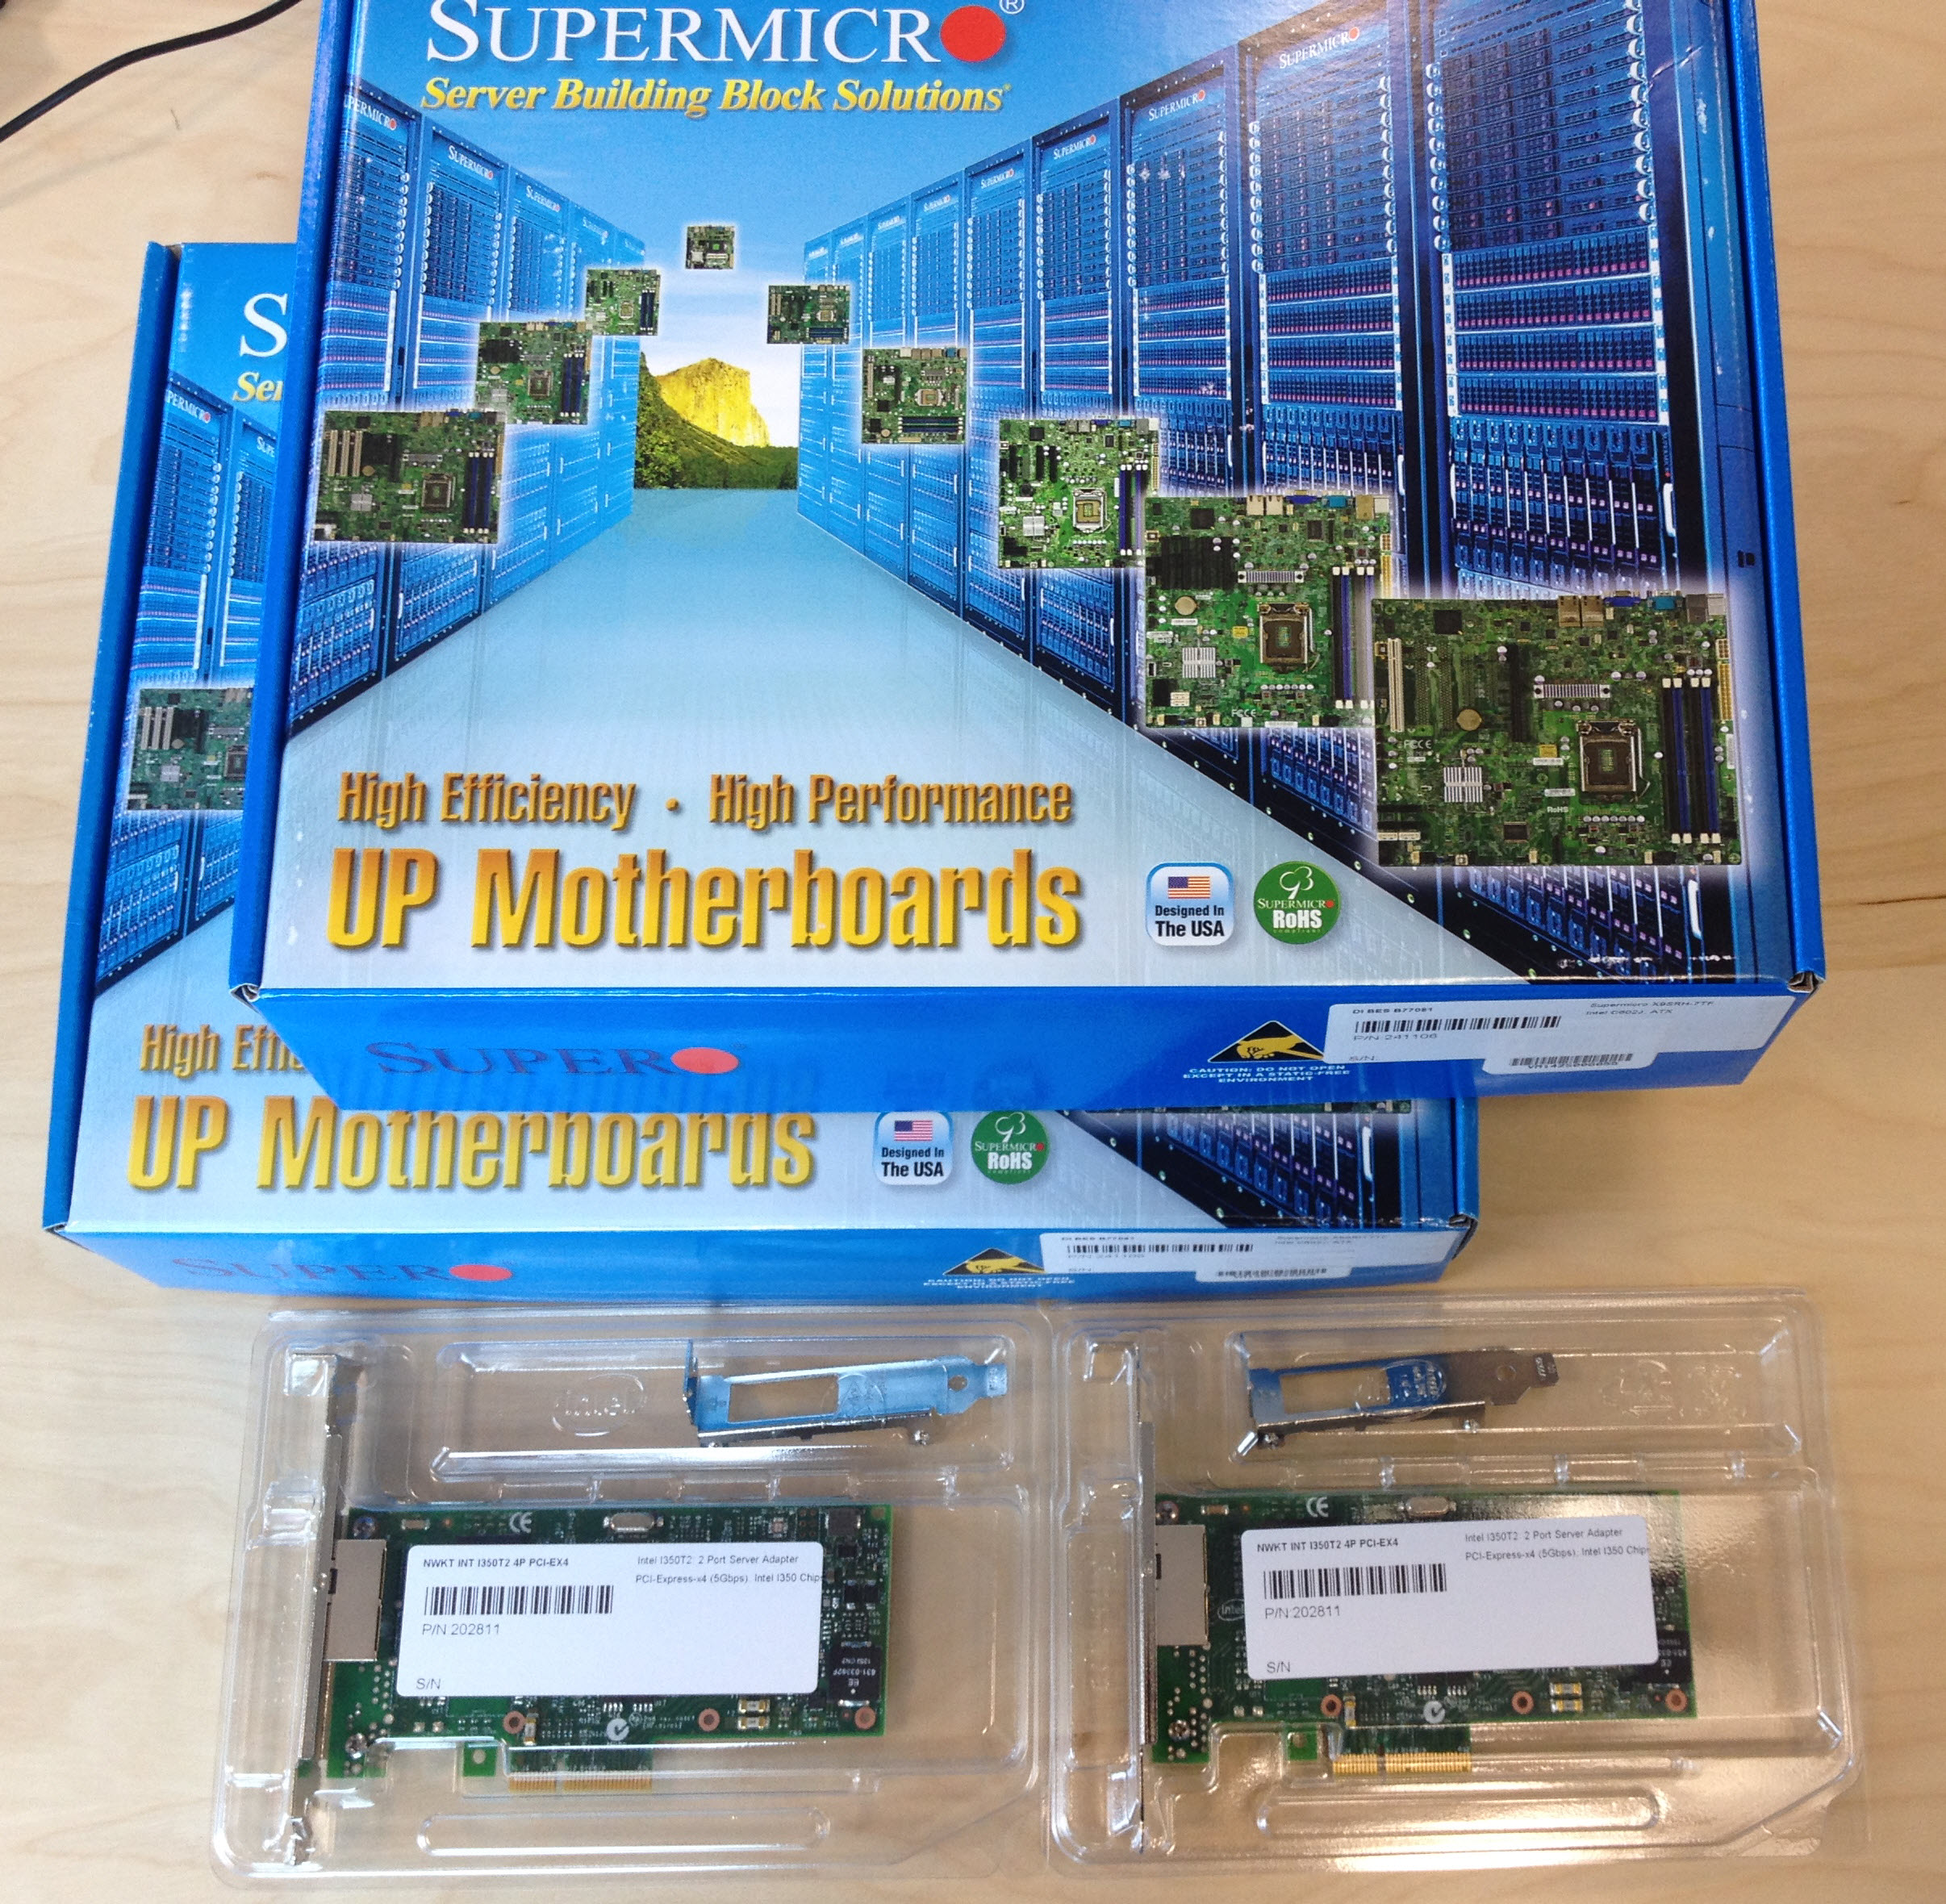
The two Supermicro X9SRH-7TF motherboards and two add-on Intel I350-T2 dual 1Gbps network cards.
Getting everything read for the build stage.
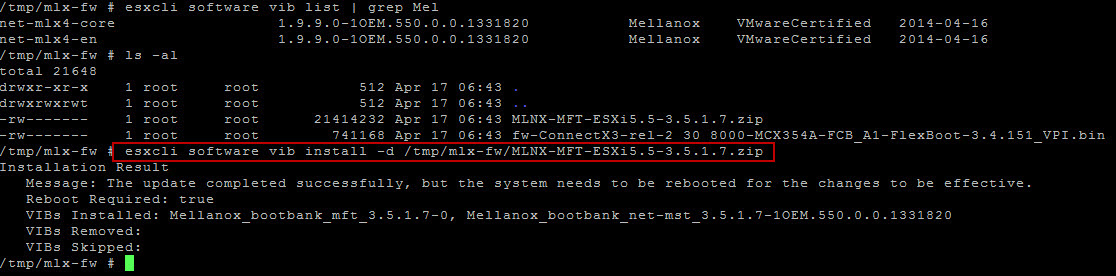
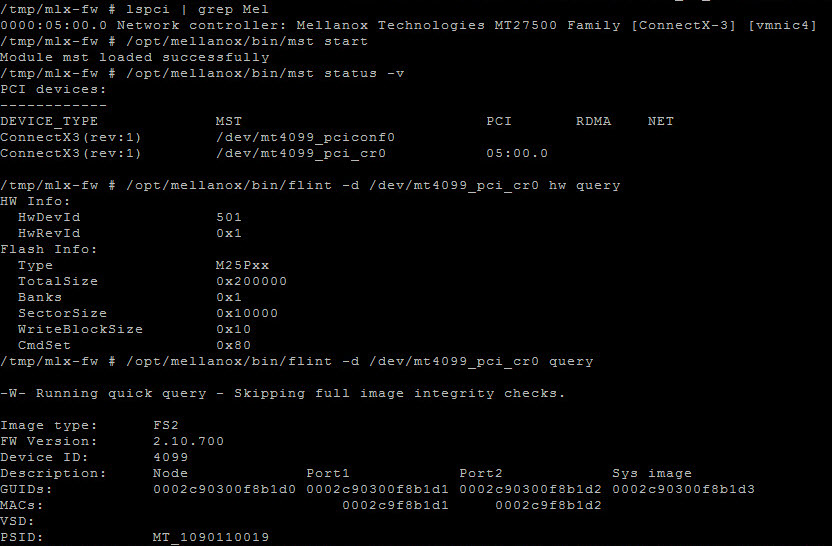
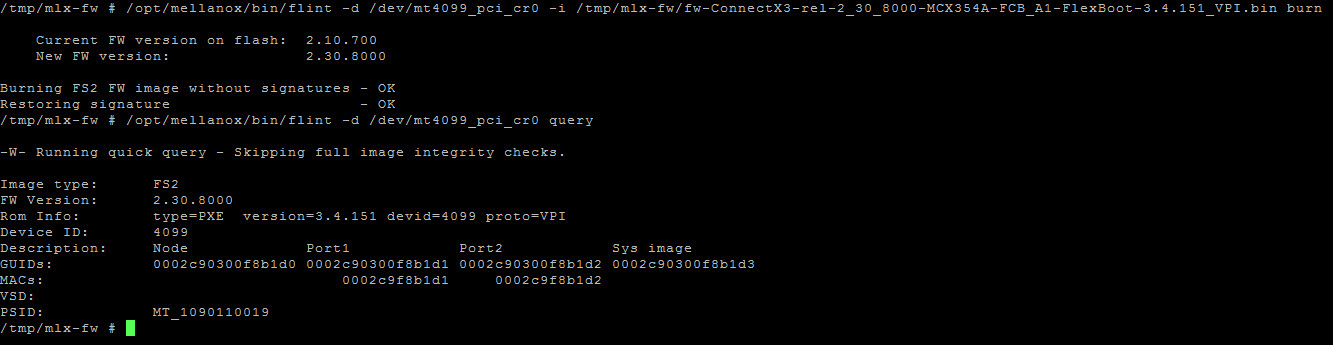
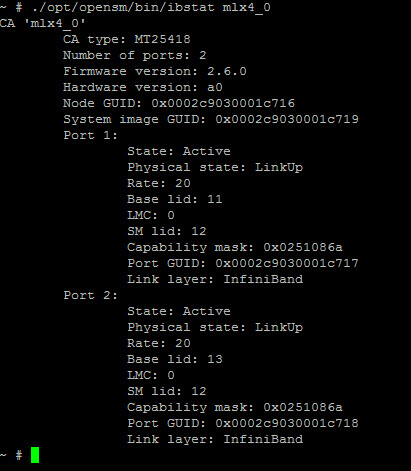
On the next photo you will see quiet a large assortment of pieces. There are 5 small yet long lasting Intel SSD S3700 100GB, 8x Seagate Constellation 3TB disks, some LSI HBA Adapters like the LSI 9207-8i and LSI 9300-8i, two Mellanox ConnectX-3 VPI Dual 40/56Gbps InfiniBand and Ethernet adapters that I got for a steal (~$320USD) on ebay last summer.
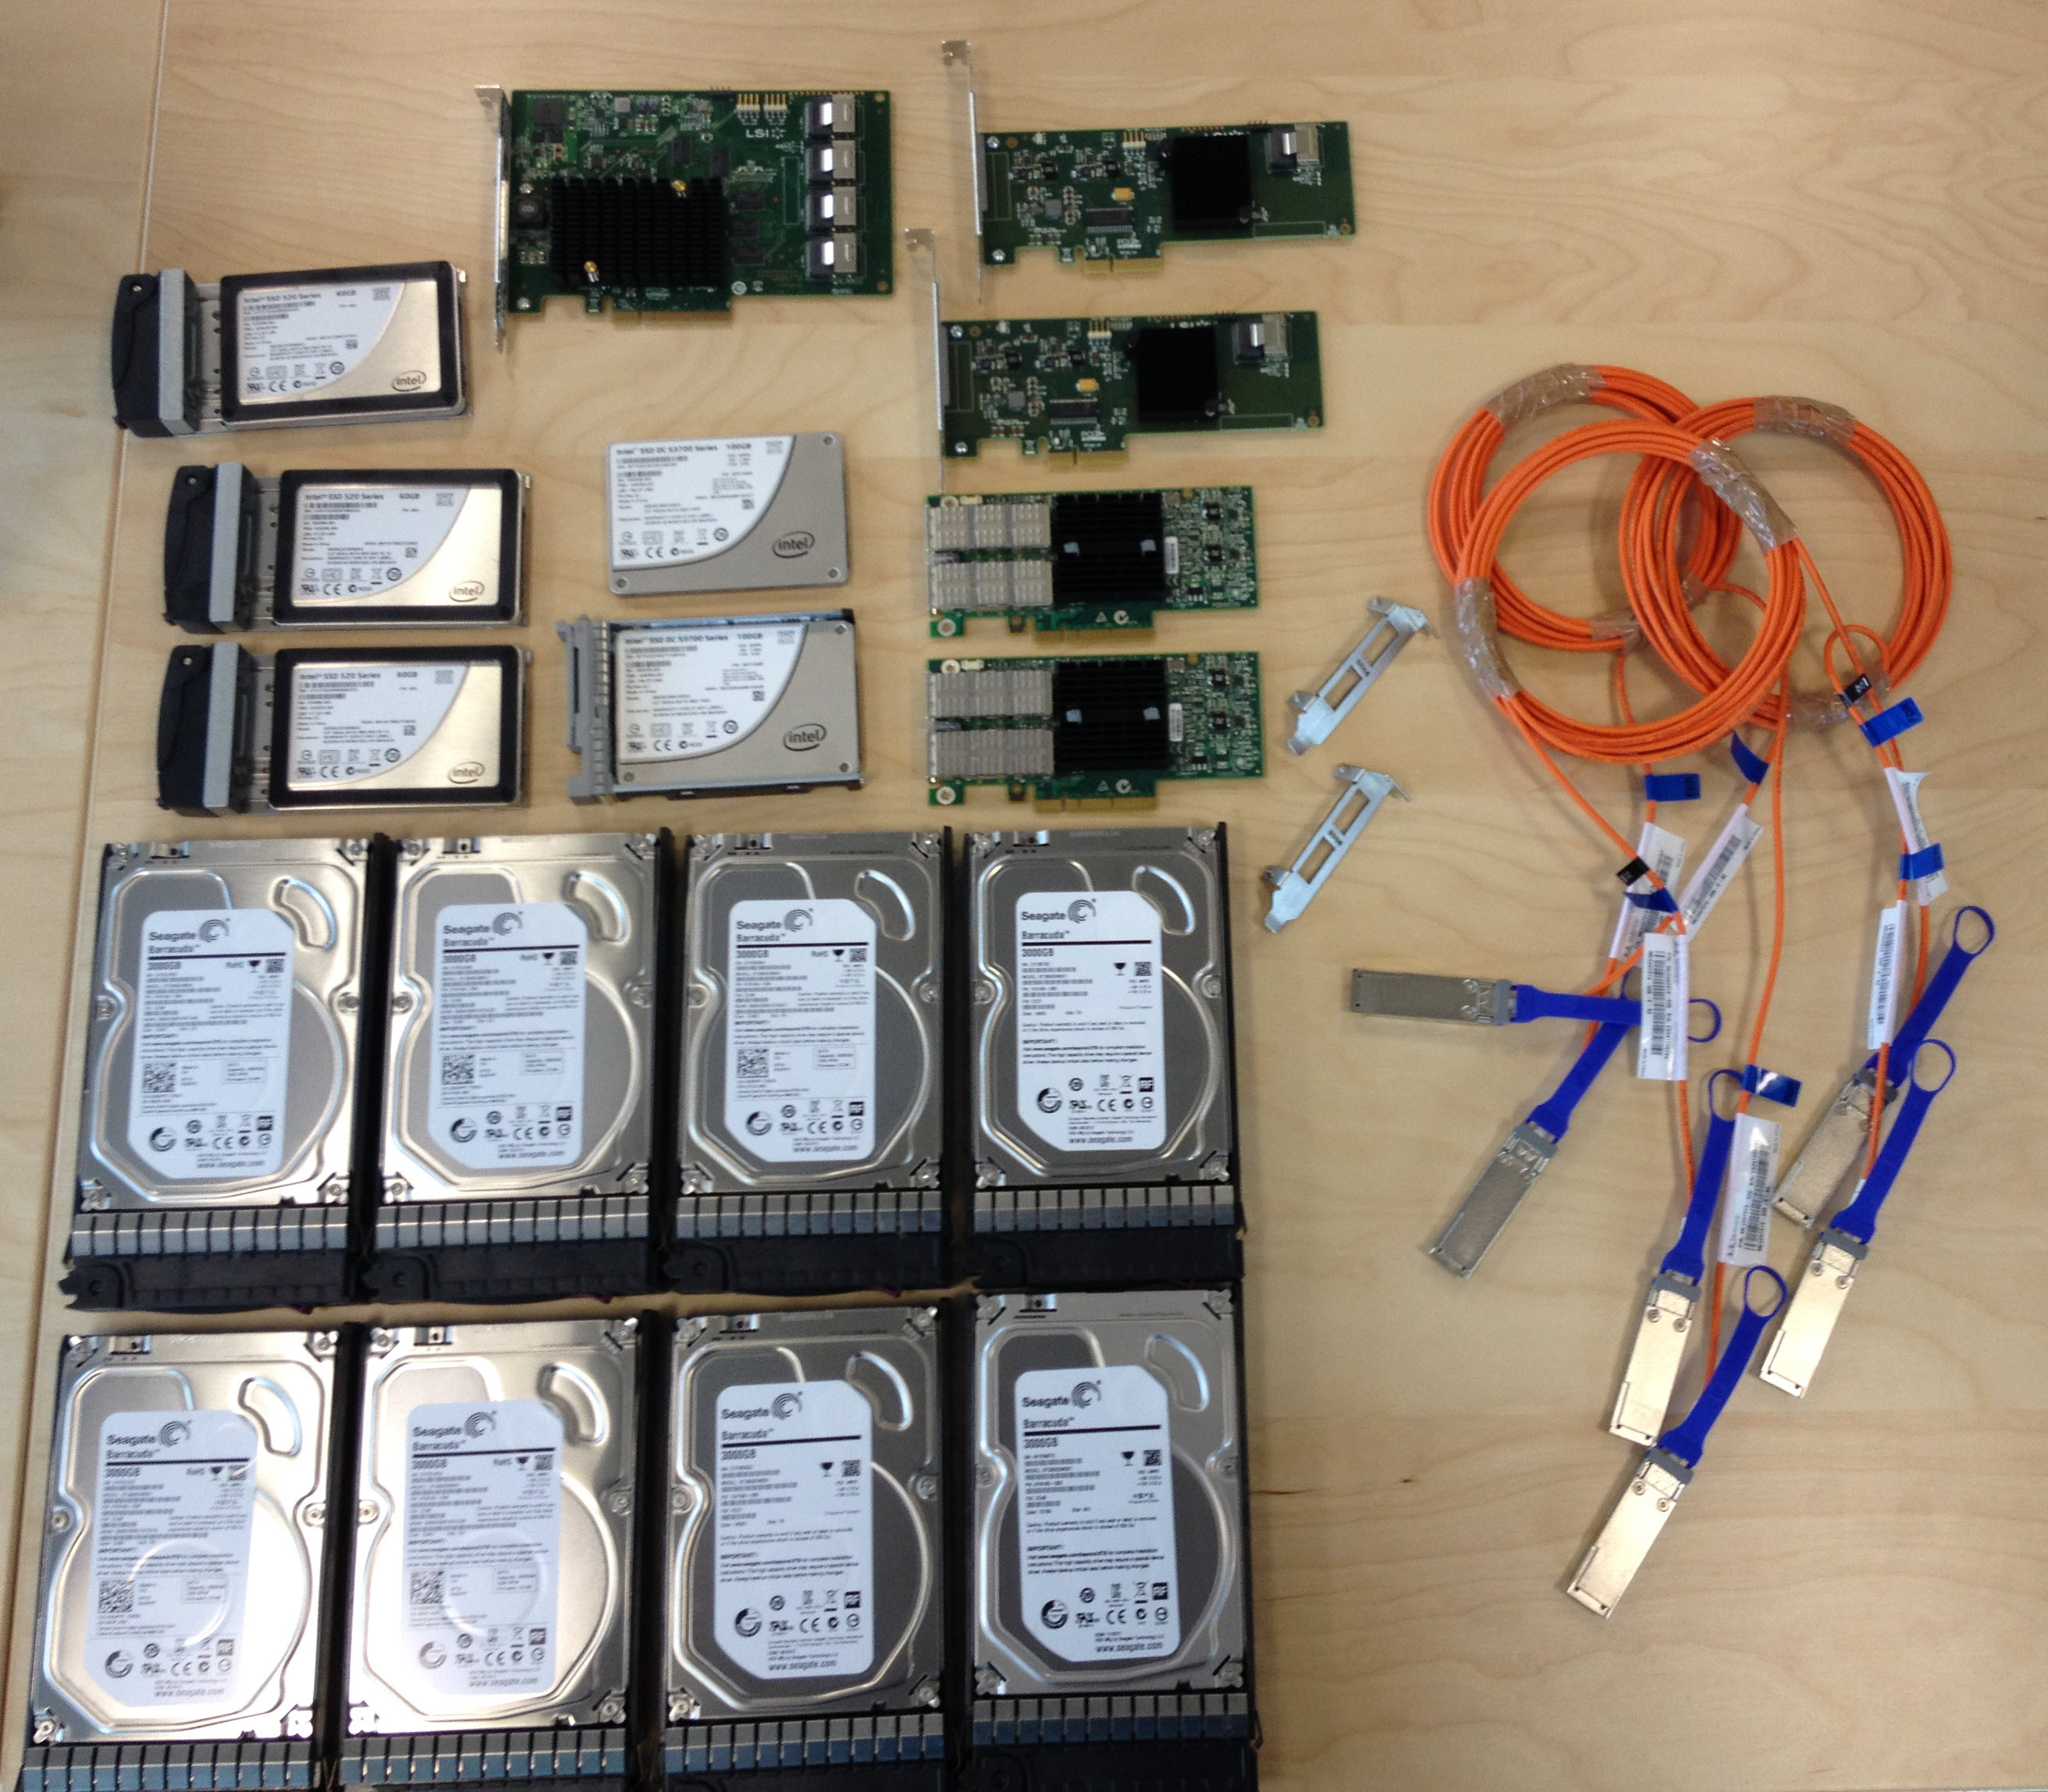
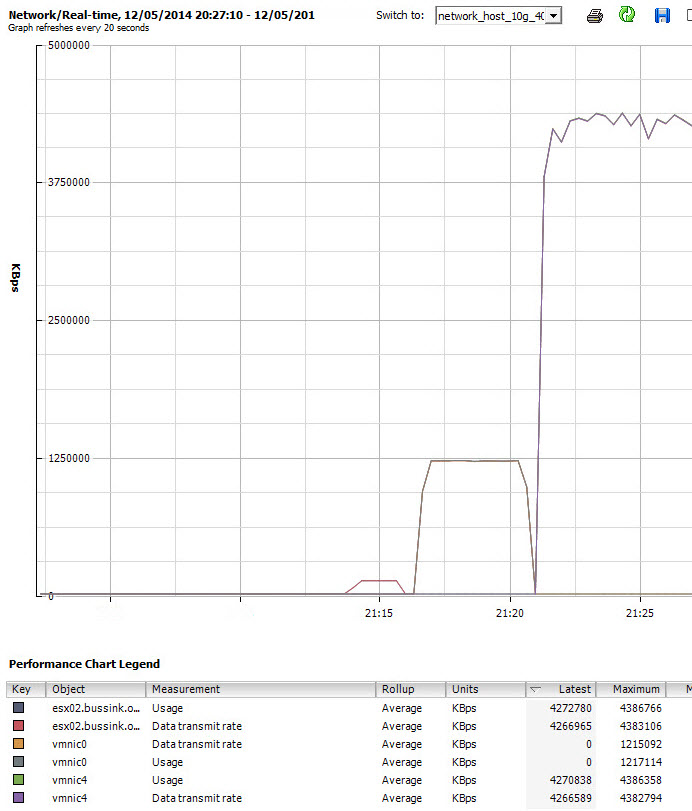
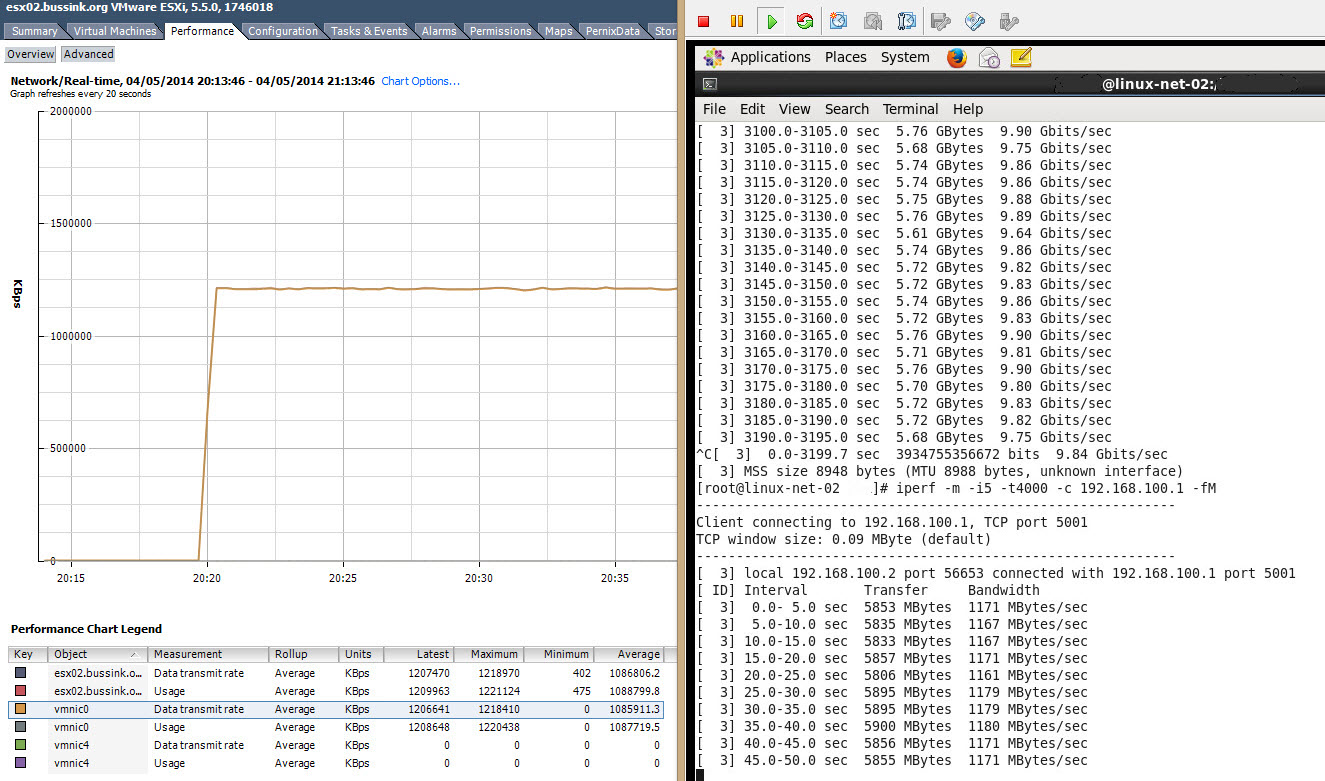
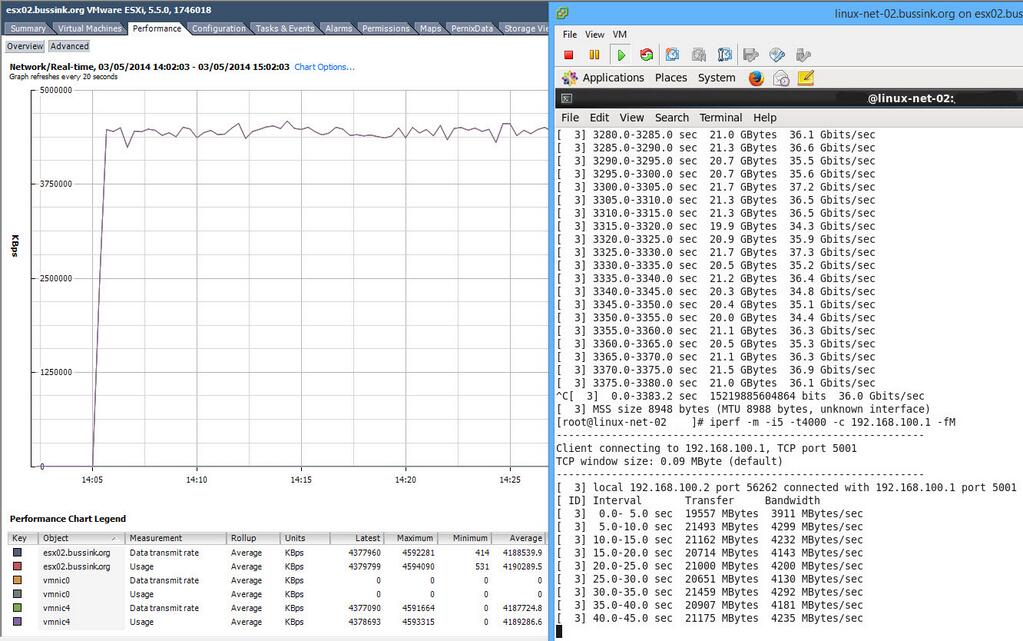
You need to remember, that if you only have two hosts, with 10Gbps Ethernet or 40Gbps Ethernet, you can build a point-to-point config, without having to purchase a network switch. These ConnectX-3 VPI adapters are recognized as 40Gbps Ethernet NIC by vSphere 5.5.
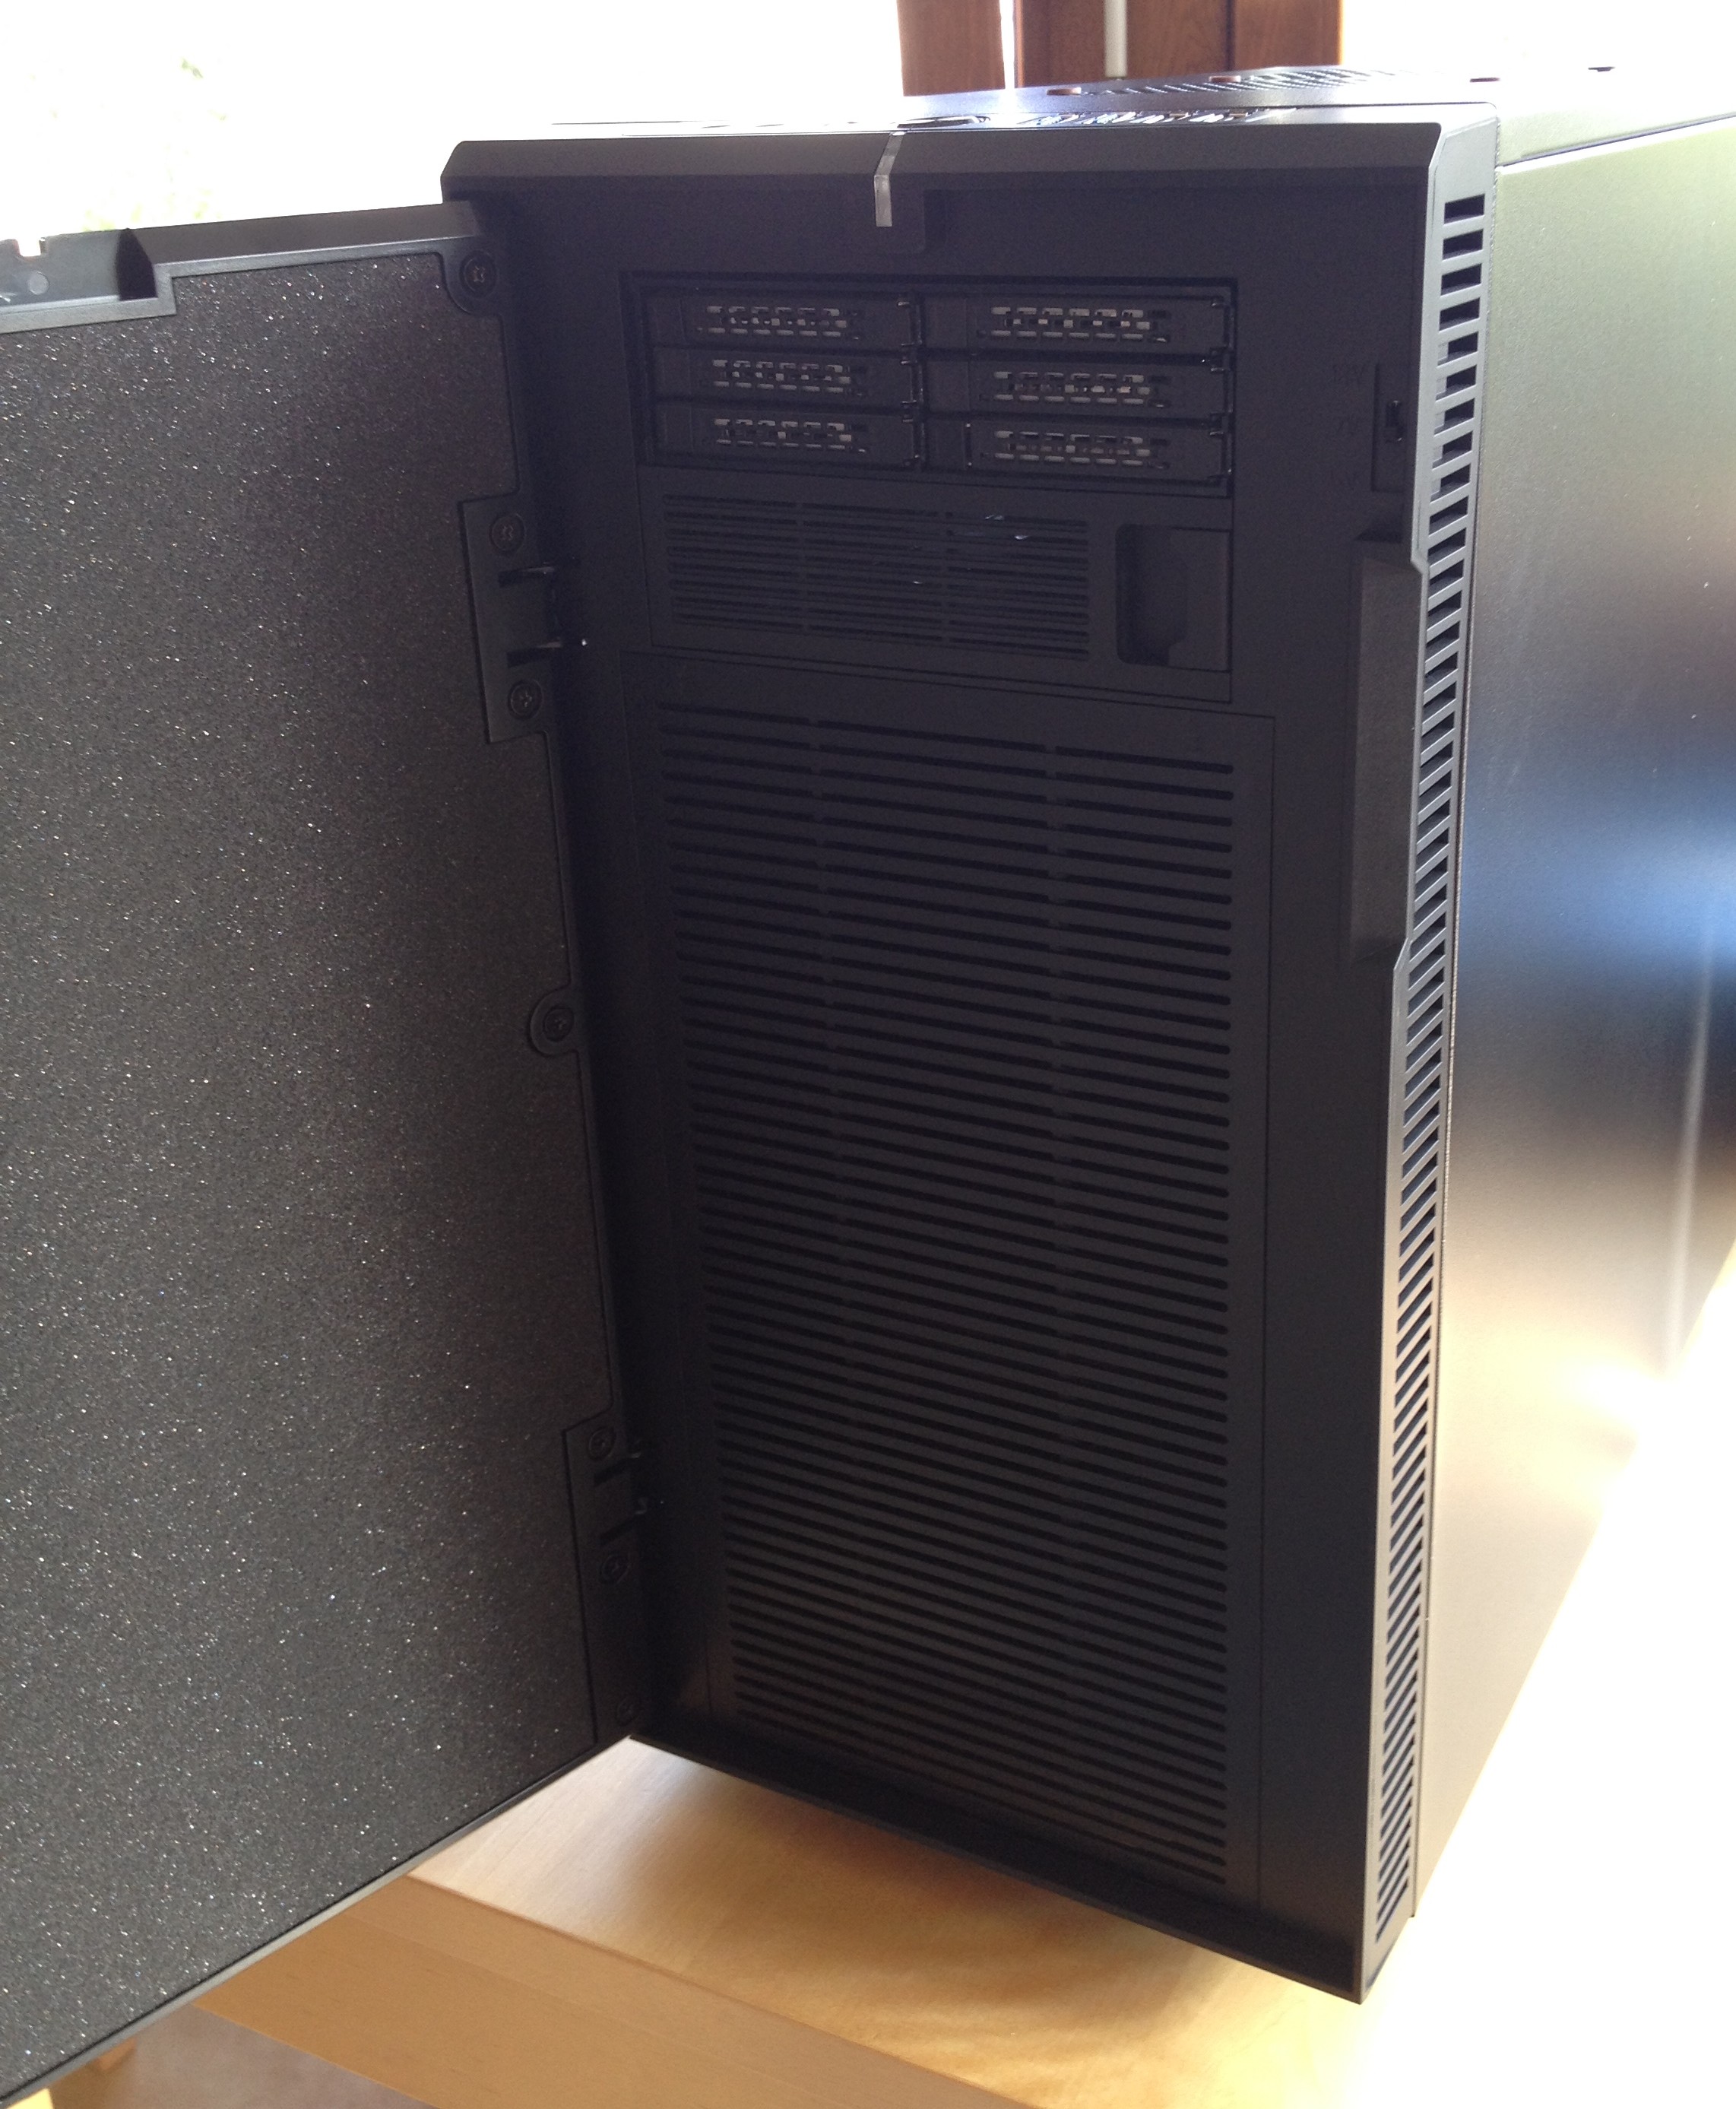
Lets have a closer look at the Fractal Design Define R4 chassis.
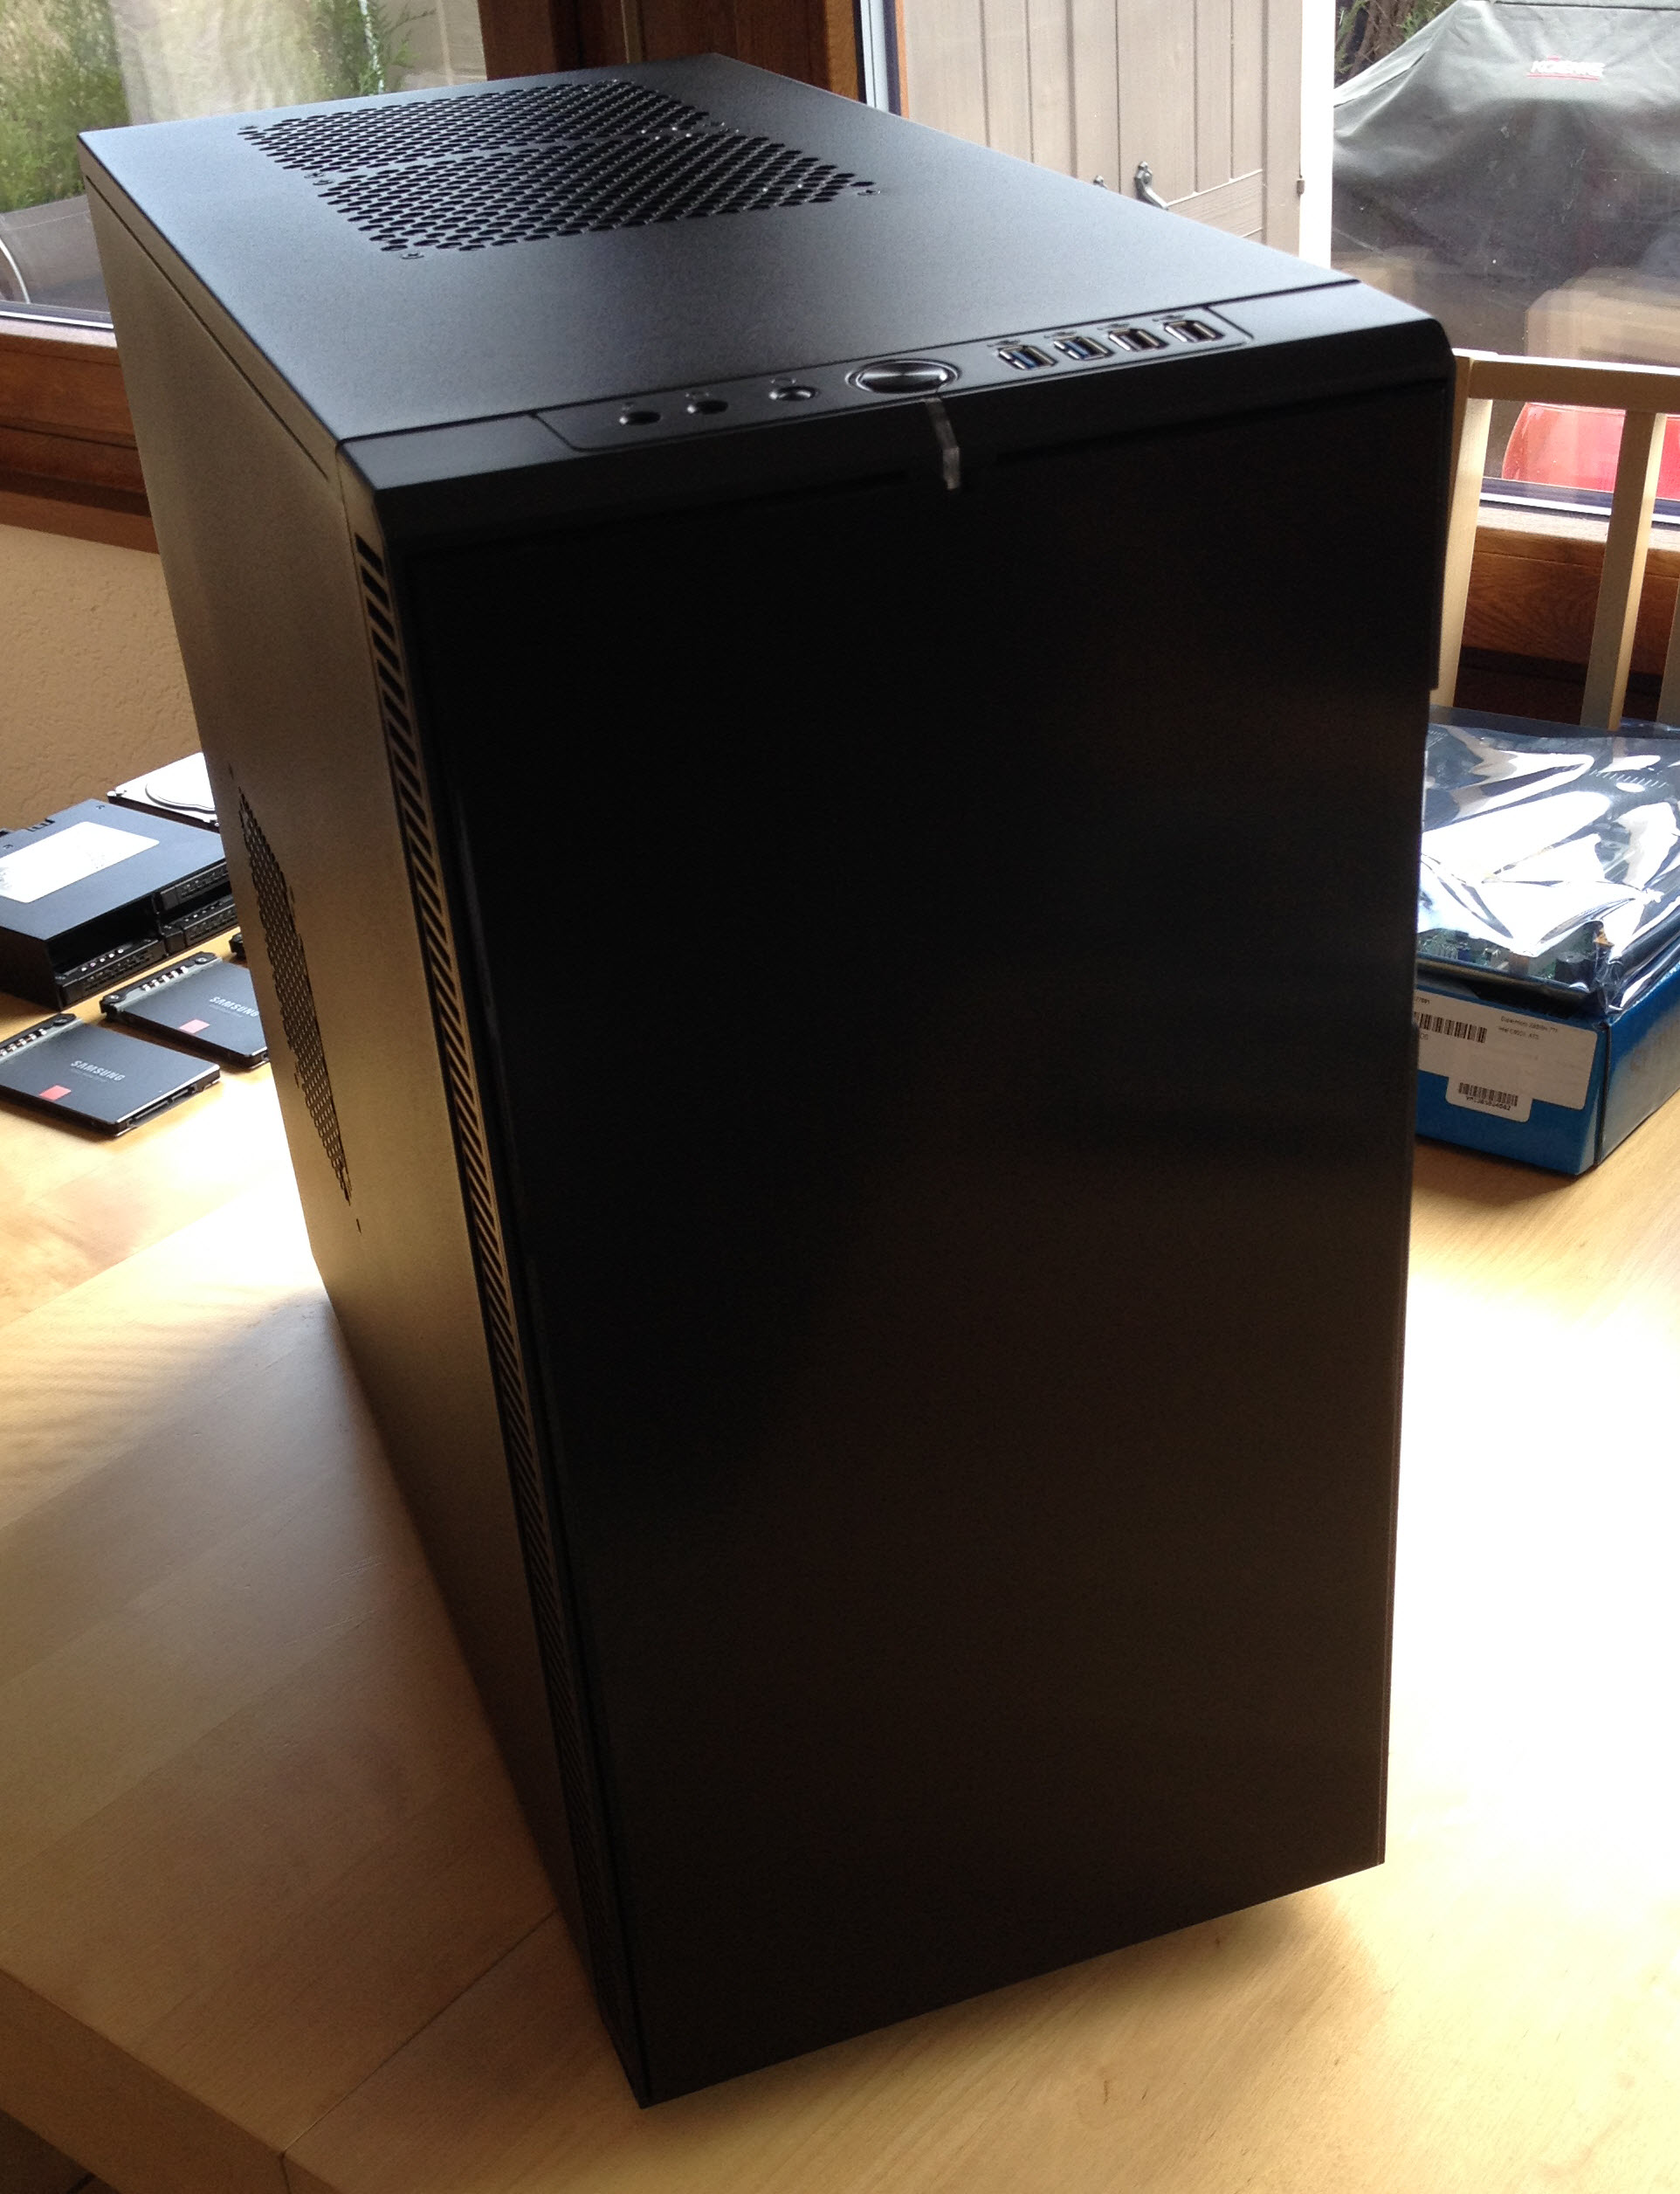
Fractal Design Define R4 Front
The Fractal Design Define R4 has two 14cm Fans, one in the front, and one in the back. I’m replacing the back one with the Noctua NF-A14 FLX, and I put one in the top of the chassis to extra the little warm air out the top.
The inside of the chassis has a nice feel, easy access to the various elements, space for 8x 3.5″ disk in the front, and you can push power-cables on the other side of the chassis.
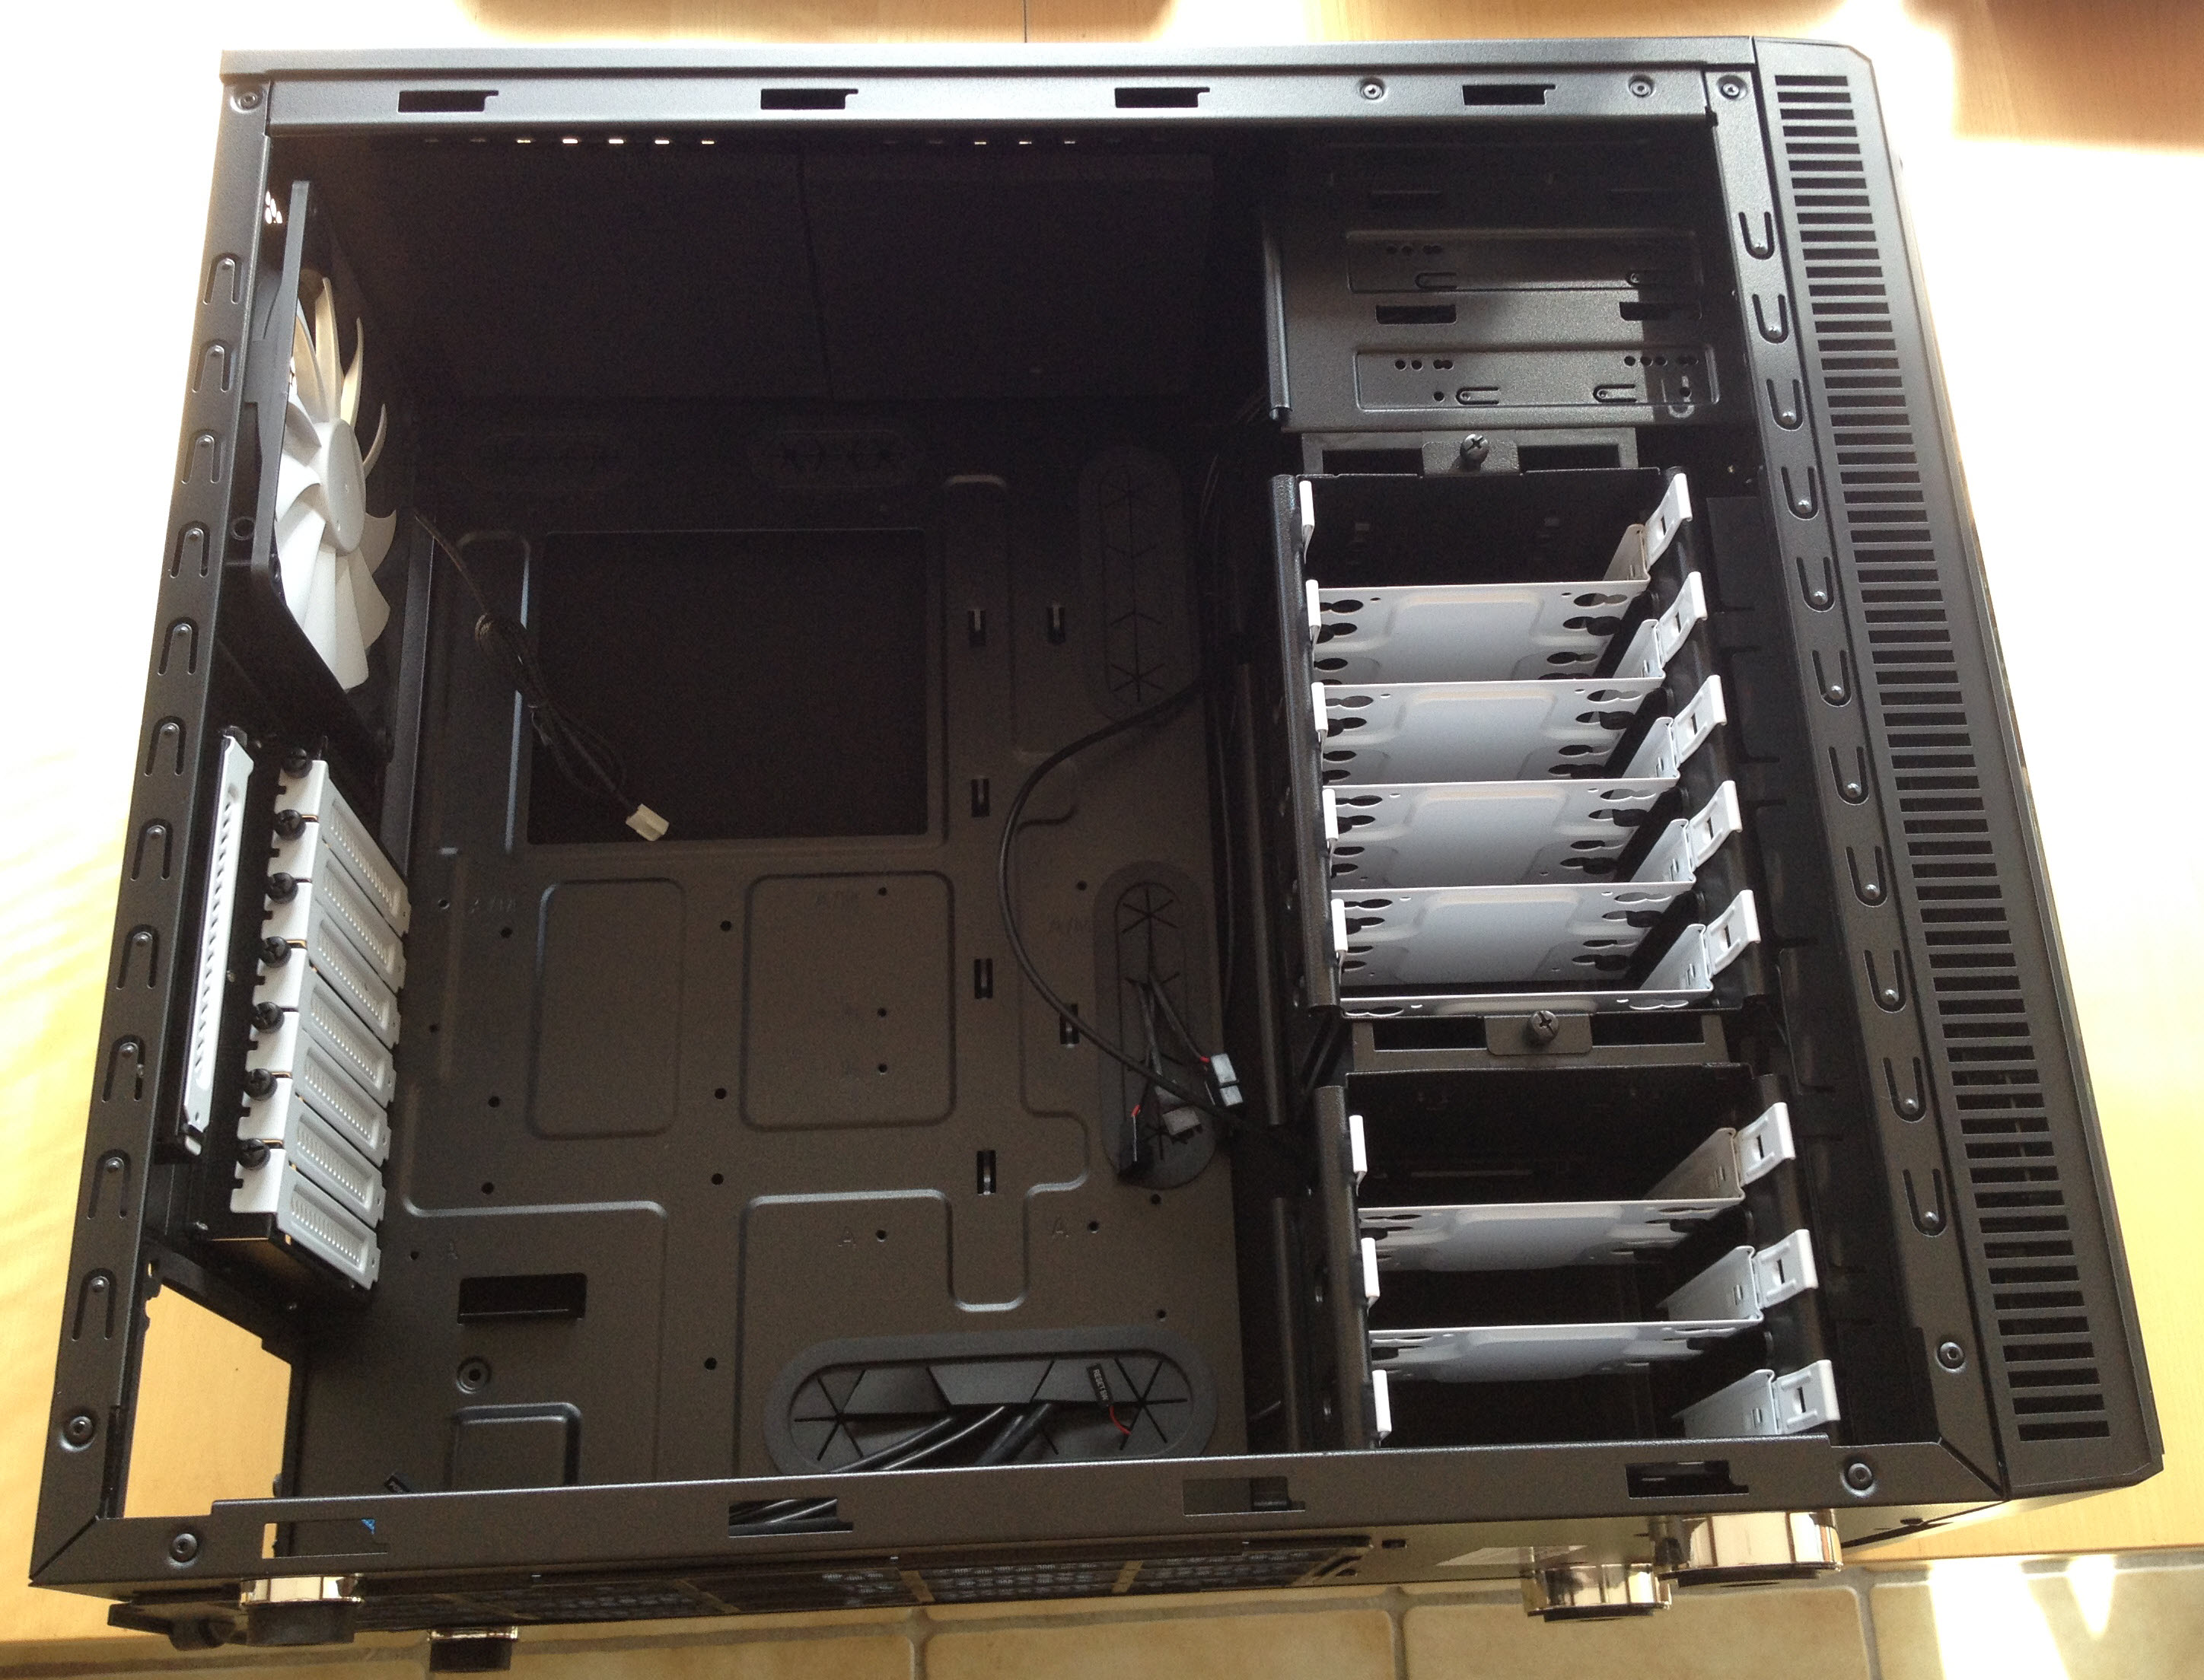
Fractal Design Define R4 Inside
A few years ago, I bought a very nice yet expensive Tyan dual processor motherboard and I installed it with all the elements before looking to put the CPU on the motherboard. It had bent pins under the CPU cover. This is something that motherboard manufacturers and distributors have no warranty. That was an expensive lesson, and that was the end of my Tyan allegiance. Since then I moved to Supermicro.
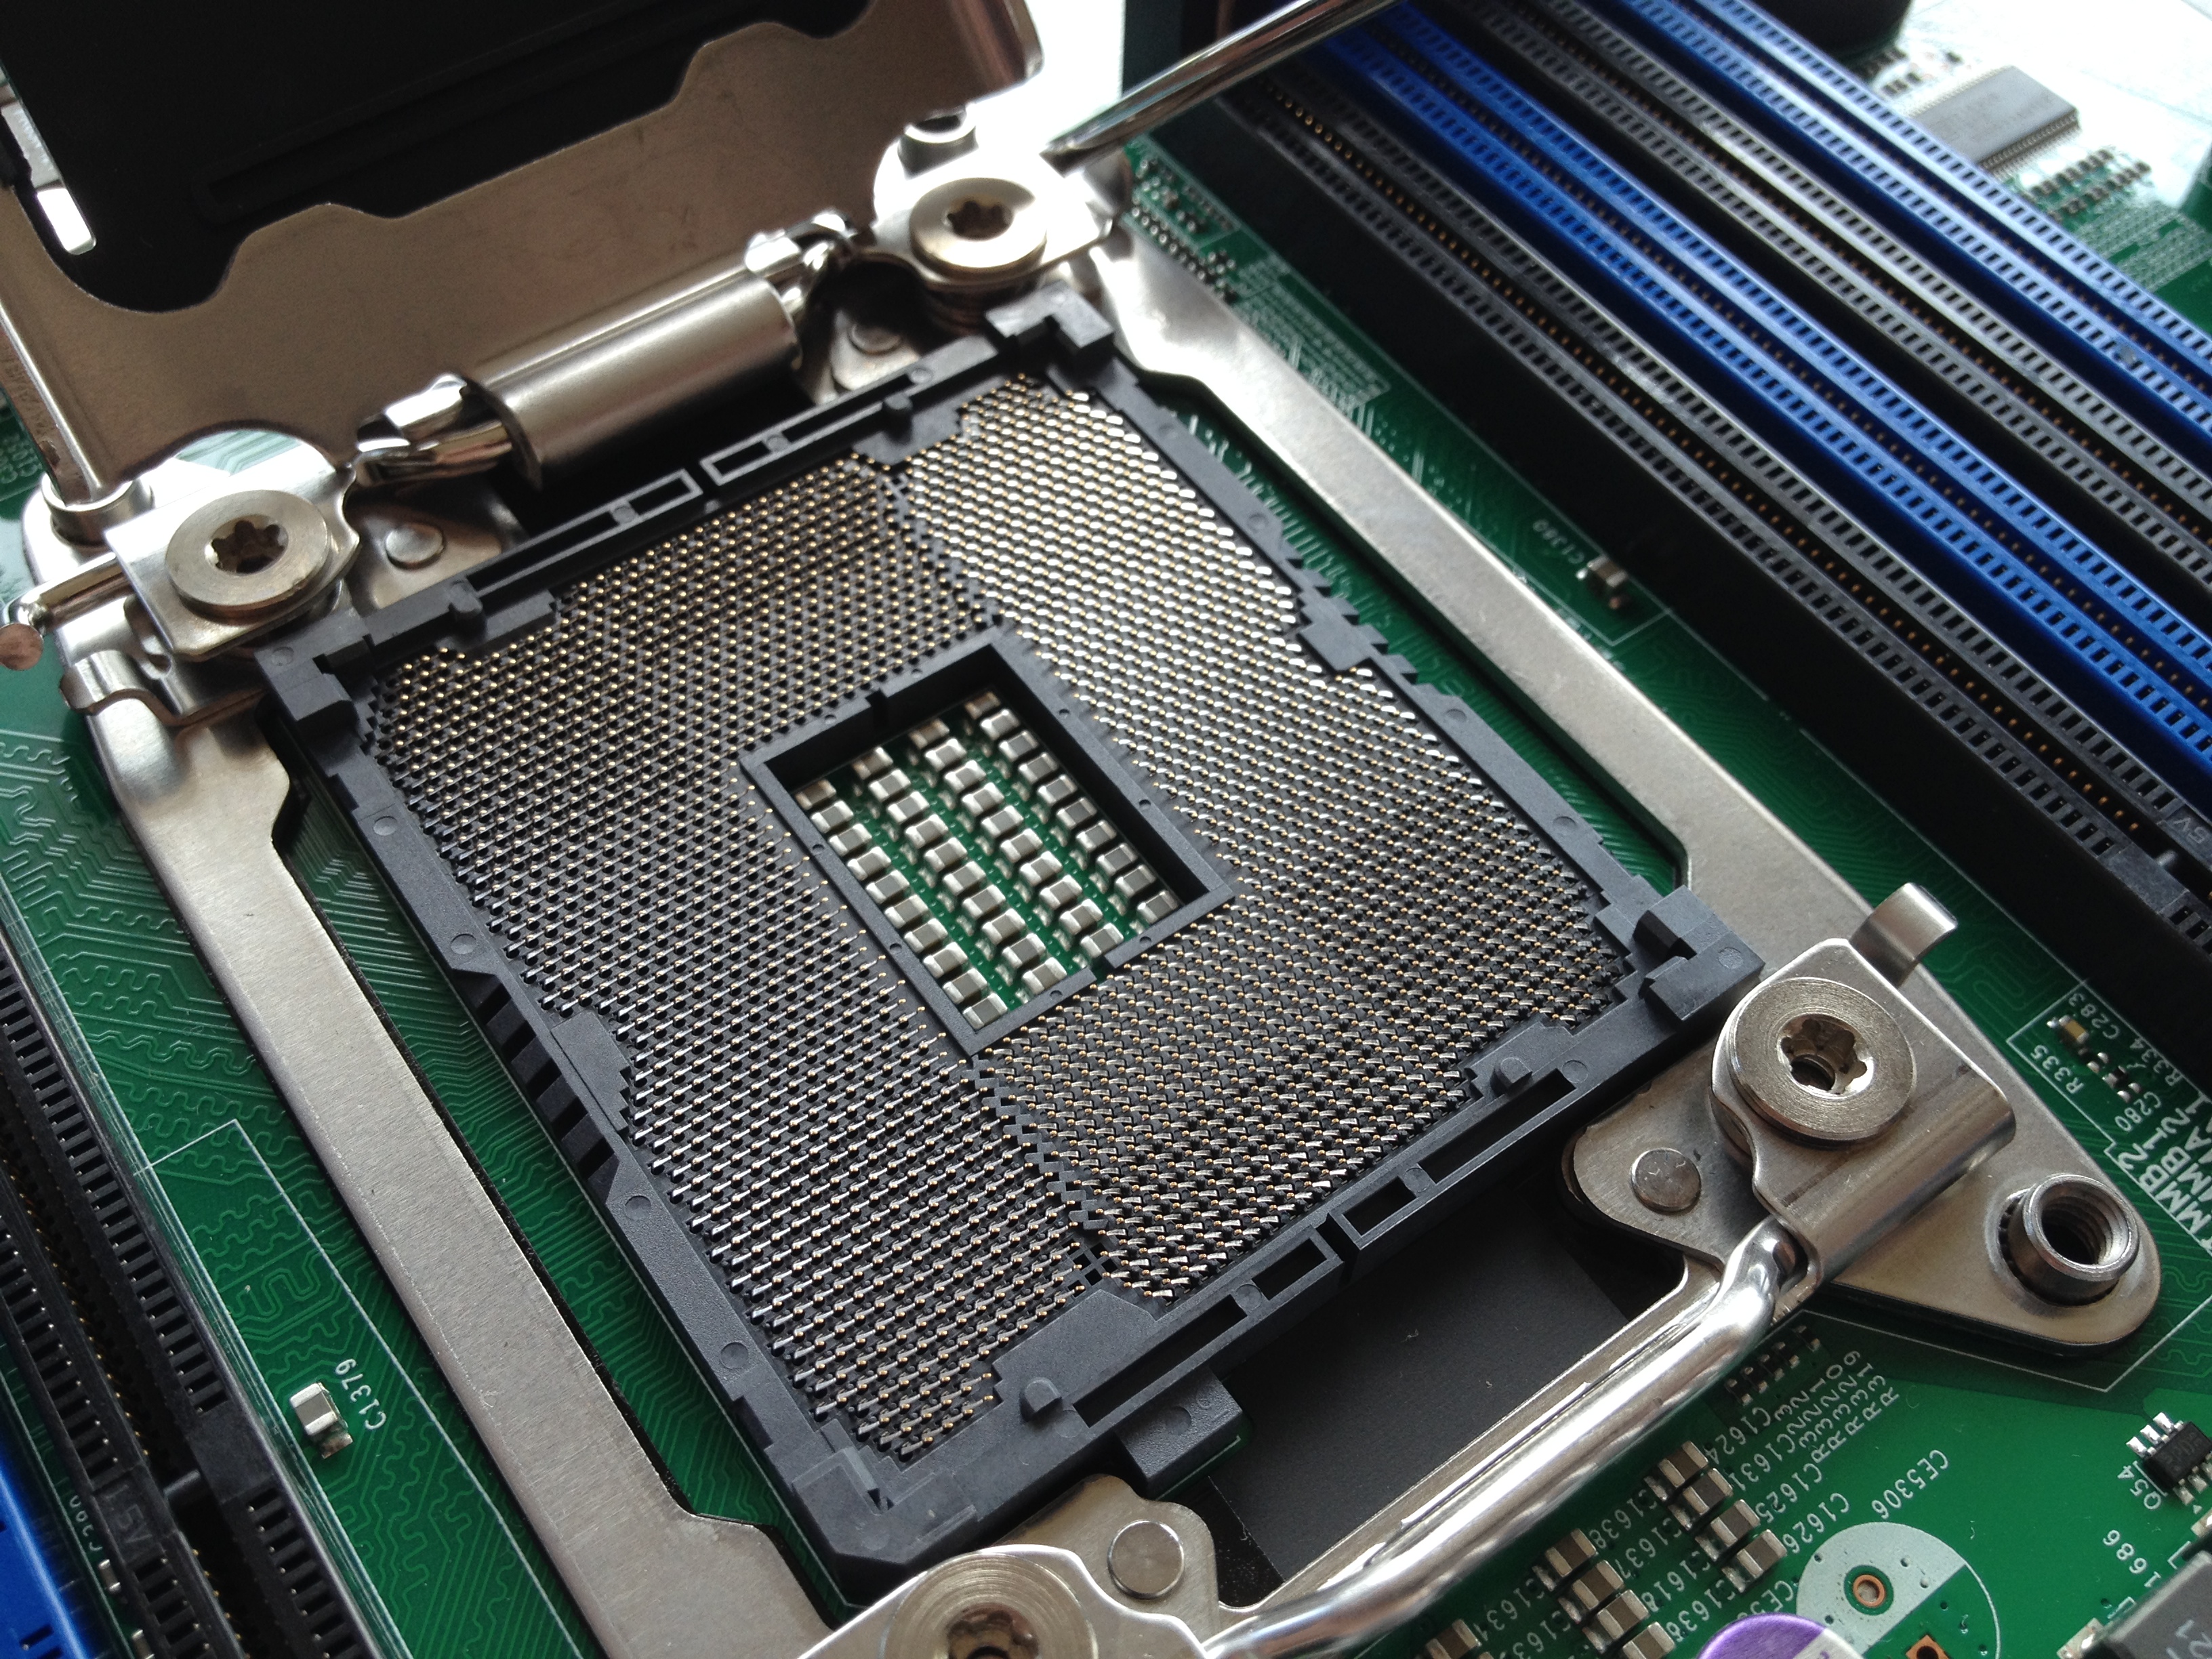
LGA2011 socket close-up. Always check the PINs. for damage
Here is the close up of the Supermicro X9SRH-7TF
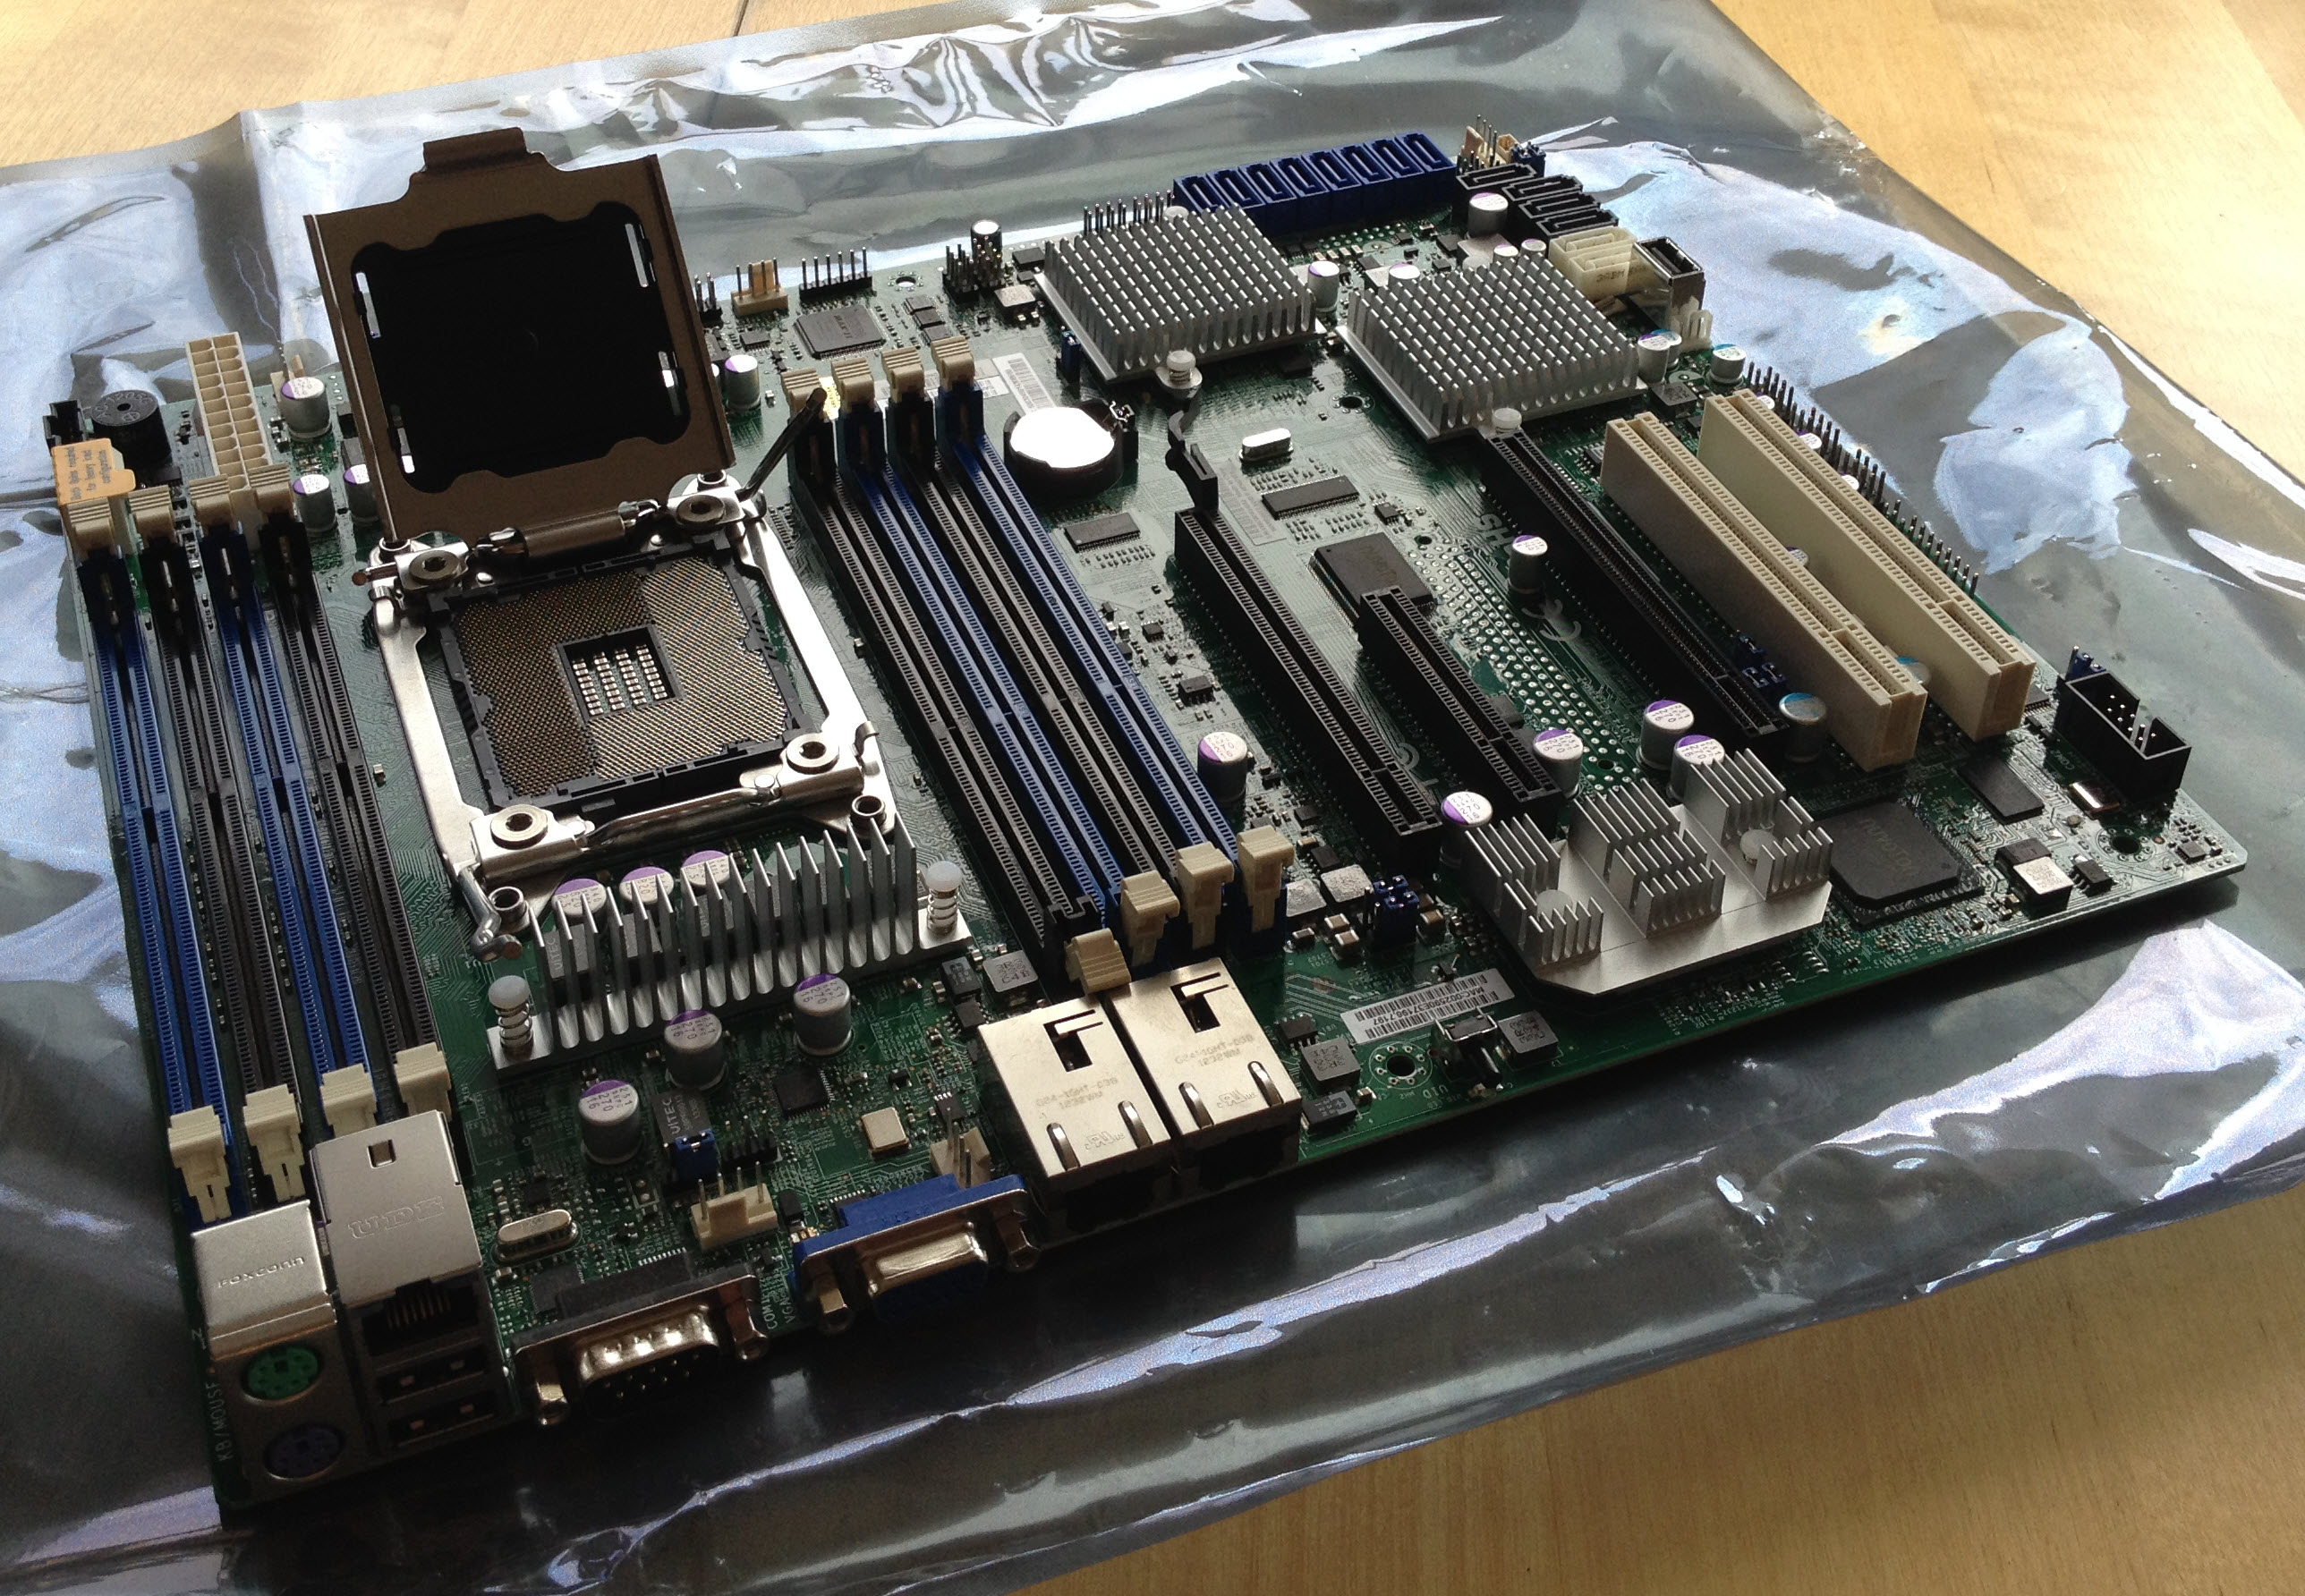
Supermicro X9SRH-7TF
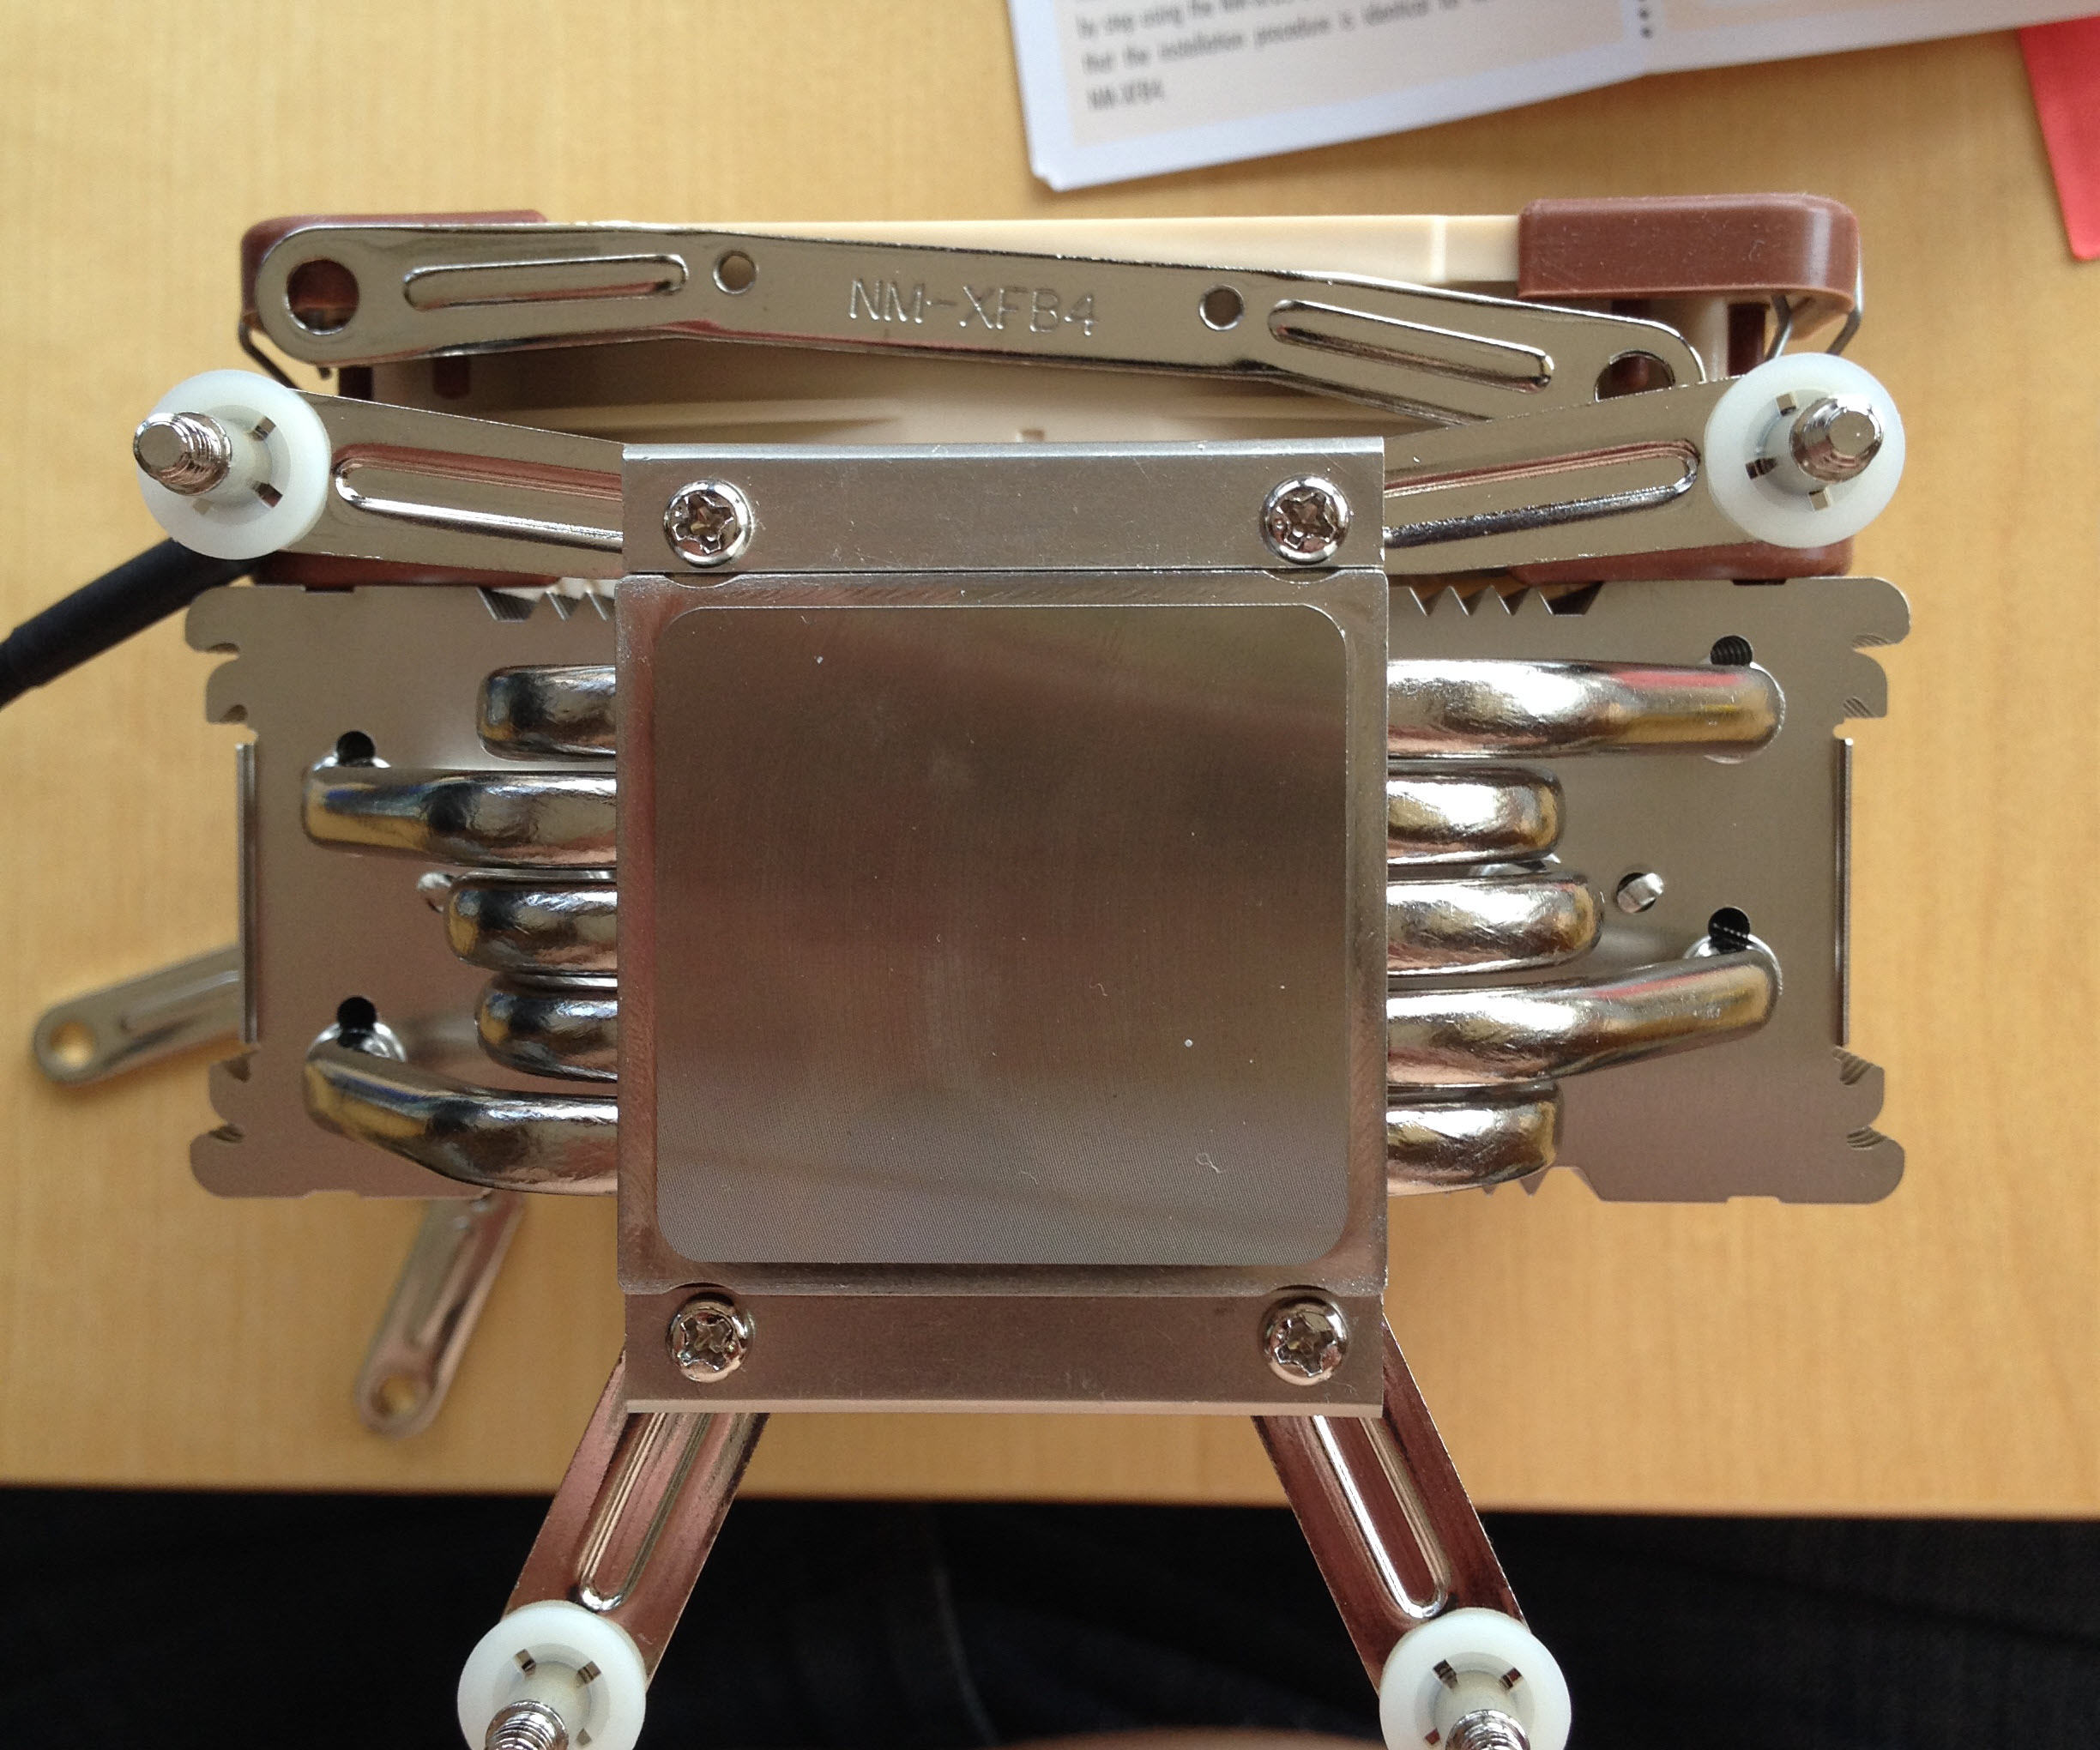
I now always put the CPU on the motherboard, before the motherboard goes in the chassis. Note on the next picture the Narrow ILM socket for the cooling.
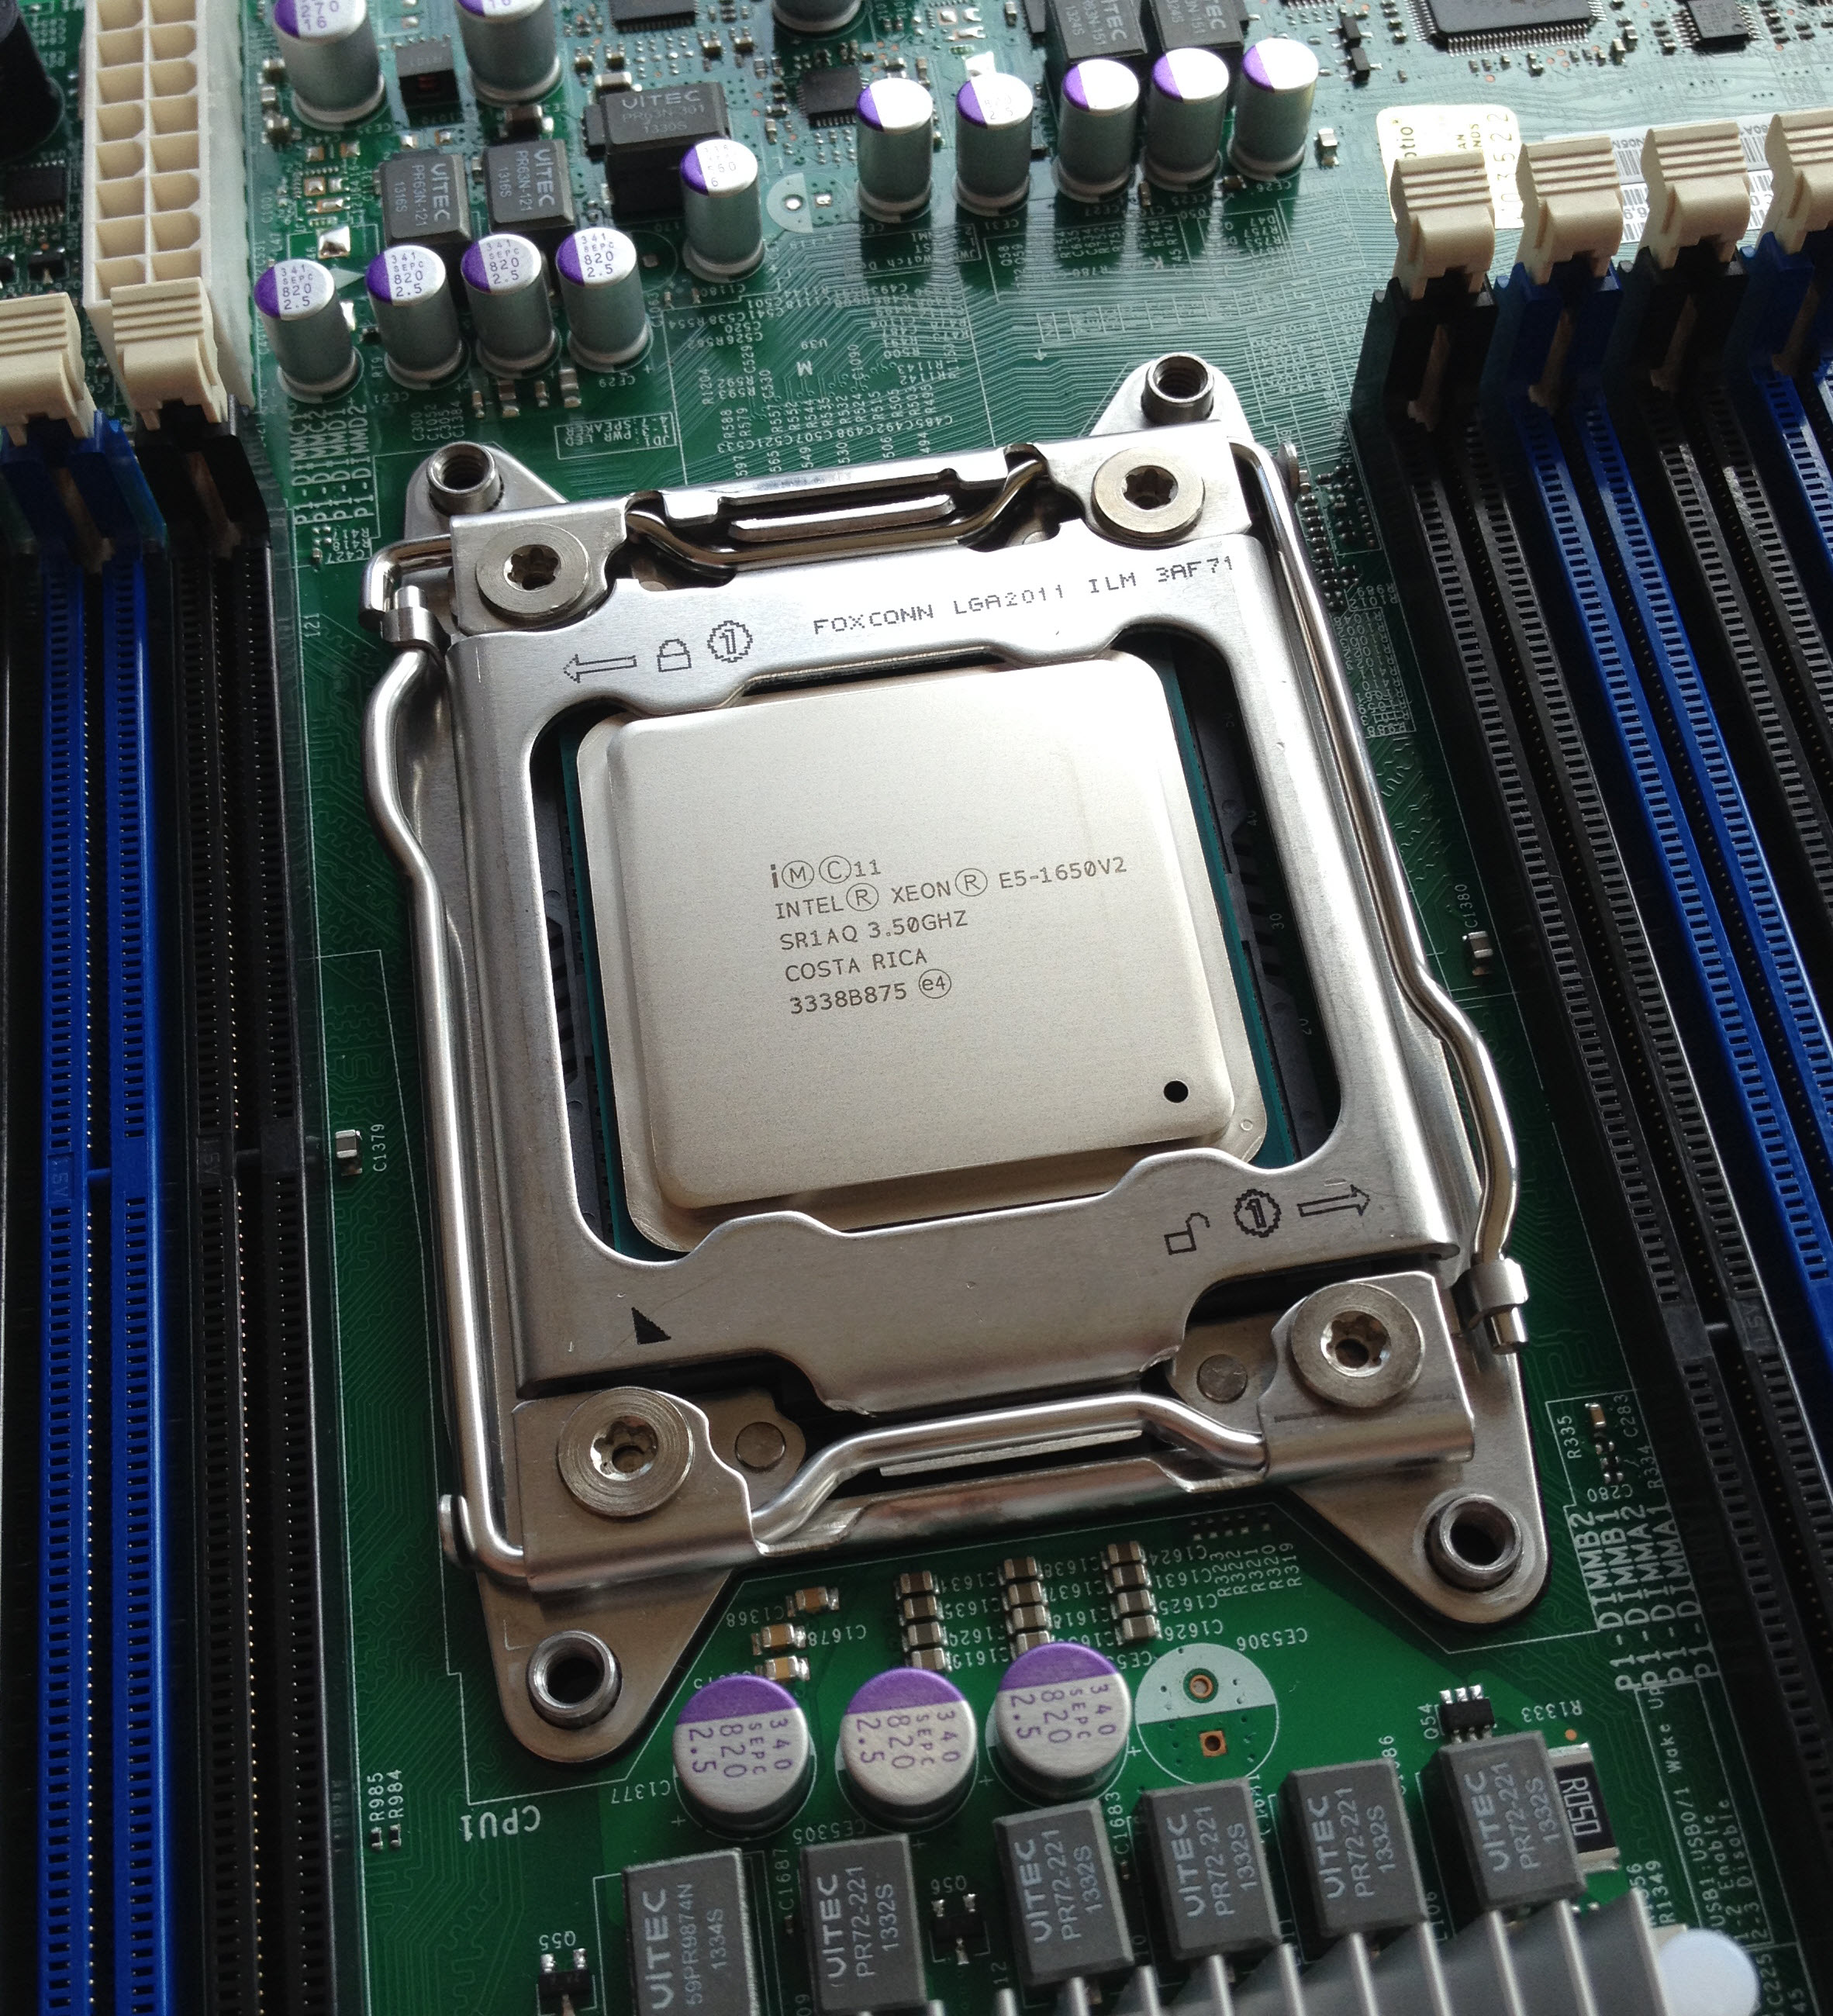
Intel Xeon E5-1650v2 and Narrow ILM
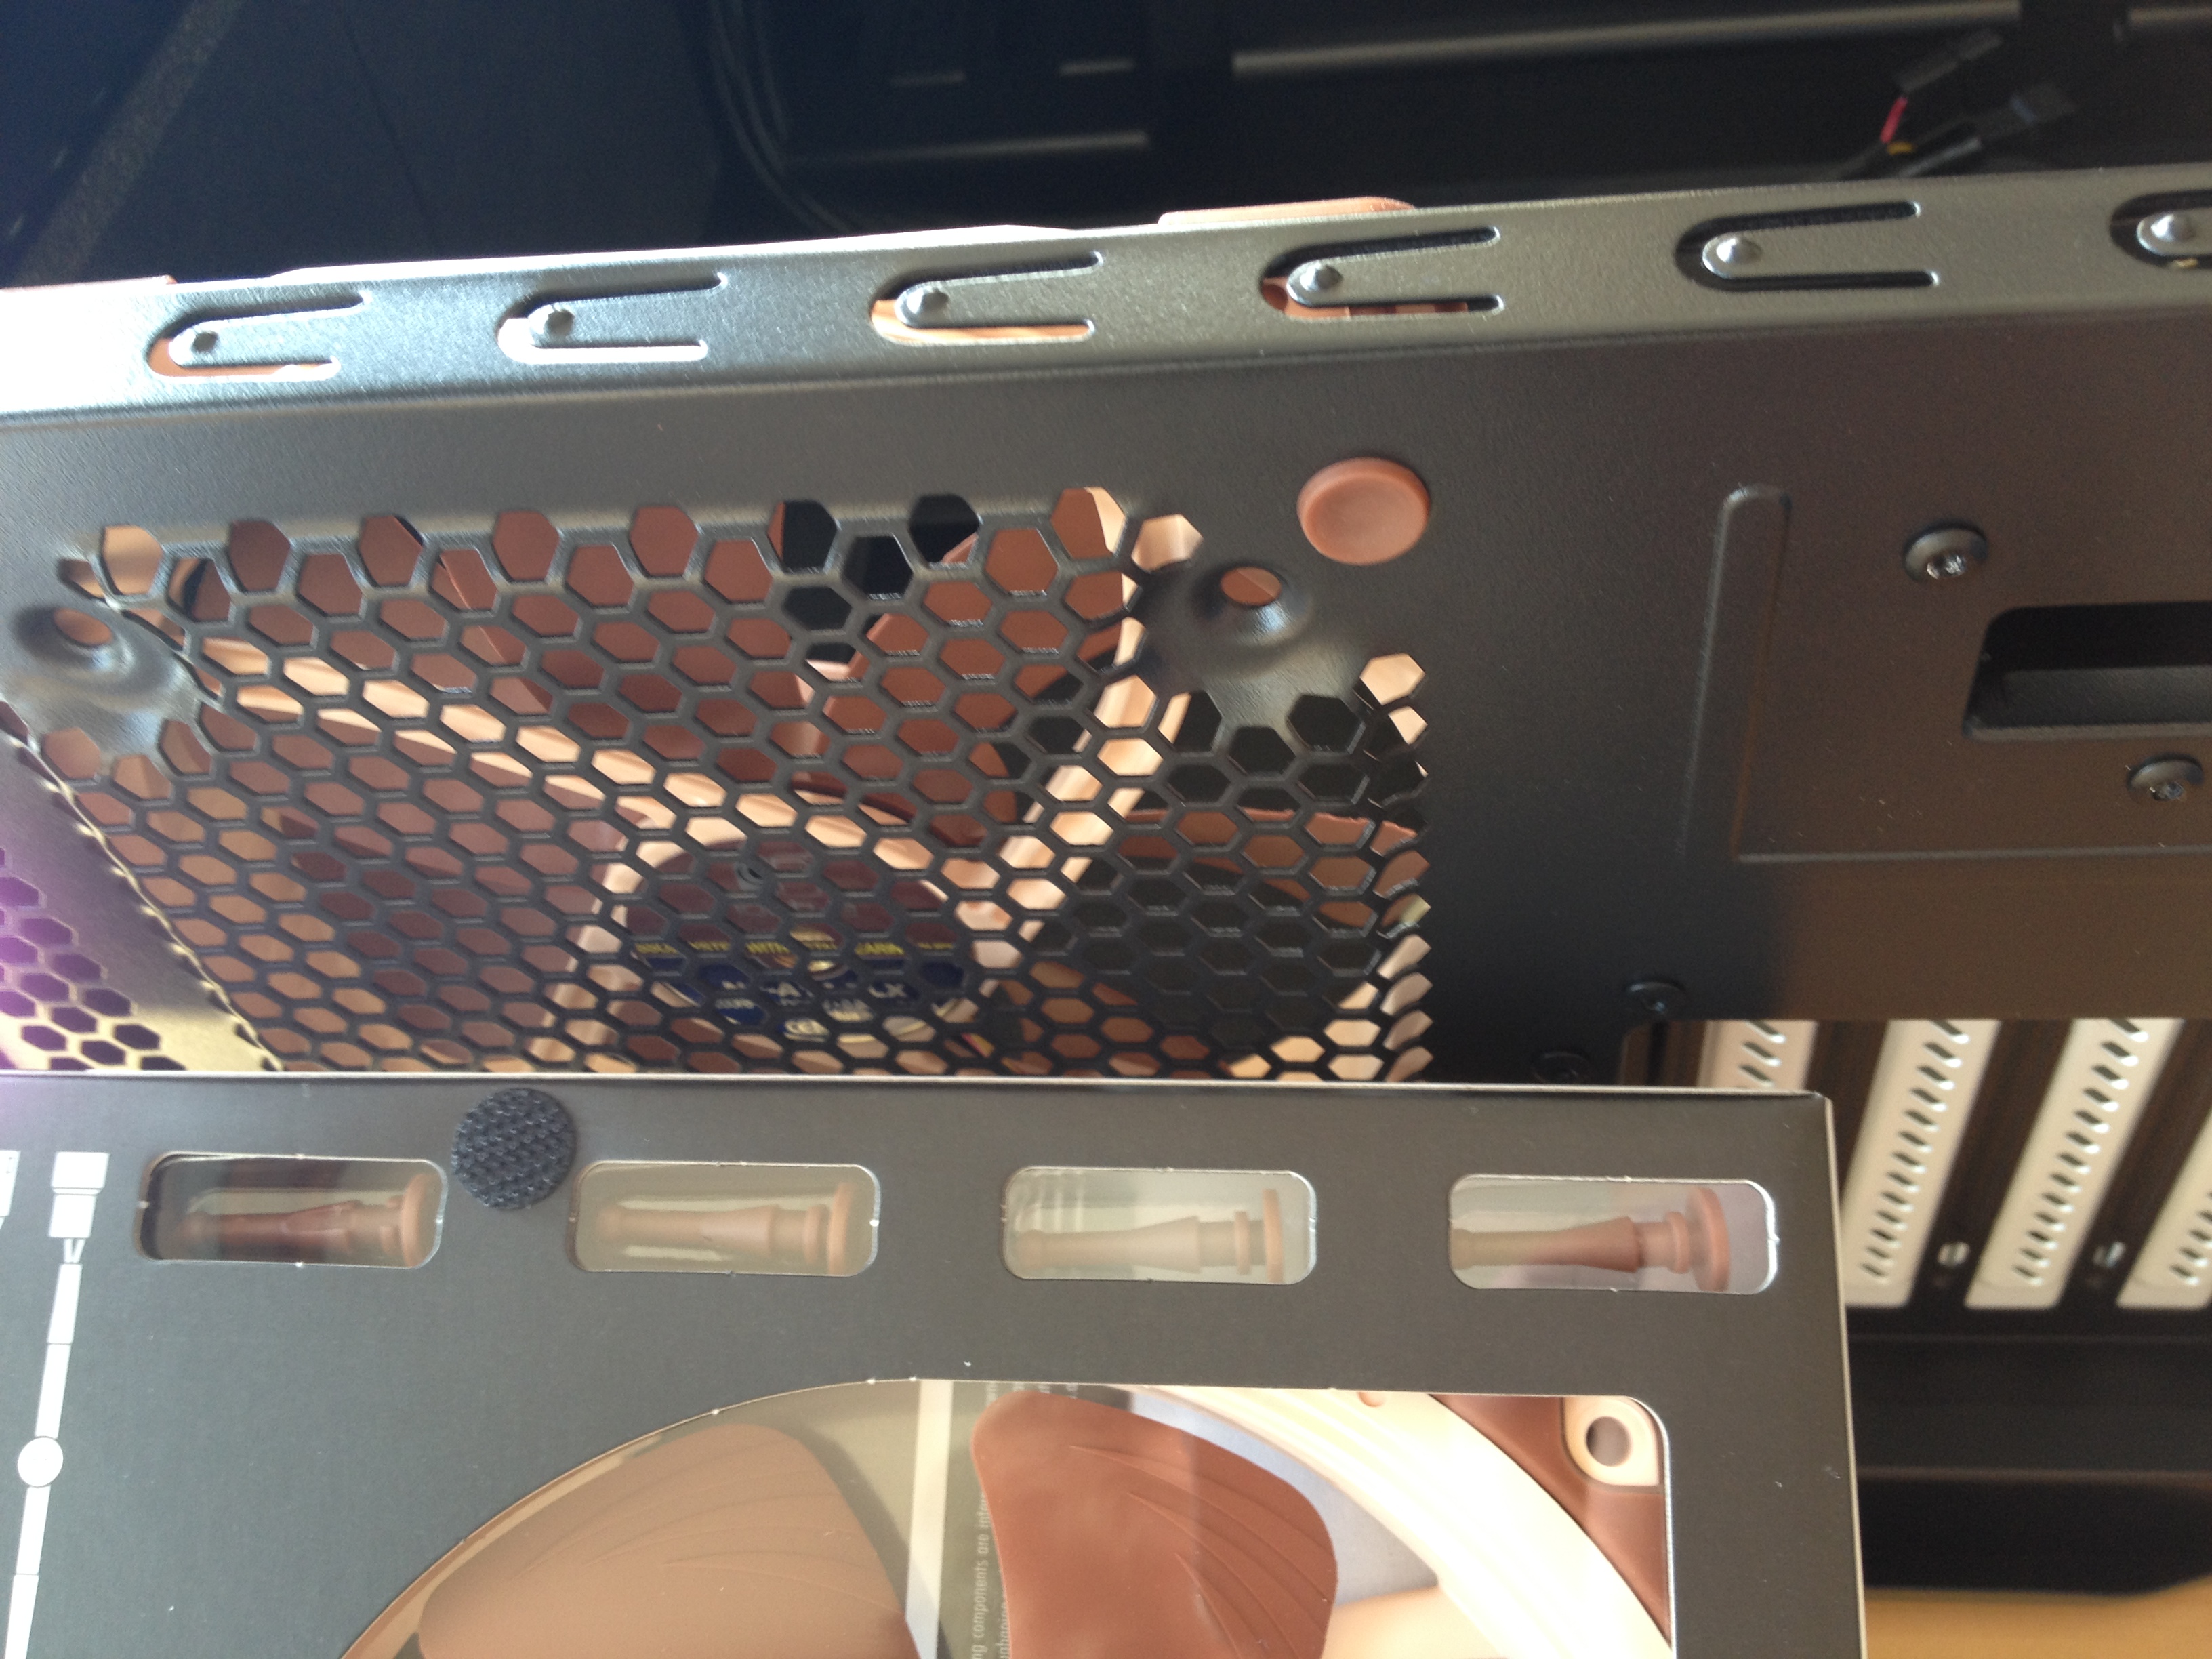
Here is the difference between the Fractal Design Silent Series R2 fan and the Noctua NF-A14 FLX.
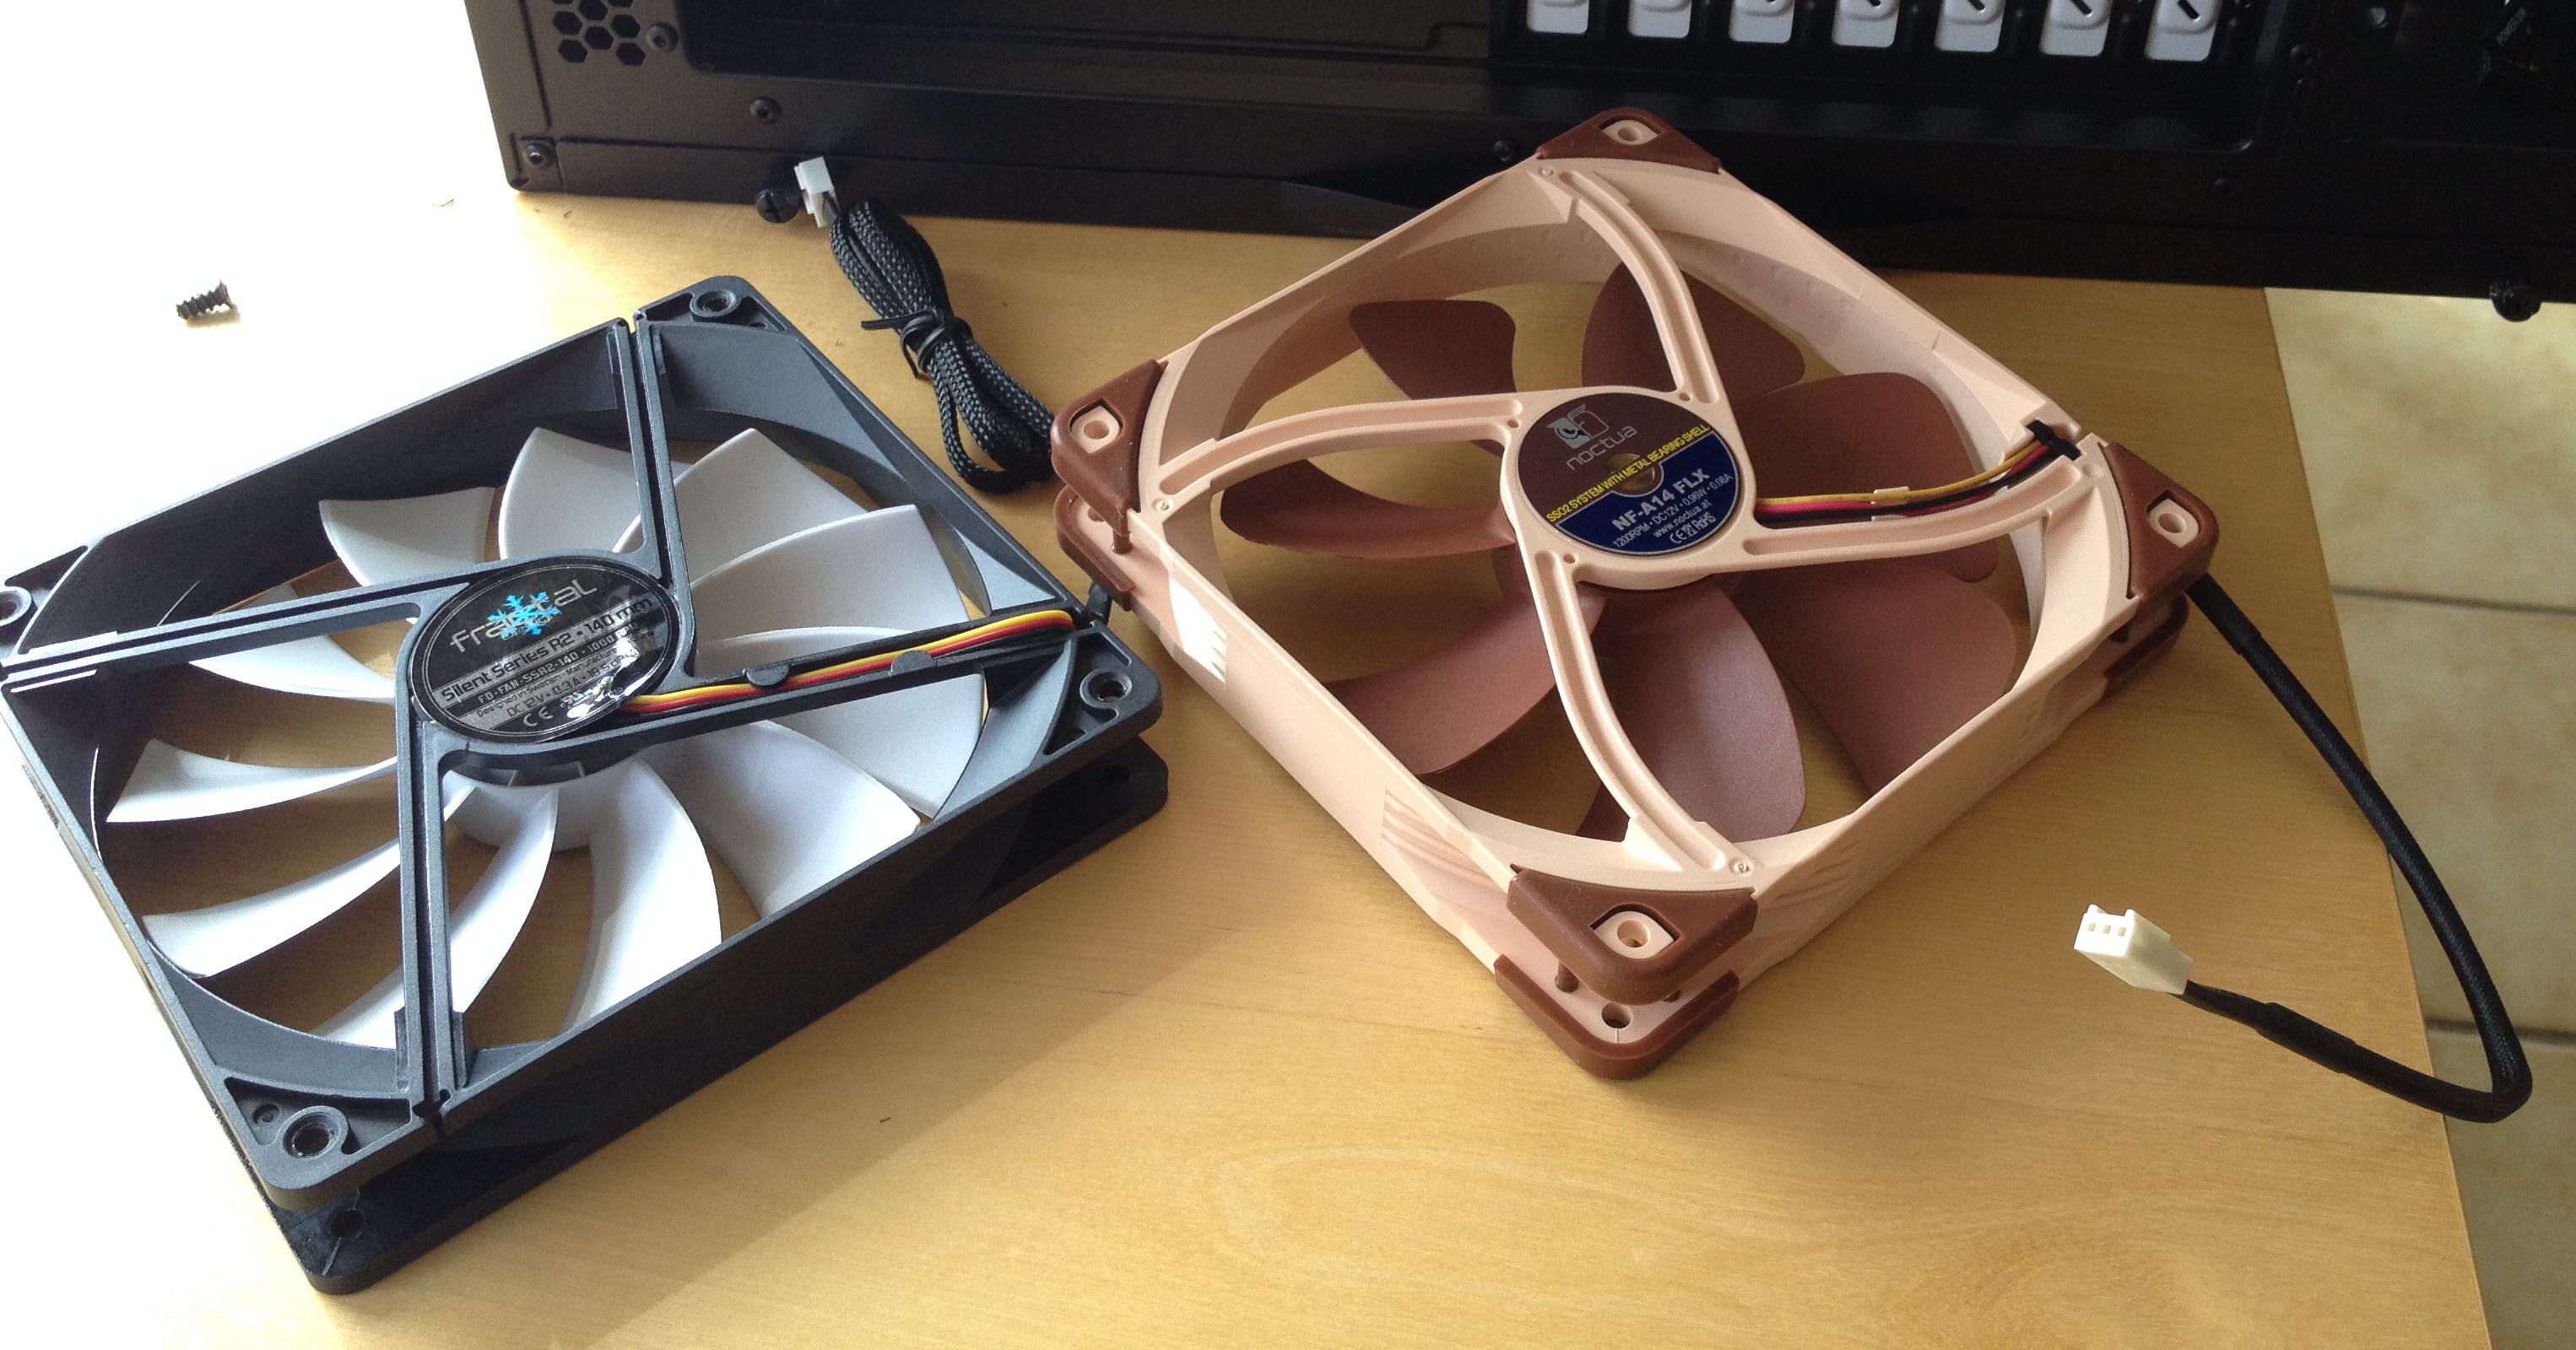
Fractal Design Silent Series R2 & Noctua NF-A14 FLX
What I like in the Noctua NF-A14 FLX are the rubber hold-fasts that replace the screws holding the fan. That is one more option where items in a chassis don’t vibrate and make noise. Also the Noctua NF-A14 FLX runs by default at 1200RPM, but you have two electric Low-Noise Adapters (LNA) that can bring the default speed down to 1000RPM and 800RPM. Less rotations equals less noise.
Noctua NF-A14 FLX Details
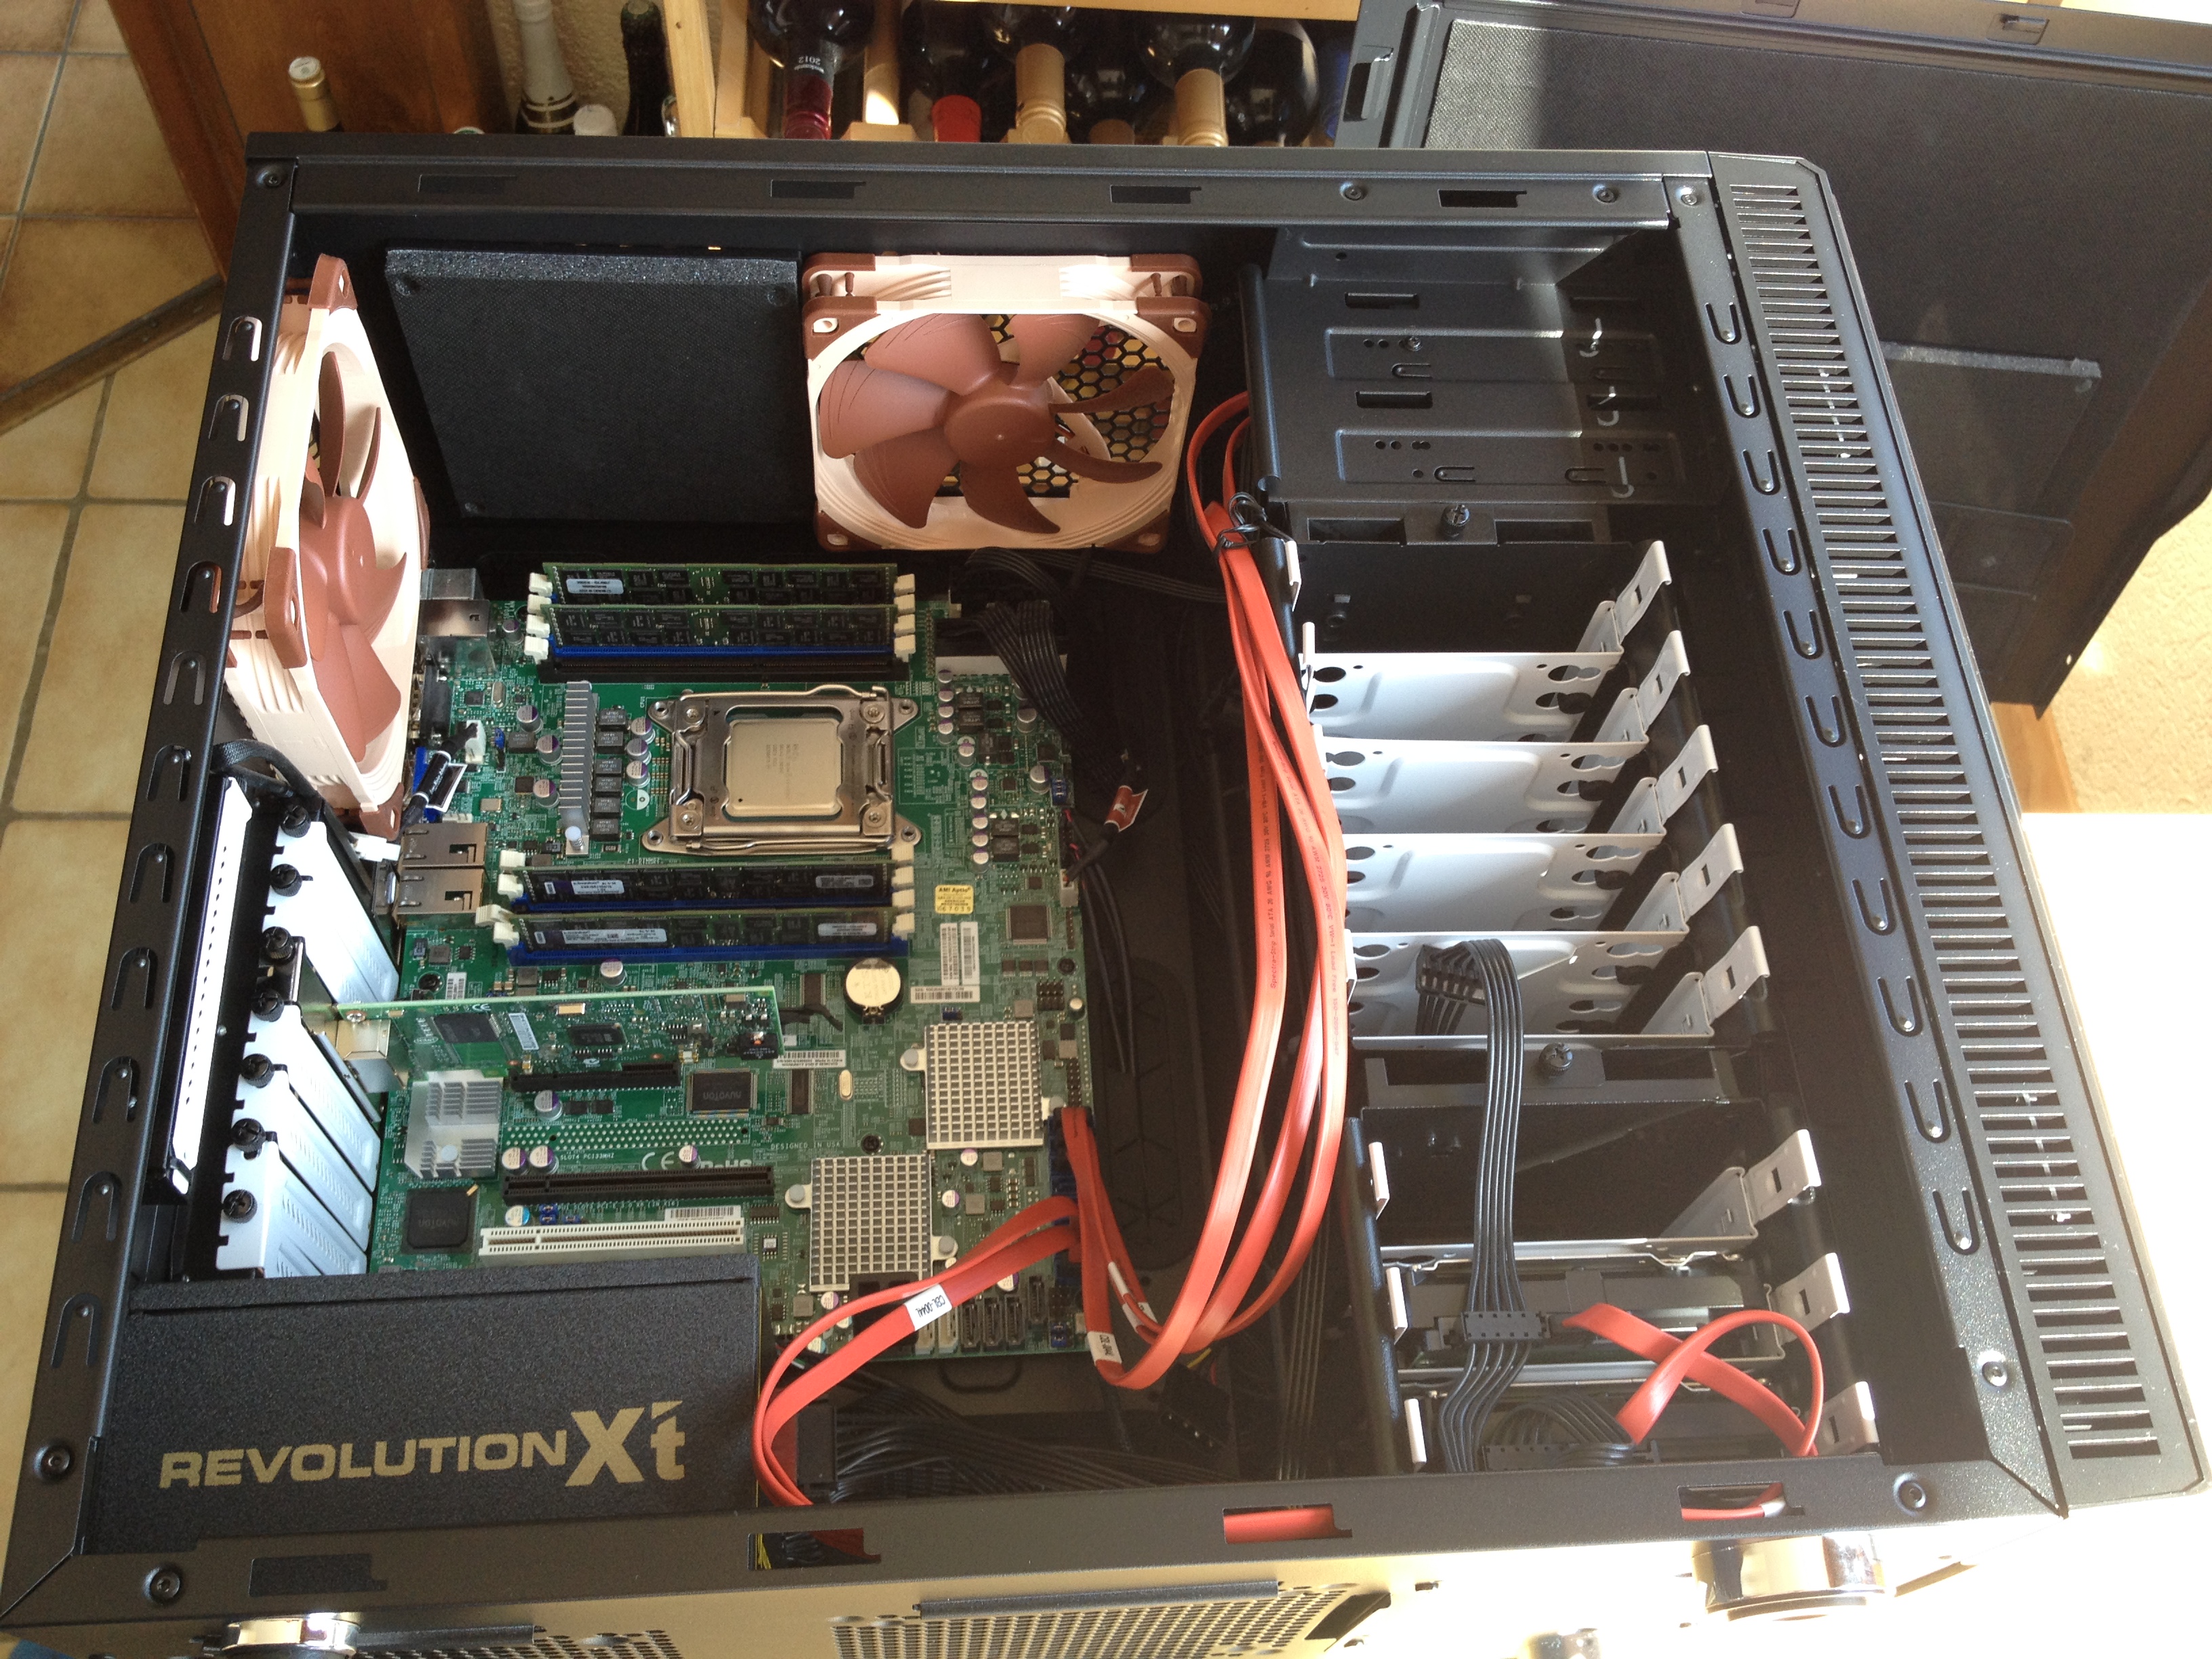
Putting the motherboard in the Chassis.
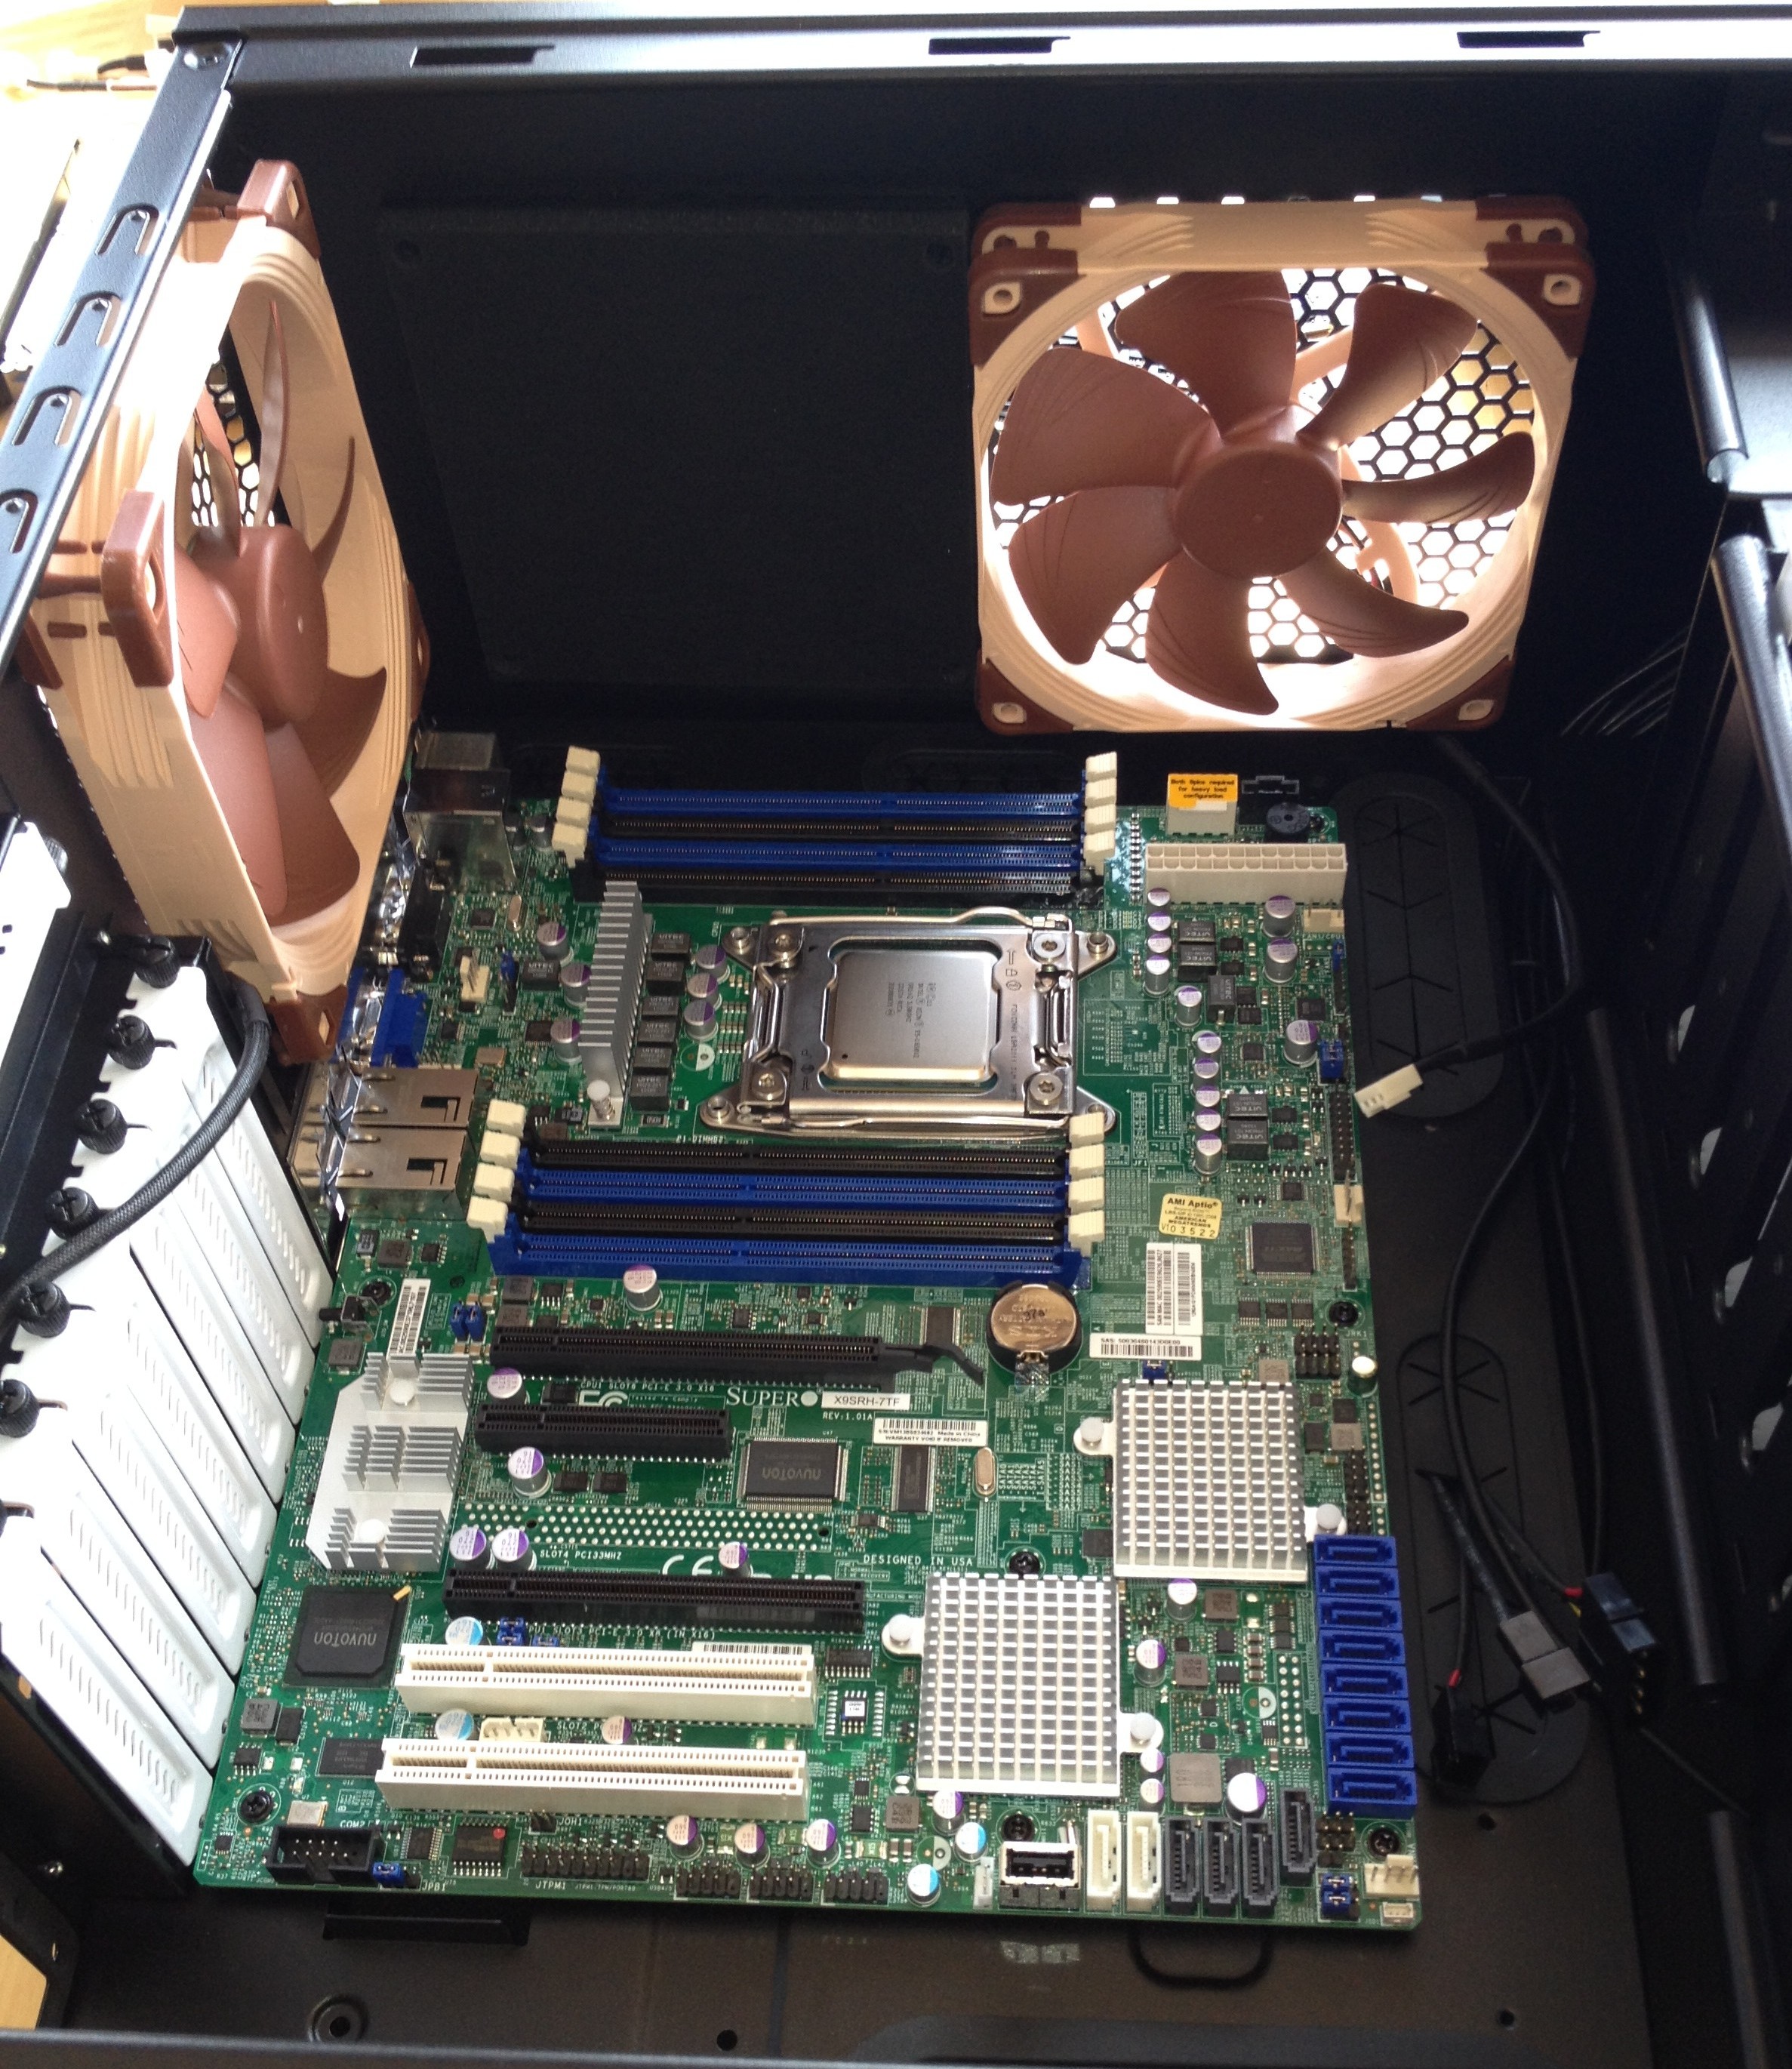
Now we need to modify the holding brackets for the CPU Cooler. The Noctua NH-U12DX i4 comes with Narrow ILM that can replace the ones on it. In the picture below, the top one is the Narrow ILM holder, while the bottom one still needs to be replaced.
And a close up of everything installed in the Chassis.
To hold the SSD in the chassis, I’m using an Icy Dock MB996SP-6SB to hold multiple SSD in a single 5.25″ frontal slot. As SSD don’t heat up like 2.5″ HDD, you can select to cut the electricity to the FAN.
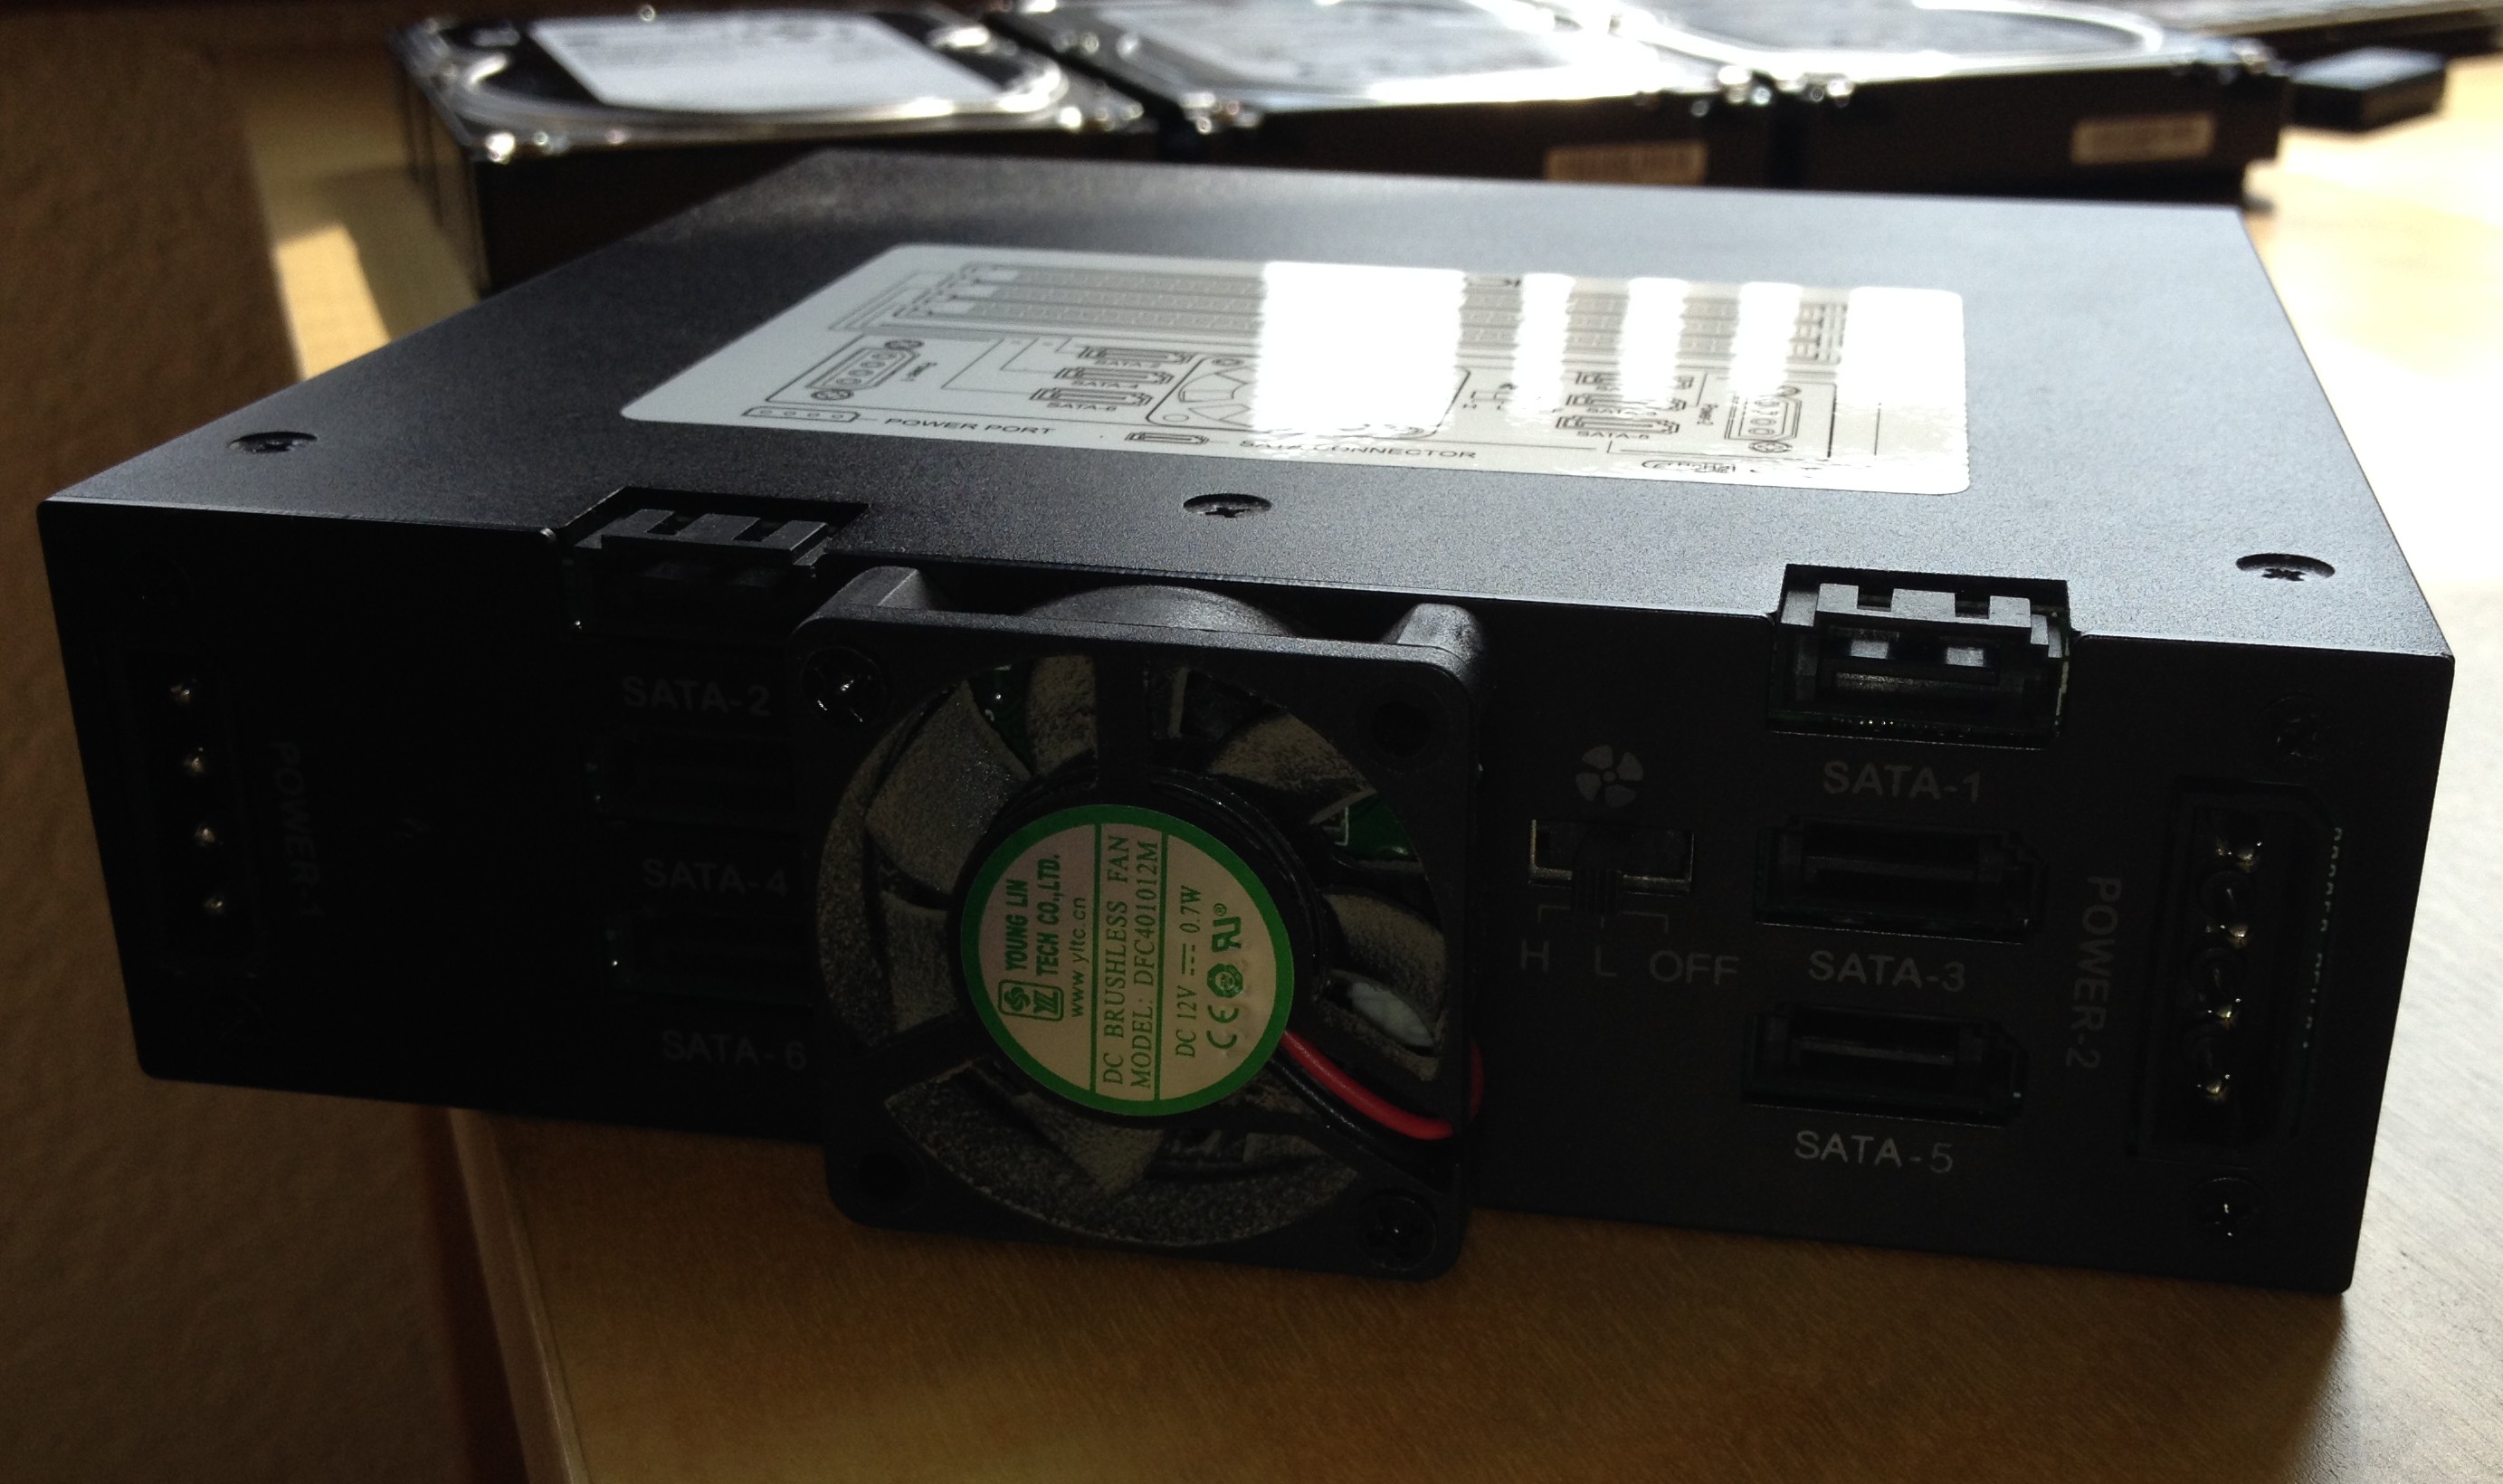
This Icy Dock MB996SP-6SB gives a nice front look to the chassis.
How does it look inside… okay, honest I have tied up the sata cables since my building process.
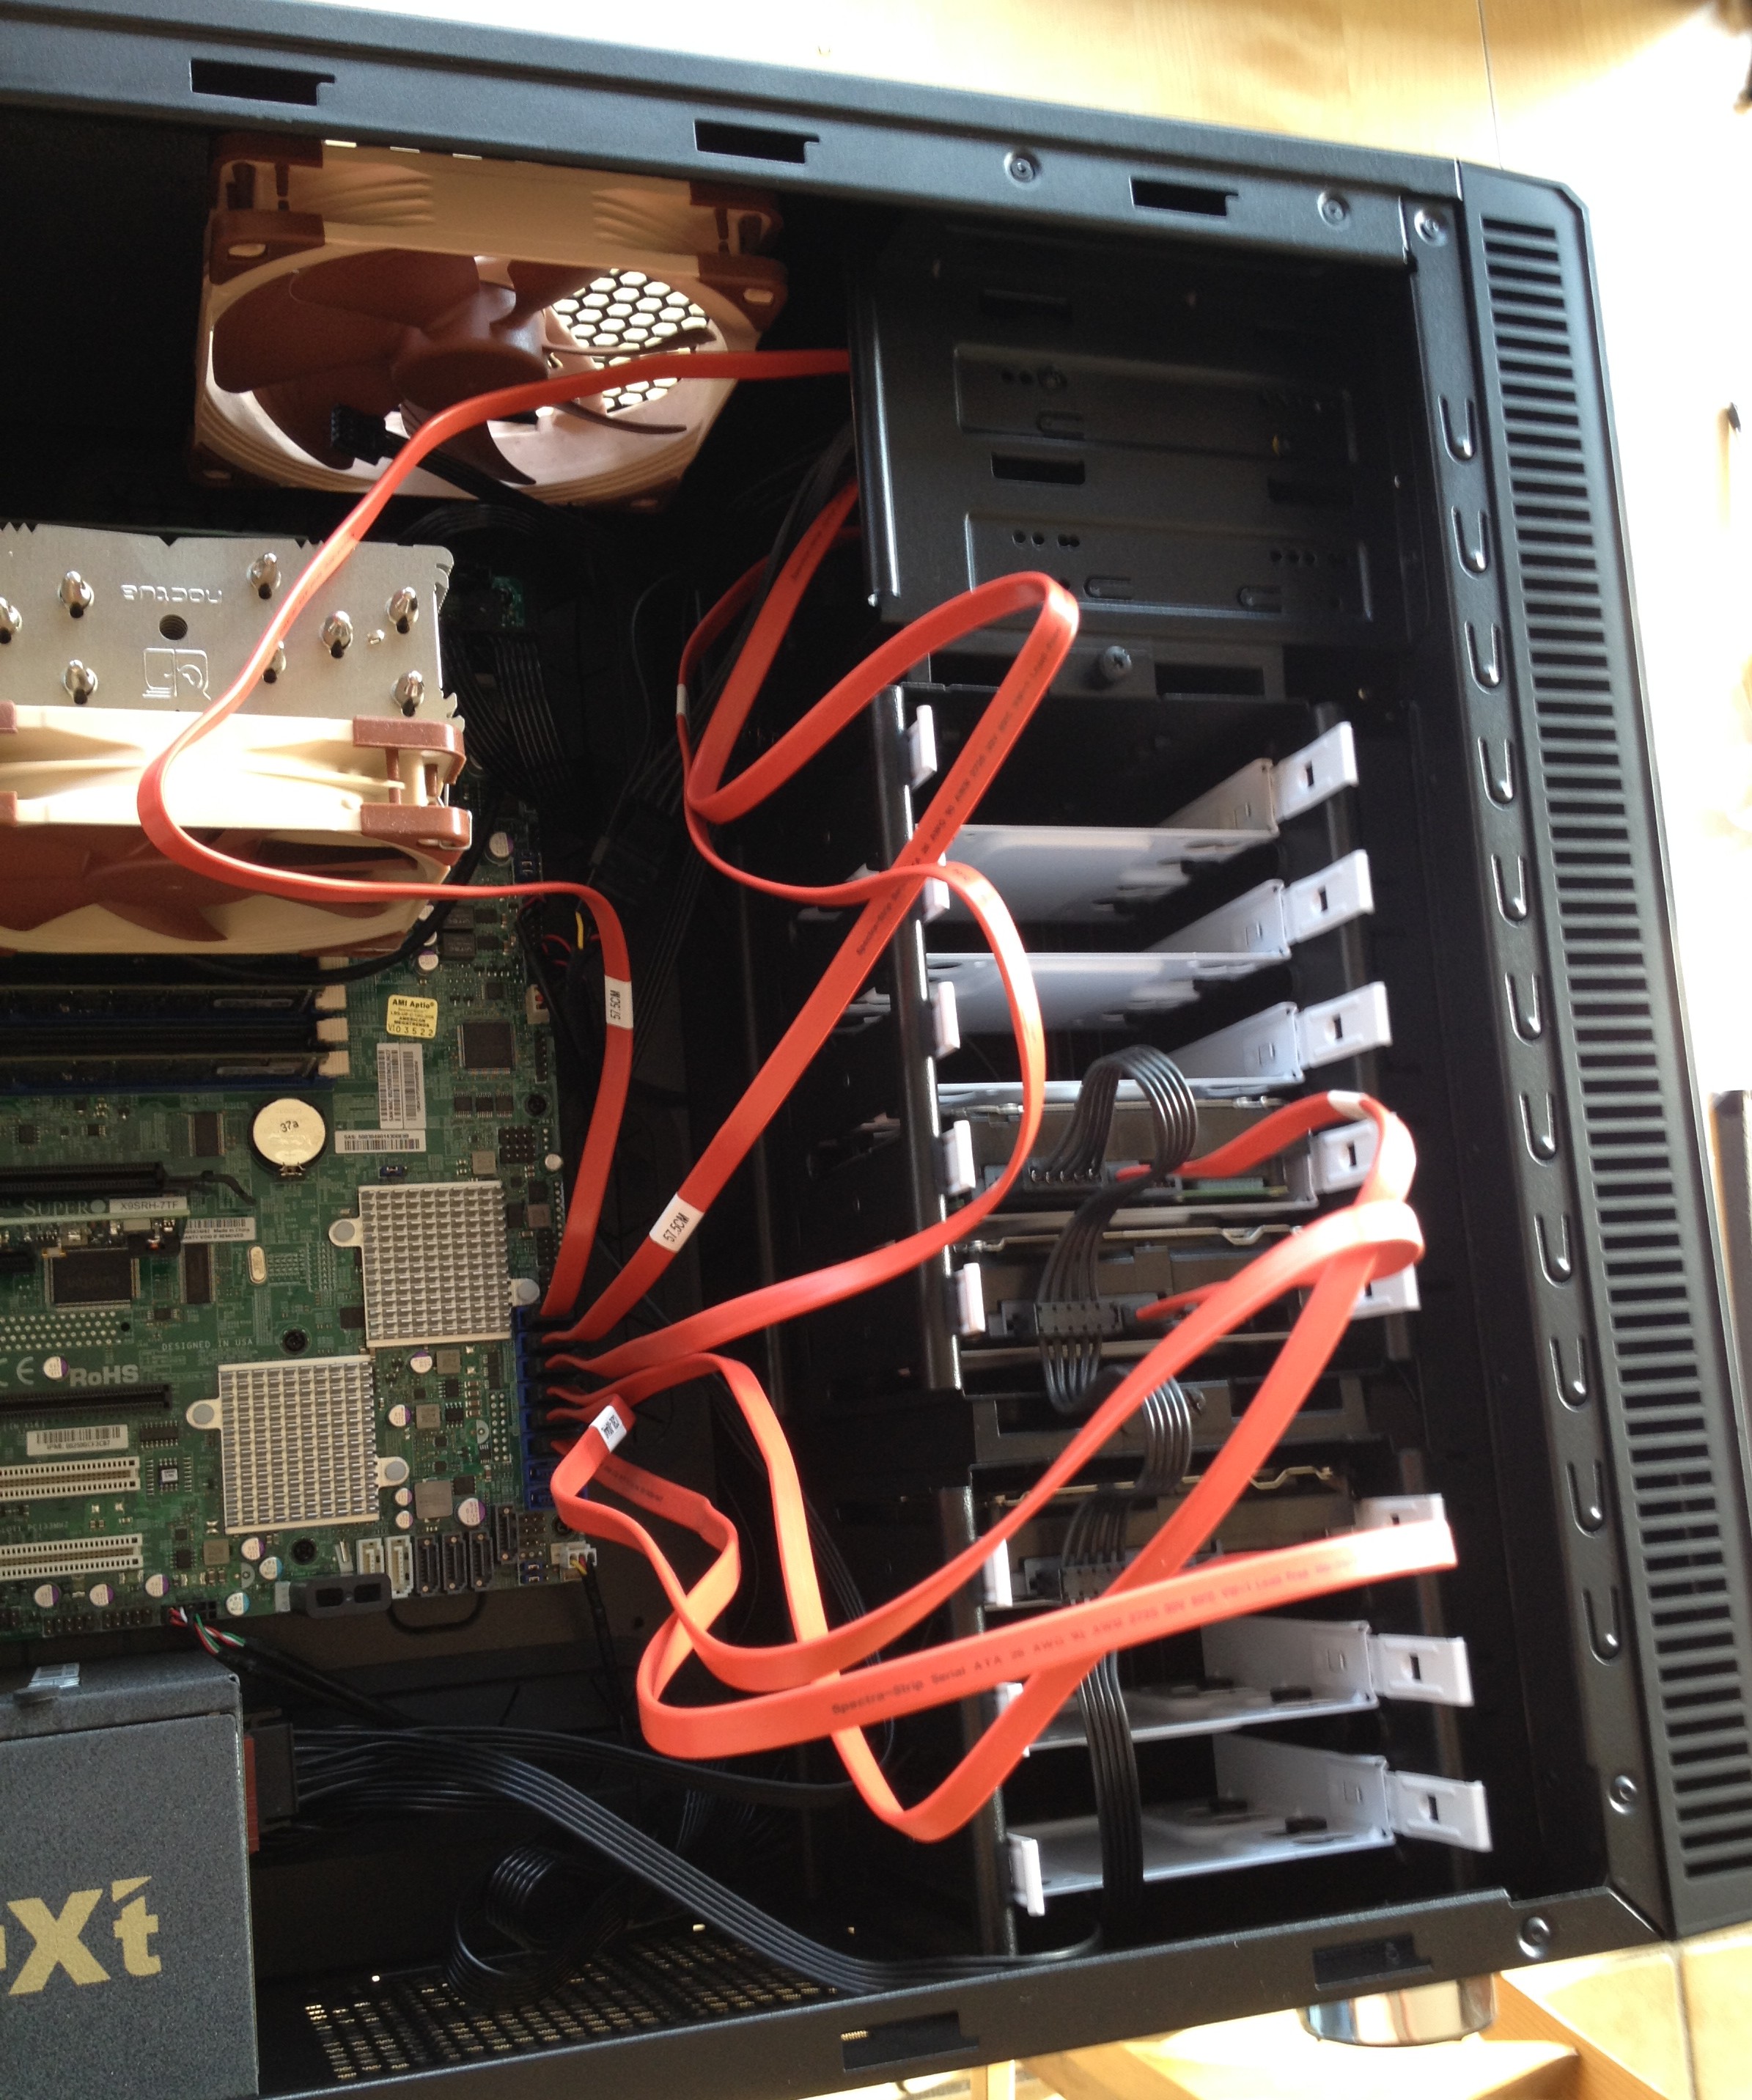
Here is the picture of my 2nd vSphere host during building. See the cabling is done better here.
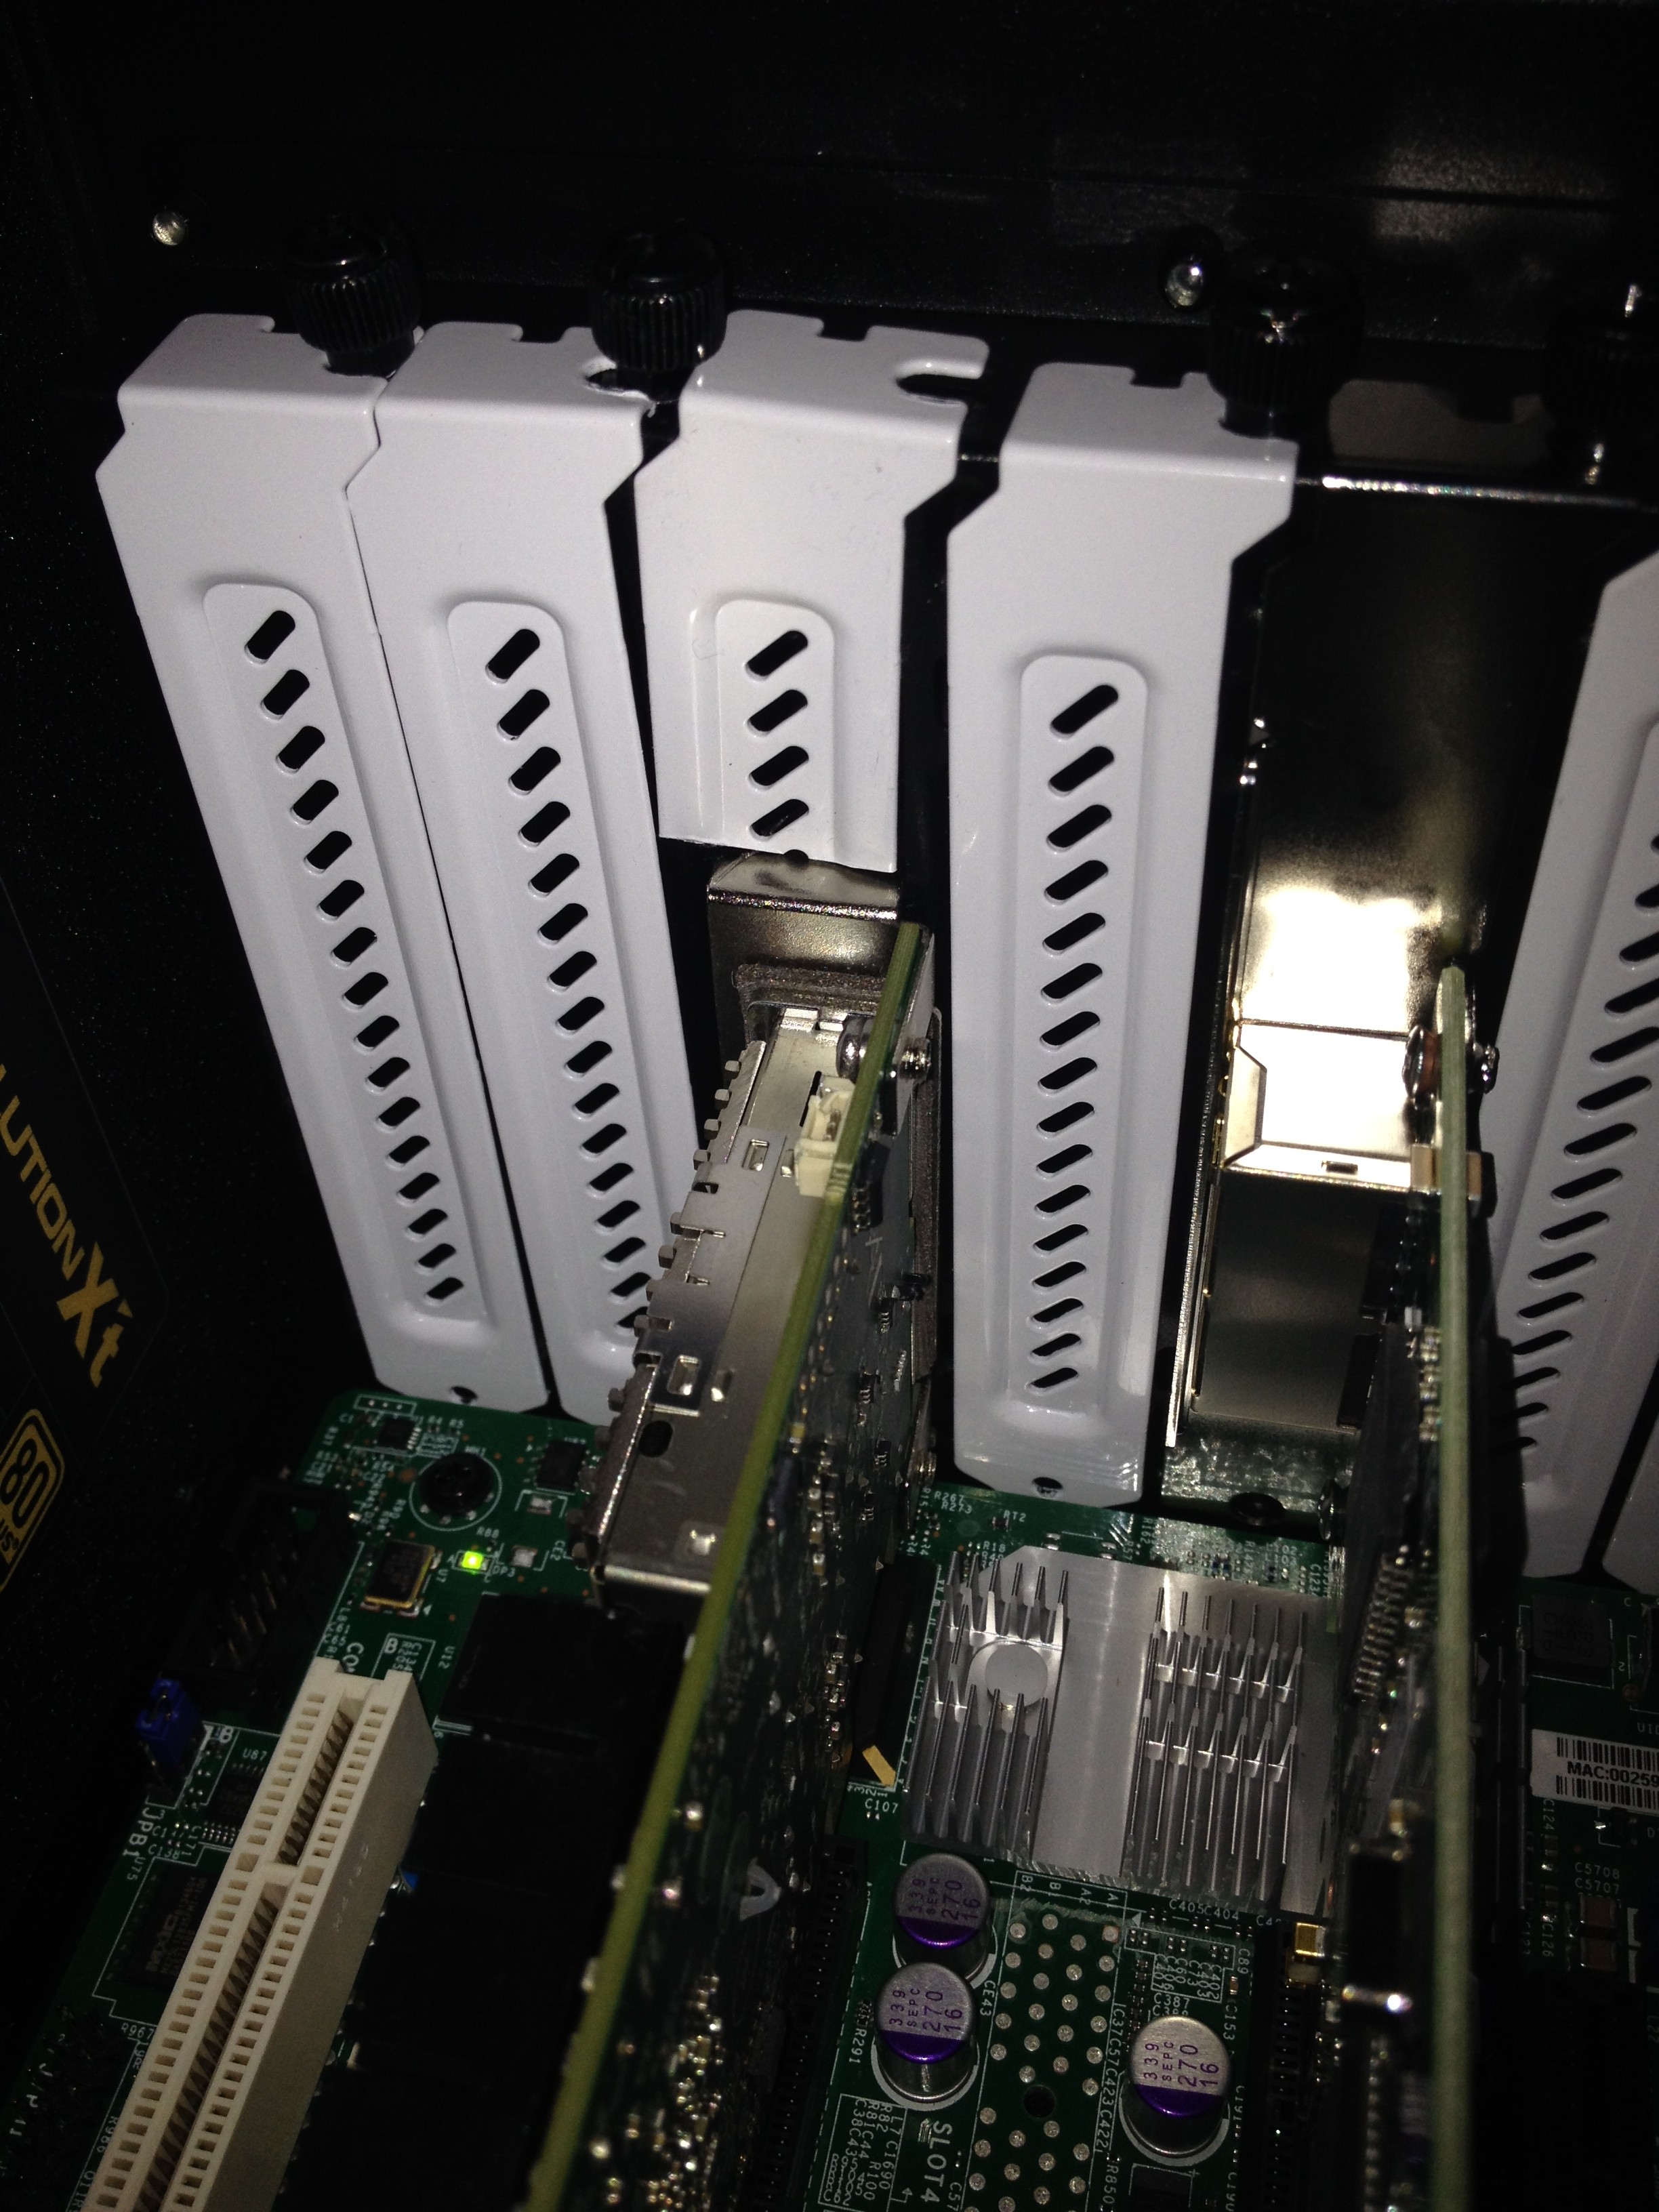
The two Mellanox ConnectX-3 VPI 40/56Gbps cards I have where half-height adapters. So I just to adapt a little bit the holders so that the 40Gbps NIC where firmly secured in the chassis.
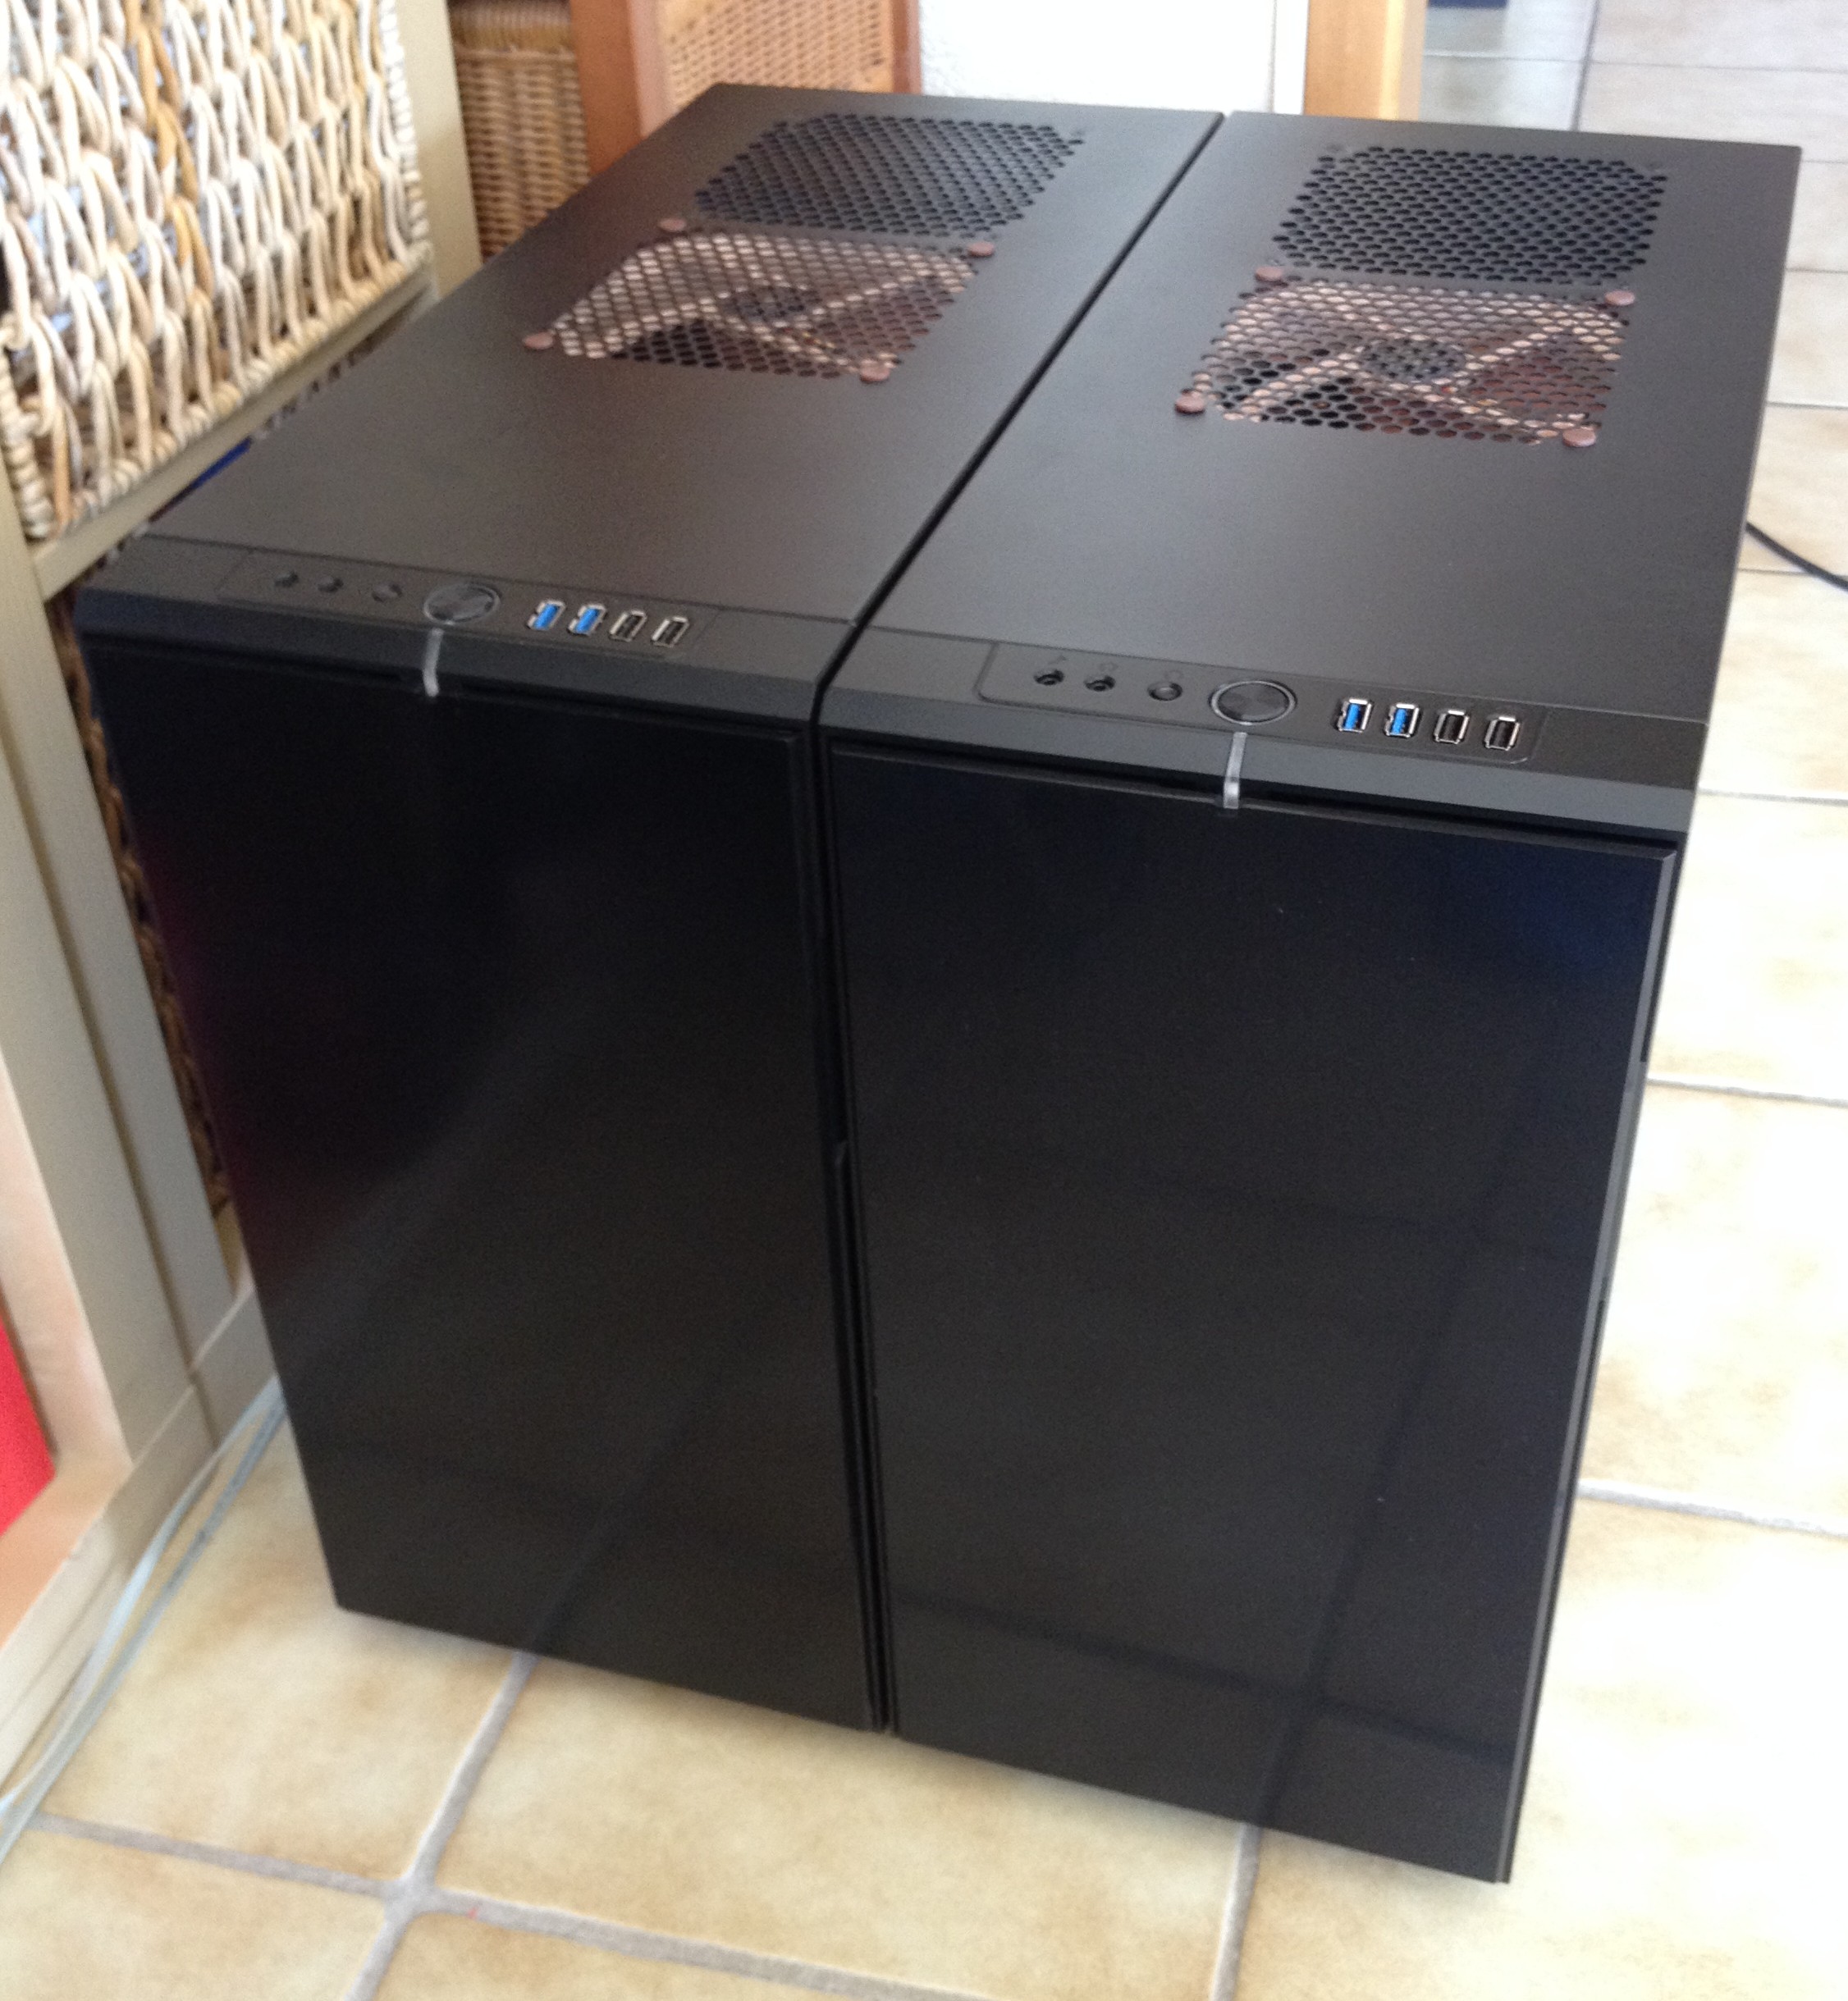
Here is the Homelab 2014 after the first build.
At the end of August 2014, I got a new Core network switch to expand the Homelab. The Cisco SG500XG-8F8T, which is a 16x Port 10Gb Ethernet. Eight ports are in RJ45 format, and eight are in SFP+ format, and one for Management.
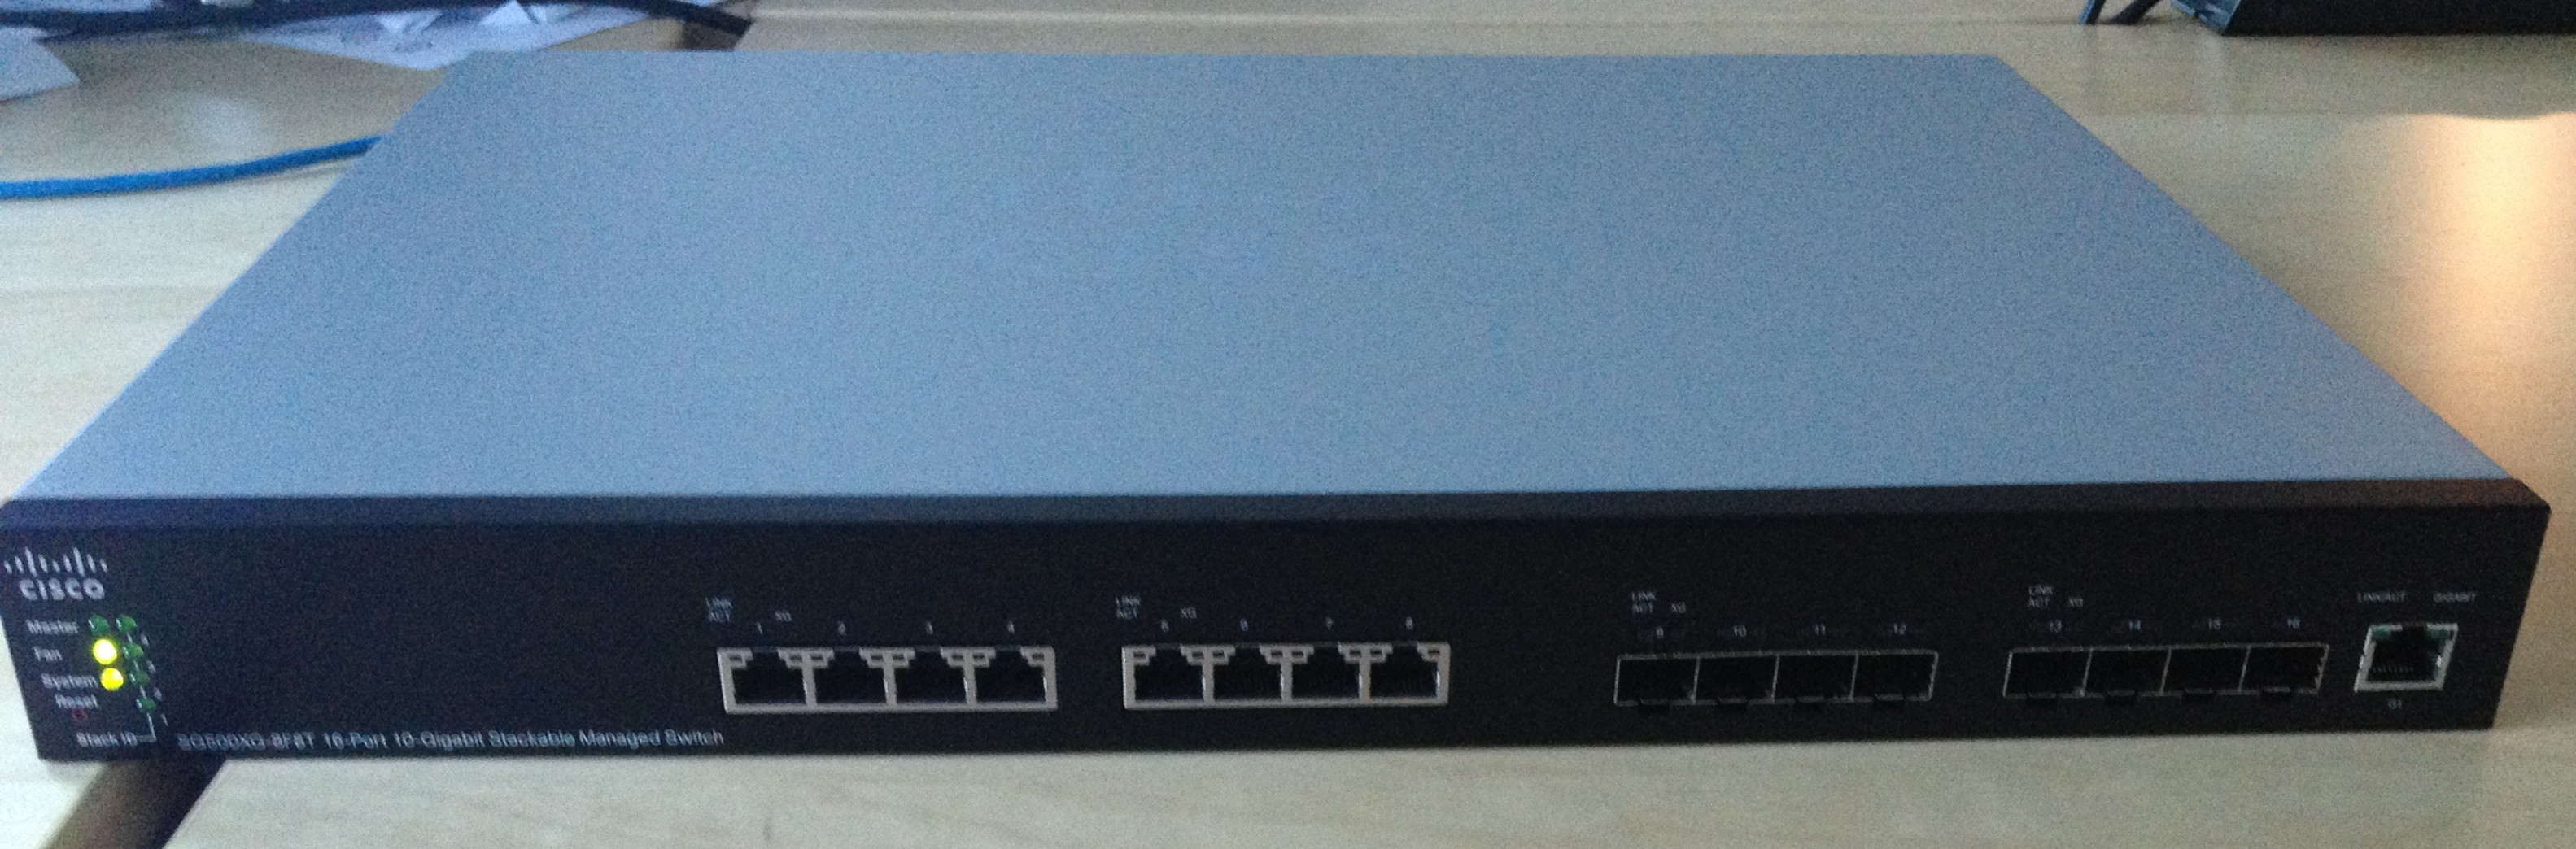
Cisco SG500XG-8G8T
I build a third vSphere host using the same config as the first ones. And here is the current 2014 Homelab.
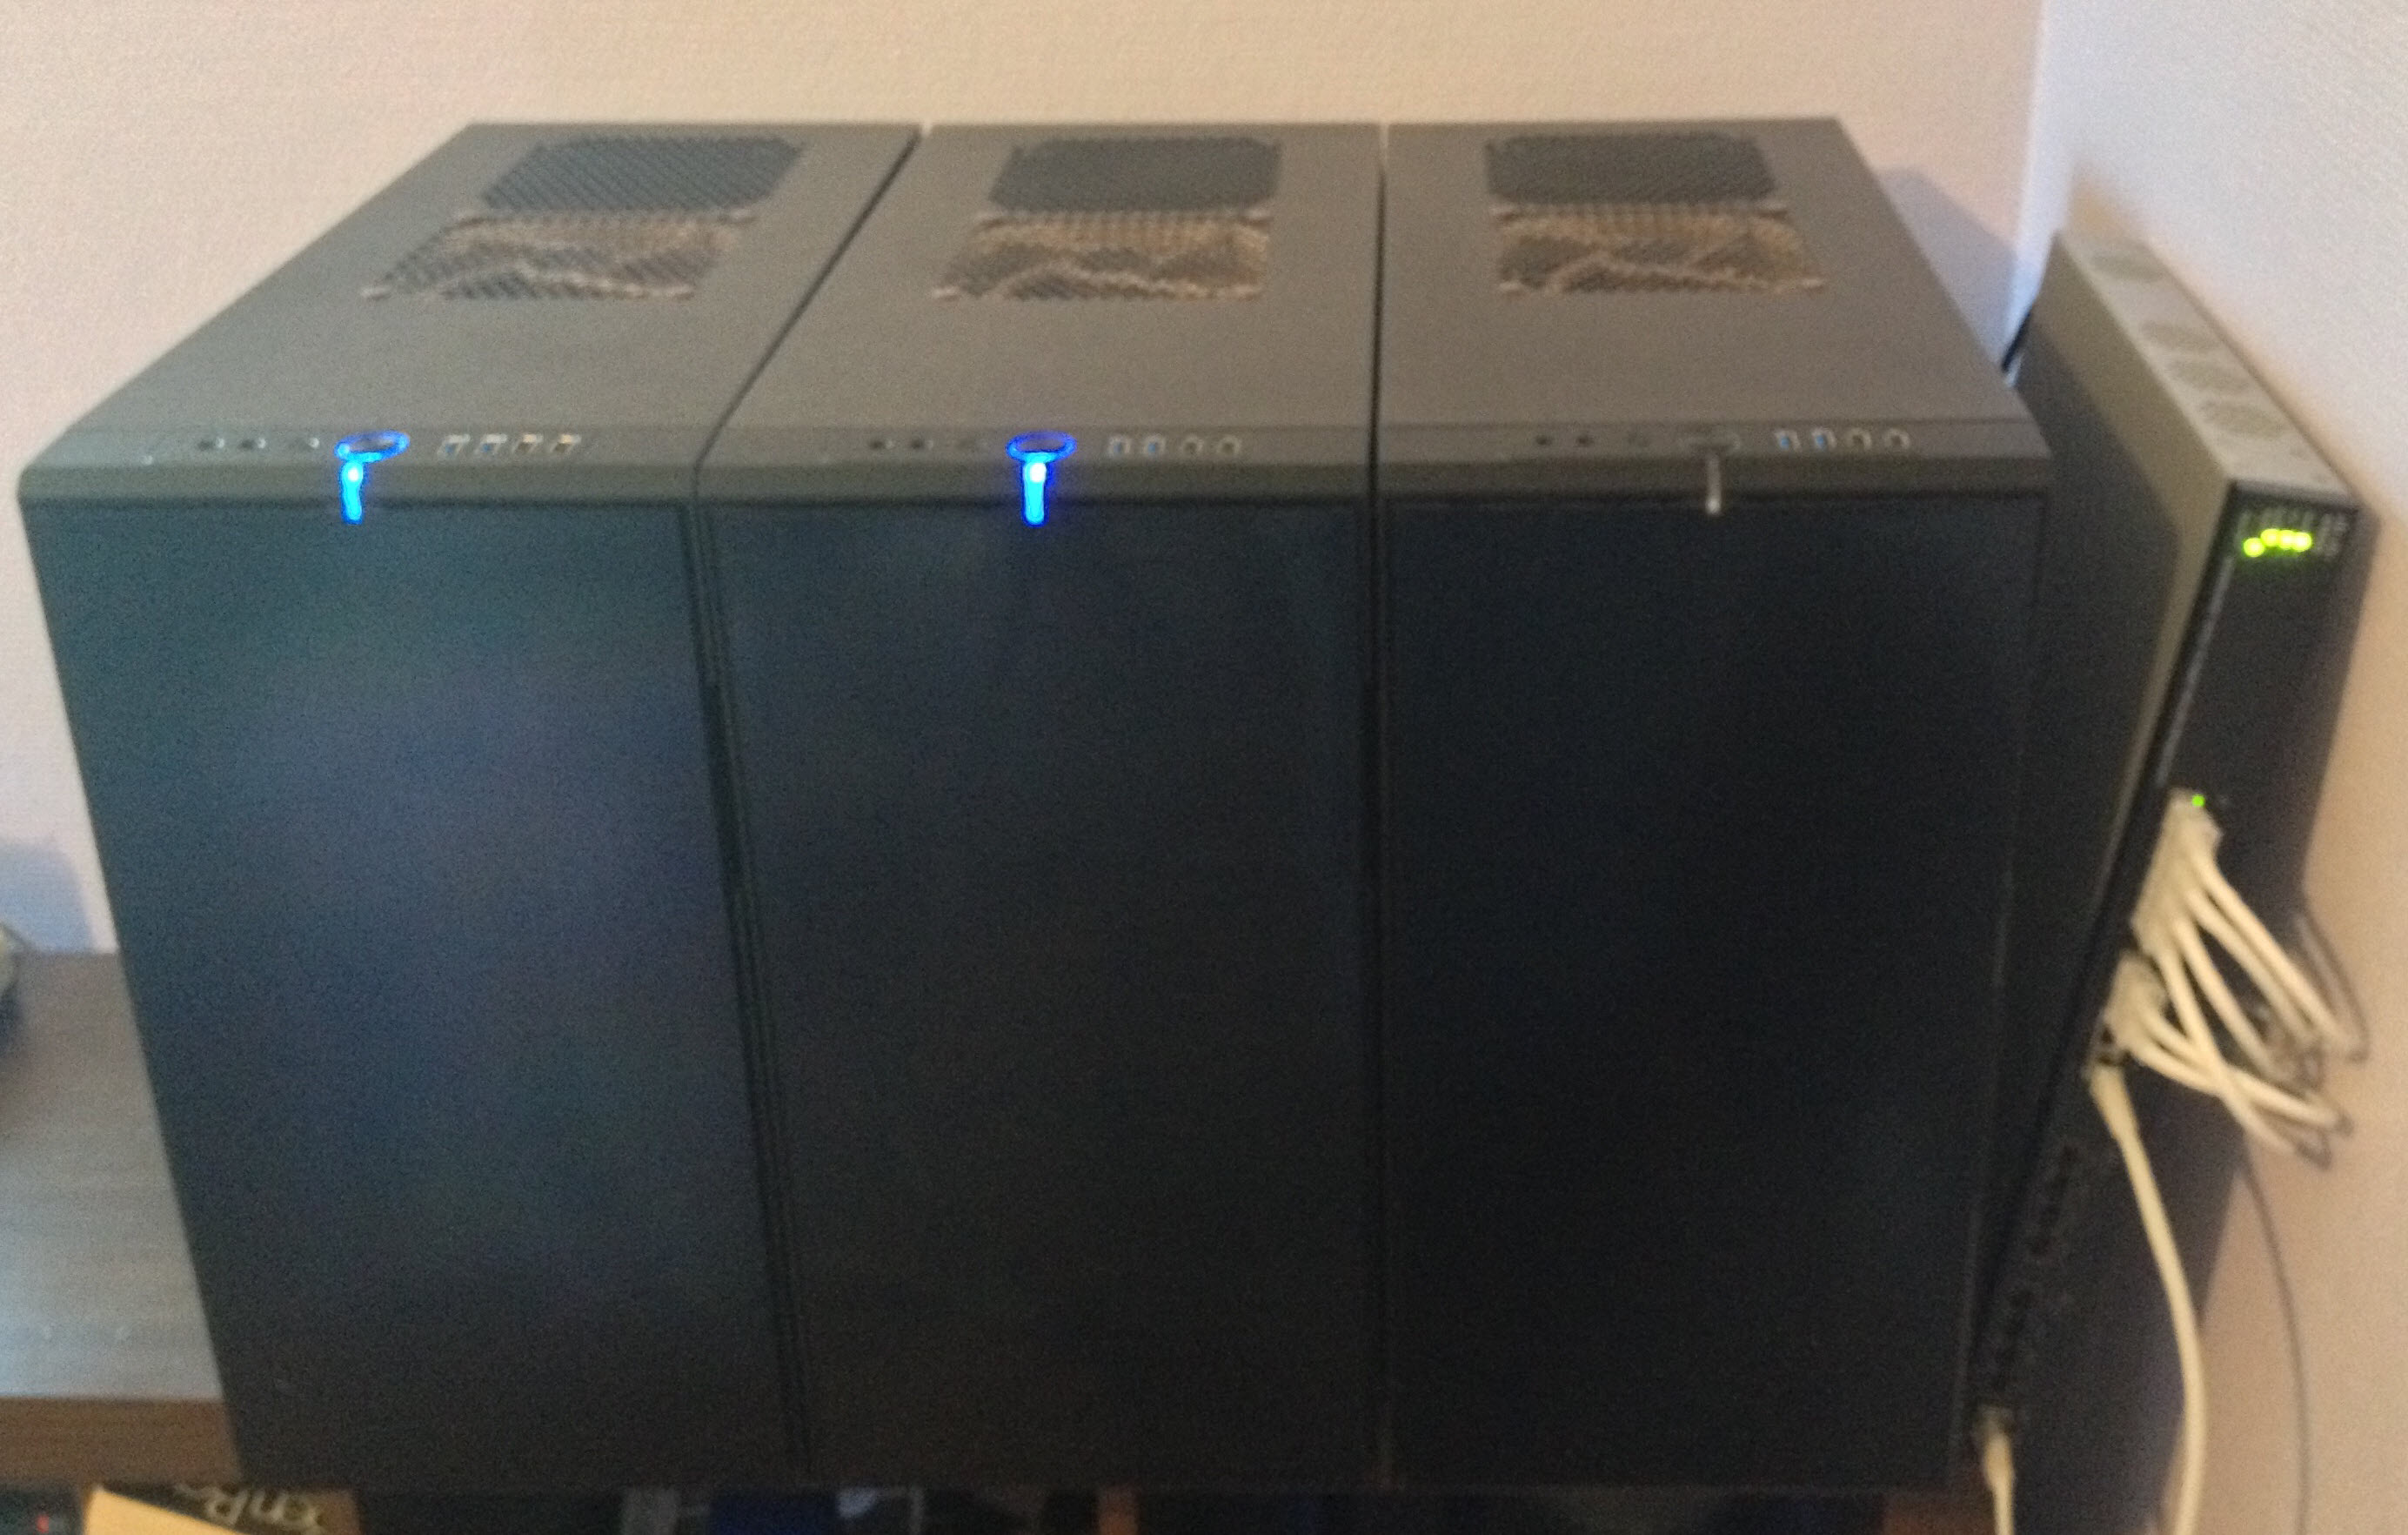
Homelab 2014
And if you want to see what the noise is at home, check this Youtube movie out. I used the dBUltraPro app on the iPad to measure the noise level.
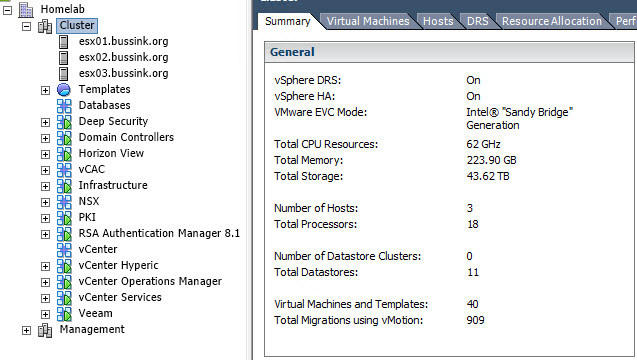
And this page would not be complete if it didn’t have a vCenter cluster screenshot.